Cosmetic moulding demands high precision, superior surface finish, and strict aesthetic standards. Even minor defects can lead to product rejection, brand damage, and increased production costs. Effective troubleshooting requires understanding the root causes of defects and implementing corrective measures in mould design, material selection, and processing parameters.
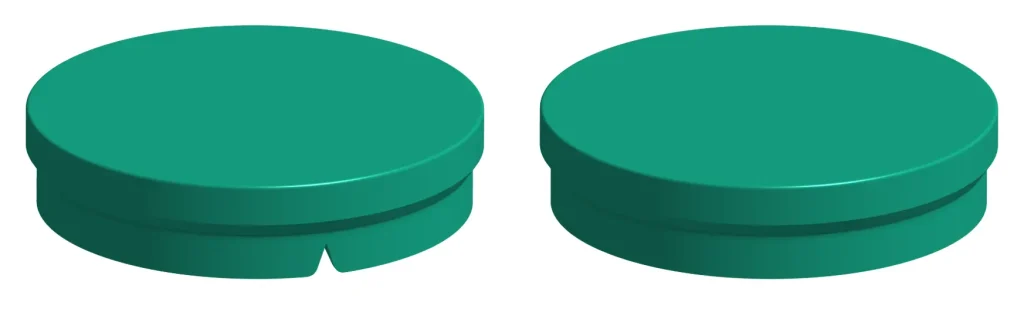
1. Flow Marks and Weld Lines
Description:
Visible streaks or lines on the surface where molten plastic flows meet or changes direction.
Causes:
- Low melt or mould temperature
- Slow injection speed
- Poor gate design or placement
- Inadequate venting
Solutions:
- Increase melt and mould temperature
- Optimize injection speed and pressure
- Redesign gate location to ensure uniform flow
- Improve venting to eliminate air traps
2. Sink Marks
Description:
Depressions or dimples on the surface, usually in thicker sections.
Causes:
- Uneven wall thickness
- Insufficient packing pressure
- Rapid cooling of outer surface
- Poor material shrinkage control
Solutions:
- Maintain uniform wall thickness in design
- Increase packing pressure and holding time
- Optimize cooling system design
- Use materials with lower shrinkage rates
3. Warpage
Description:
Distortion or bending of the final product after ejection.
Causes:
- Uneven cooling
- Internal stresses
- Improper mould temperature distribution
- Material anisotropy
Solutions:
- Balance cooling channels for uniform cooling
- Optimize packing and cooling time
- Adjust mould temperature settings
- Select materials with better dimensional stability
4. Flash Formation
Description:
Excess material appearing along parting lines or edges.
Causes:
- Excessive injection pressure
- Worn or damaged mould components
- Poor clamping force
- Incorrect mould alignment
Solutions:
- Reduce injection pressure
- Repair or refurbish mould surfaces
- Increase clamping force
- Ensure proper mould alignment and maintenance
5. Short Shots
Description:
Incomplete filling of the mould cavity.
Causes:
- Insufficient injection pressure or speed
- Low melt temperature
- Blocked gates or runners
- Air traps
Solutions:
- Increase injection pressure and speed
- Raise melt temperature
- Clean and enlarge gates/runners if necessary
- Improve venting
6. Burn Marks
Description:
Dark discoloration or burnt appearance on the product surface.
Causes:
- Trapped air overheating
- Excessive injection speed
- Poor venting
- Material degradation
Solutions:
- Improve venting design
- Reduce injection speed
- Lower melt temperature
- Ensure proper material handling and drying
7. Surface Defects (Gloss Variation, Scratches)
Description:
Uneven surface finish, dull patches, or visible scratches.
Causes:
- Poor mould surface finish
- Contamination in material
- Improper ejection
- Inconsistent cooling
Solutions:
- Polish mould cavity surfaces
- Use clean, high-quality raw materials
- Optimize ejection system design
- Maintain consistent cooling conditions
8. Air Bubbles / Voids
Description:
Air pockets trapped inside or on the surface.
Causes:
- Poor venting
- High moisture content in material
- Rapid cooling
- Improper injection parameters
Solutions:
- Improve venting system
- Properly dry materials before processing
- Adjust injection speed and pressure
- Optimize cooling rates
9. Colour Inconsistency
Description:
Variation in colour across batches or within the same part.
Causes:
- Improper mixing of masterbatch
- Temperature fluctuations
- Material contamination
- Inconsistent processing conditions
Solutions:
- Ensure uniform mixing of colourants
- Maintain stable processing temperatures
- Use consistent material batches
- Clean machine and hopper regularly
10. Ejection Marks and Drag Lines
Description:
Marks left by ejector pins or scratches during part removal.
Causes:
- Improper ejector pin placement
- Insufficient draft angle
- Rough mould surfaces
- High ejection force
Solutions:
- Optimize ejector pin design and positioning
- Increase draft angles
- Polish mould surfaces
- Apply proper mould release techniques
Best Practices for Defect Prevention
- Design Optimization: Ensure uniform wall thickness, proper gating, and adequate draft angles.
- Material Selection: Use high-quality, suitable polymers for cosmetic applications.
- Process Control: Maintain consistent temperature, pressure, and cycle times.
- Regular Maintenance: Periodically inspect and service moulds to prevent wear-related defects.
- Quality Monitoring: Implement real-time inspection systems to detect defects early.
Conclusion
Troubleshooting defects in cosmetic moulding requires a systematic approach involving design, material, and process optimization. By identifying root causes and applying corrective actions, manufacturers can achieve superior surface quality, reduce rejection rates, and enhance overall production efficiency.