1. Introduction
Compression moulding is one of the oldest and most widely used manufacturing processes for producing rubber products. It is a process in which a measured quantity of uncured rubber compound is placed inside a heated mould cavity and compressed under pressure until it takes the required shape.
During the moulding process, heat and pressure cause the rubber compound to flow and fill the mould cavity. The rubber then undergoes vulcanisation (curing), which transforms it from a soft, plastic-like material into an elastic and durable product.
Compression moulding is commonly used to manufacture rubber components for automotive, electrical, industrial, medical, construction, and household applications.
Examples of compression-moulded rubber products include:
- Rubber gaskets
- O-rings
- Rubber seals
- Rubber bushes
- Rubber washers
- Rubber diaphragms
- Rubber mats
- Rubber pads
- Rubber vibration mounts
- Rubber stoppers
- Rubber rollers
- Industrial rubber components
2. Definition of Compression Moulding
Compression moulding is a manufacturing process in which a predetermined quantity of uncured rubber material is placed into an open, heated mould cavity.
The mould is then closed using a hydraulic or mechanical press. Pressure forces the rubber compound to spread throughout the cavity and take the shape of the mould.
Heat is transferred from the mould to the rubber, initiating the vulcanisation process.
After the required curing time, the mould is opened and the finished rubber component is removed.
Main characteristics
- Uses uncured rubber compound.
- Requires a heated mould.
- Uses compression pressure.
- Involves vulcanisation.
- Produces components in different shapes and sizes.
- Can be used for small and large rubber products.
- Requires controlled temperature, pressure, and curing time.
3. Working Principle of Compression Moulding
The working principle is based on the application of heat and pressure to uncured rubber inside a closed mould.
The process involves three main stages:
3.1 Material Loading
A measured quantity of uncured rubber compound is placed into the mould cavity.
The material may be supplied as:
- Rubber sheets
- Pre-cut rubber blanks
- Strips
- Preformed rubber charges
- Prepared rubber pieces
The quantity of rubber must be calculated carefully to ensure that the mould cavity is filled correctly.
3.2 Compression and Material Flow
The mould is closed using a compression press.
As the mould closes, the rubber compound is compressed and flows into the cavity.
Pressure helps the material fill the required shape and reduces the formation of air pockets.
3.3 Vulcanisation or Curing
The heated mould transfers heat to the rubber compound.
The curing agents in the rubber formulation react to form cross-links between polymer chains.
This process is called vulcanisation.
During vulcanisation:
- Rubber becomes more elastic.
- Mechanical strength improves.
- Shape stability increases.
- Resistance to deformation improves.
- The material becomes more suitable for its intended application.
After curing is complete, the mould opens and the product is removed.
4. Materials Used in Rubber Compression Moulding
Different types of rubber compounds can be used depending on the required product properties.
4.1 Natural Rubber (NR)
Natural rubber is obtained from latex produced by rubber trees.
Properties:
- High elasticity
- Good tensile strength
- Good tear resistance
- Excellent resilience
- Good dynamic performance
Applications:
- Rubber bushes
- Vibration mounts
- Rubber pads
- Industrial components
- Shock-absorbing products
4.2 Nitrile Rubber (NBR)
Nitrile rubber is a synthetic rubber commonly used where oil and fuel resistance are required.
Properties:
- Good oil resistance
- Good fuel resistance
- Good abrasion resistance
- Good mechanical strength
- Suitable for sealing applications
Applications:
- Oil seals
- O-rings
- Gaskets
- Fuel system components
- Hydraulic seals
4.3 Ethylene Propylene Diene Monomer (EPDM)
EPDM is widely used for outdoor applications because of its weather resistance.
Properties:
- Good ozone resistance
- Good weather resistance
- Good water resistance
- Good heat resistance within its specified operating range
- Good electrical insulation properties
Applications:
- Automotive weather seals
- Window seals
- Door seals
- Water system gaskets
- Outdoor rubber components
4.4 Silicone Rubber
Silicone rubber is used for applications requiring flexibility over a wide temperature range.
Properties:
- Good temperature resistance
- Excellent flexibility
- Good electrical insulation
- Good ageing resistance
- Available in different hardness grades
Applications:
- Medical components
- Food-contact seals made from approved grades
- Electrical insulation parts
- Rubber stoppers
- Flexible sealing components
4.5 Neoprene Rubber (CR)
Neoprene is a synthetic rubber with balanced mechanical and environmental resistance properties.
Properties:
- Good weather resistance
- Good ozone resistance
- Moderate oil resistance
- Good flexibility
- Good flame resistance in suitable formulations
Applications:
- Industrial gaskets
- Rubber hoses
- Vibration mounts
- Protective rubber components
- Sealing products
4.6 Butyl Rubber (IIR)
Butyl rubber is known for its very low gas permeability.
Properties:
- Excellent air retention
- Good weather resistance
- Good chemical resistance
- Good vibration damping
Applications:
- Sealing components
- Rubber liners
- Diaphragms
- Industrial membranes
- Specialised gaskets
5. Main Components of a Rubber Compression Moulding Machine
A compression moulding machine contains several important components that work together to produce rubber products.
5.1 Hydraulic Power Unit
The hydraulic power unit supplies the pressure required to close and compress the mould.
It generally includes:
- Hydraulic pump
- Hydraulic motor
- Oil reservoir
- Control valves
- Hydraulic filters
- Pressure monitoring equipment
5.2 Hydraulic Cylinder
The hydraulic cylinder converts hydraulic pressure into mechanical movement.
It provides the force required to close the mould and maintain compression during curing.
5.3 Upper Platen
The upper platen supports the upper section of the mould.
It moves during the opening and closing operations.
5.4 Lower Platen
The lower platen supports the lower mould section.
It is generally fixed to the machine structure, although machine designs vary.
5.5 Heating System
The heating system maintains the required mould temperature.
Common heating arrangements include:
- Electrical cartridge heaters
- Electric heating elements
- Steam heating
- Thermal oil heating
5.6 Temperature Controller
The temperature controller monitors and regulates mould temperature.
It helps maintain consistent curing conditions.
5.7 Control Panel
The control panel allows the operator to set and monitor:
- Mould temperature
- Press pressure
- Closing time
- Curing time
- Opening time
- Machine operating sequence
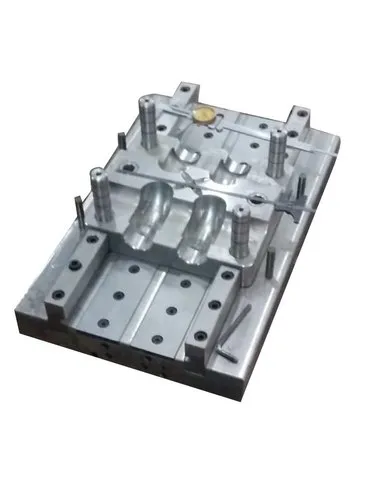
5.8 Mould
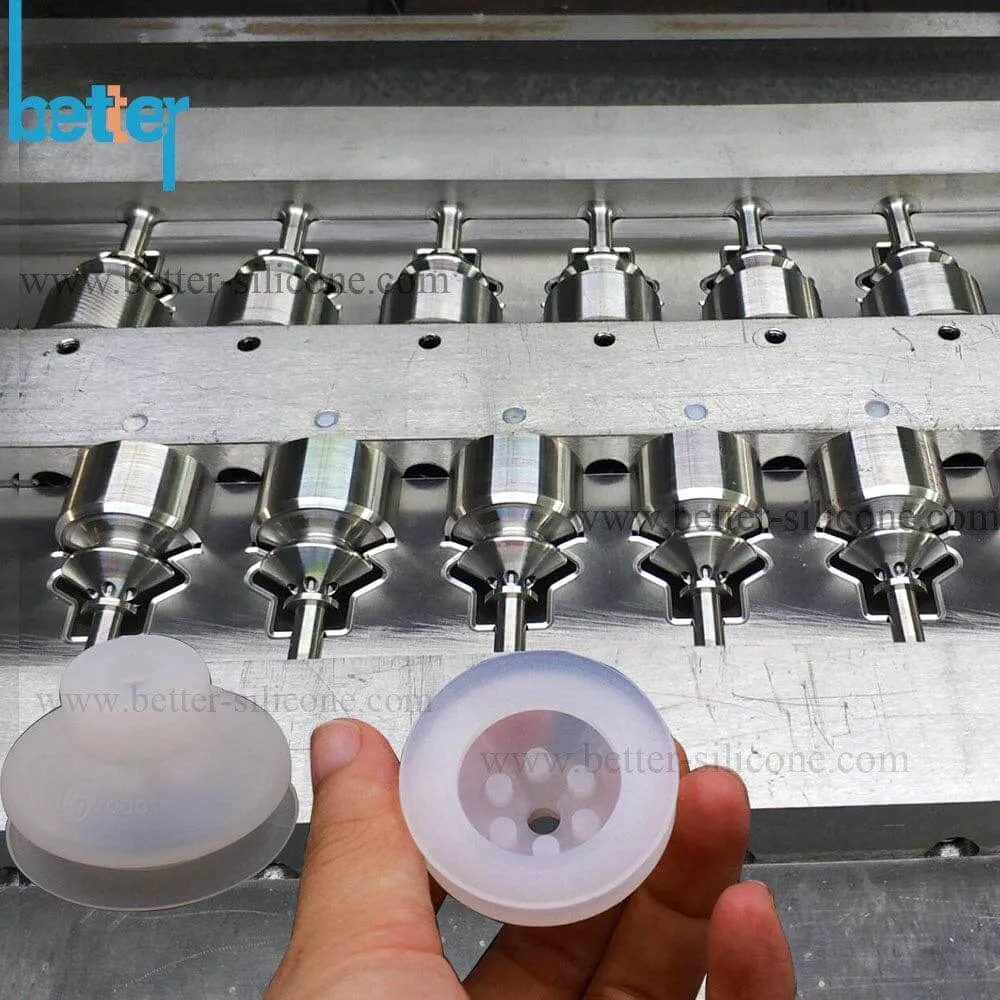
The mould is the main tooling component that determines the shape and dimensions of the finished rubber product.
It usually consists of an upper mould section, a lower mould section, and, depending on the product, inserts or other tooling elements.
6. Types of Compression Moulds Used for Rubber Products
Different mould designs are selected according to the shape, size, complexity, and production requirements of the rubber component.
6.1 Open Flash Mould
An open flash mould allows excess rubber to escape through the parting line when the mould closes.
Characteristics:
- Simple mould construction
- Relatively low tooling complexity
- Suitable for many conventional rubber products
- Requires flash trimming after moulding
6.2 Semi-Positive Mould
A semi-positive mould uses a controlled clearance between mould sections to allow a limited quantity of excess rubber to escape.
Characteristics:
- Better control of excess material
- Reduced flash compared with conventional open-flash designs
- Requires careful charge preparation
6.3 Positive Mould
A positive mould has a closely controlled cavity arrangement designed to limit or eliminate flash escape.
Characteristics:
- Accurate material containment
- Reduced flash
- Requires precise material charge weight
- Requires accurate mould manufacturing
7. Step-by-Step Compression Moulding Process
The production of rubber components through compression moulding involves several stages.
Step 1: Rubber Compound Preparation
The rubber compound is prepared using a mixing process.
The compound generally contains:
- Base rubber polymer
- Vulcanising agent
- Accelerators
- Activators
- Fillers
- Processing oils
- Antioxidants
- Pigments, where required
All ingredients must be mixed according to the approved formulation.
Step 2: Material Cutting and Weighing
The prepared rubber compound is cut into suitable sizes.
Each charge is weighed according to the mould cavity requirements.
Accurate weighing helps prevent:
- Short filling
- Excessive flash
- Uneven material distribution
- Weight variation
Step 3: Mould Preparation
The mould is cleaned and inspected before production.
The operator checks:
- Mould cavity condition
- Parting line condition
- Venting channels
- Alignment features
- Mould surface finish
- Heating system
- Release agent requirements
A suitable mould release agent may be applied when specified by the process.
Step 4: Mould Heating
The mould is heated to the required operating temperature.
The temperature depends on the rubber compound and its curing characteristics.
The mould should reach a stable temperature before production begins.
Step 5: Material Loading
The measured rubber charge is placed into the mould cavity.
The material should be positioned correctly to promote uniform flow.
Incorrect material placement can cause incomplete filling or trapped air.
Step 6: Mould Closing
The press closes the mould.
The upper and lower mould sections come together under controlled pressure.
The rubber compound spreads throughout the cavity.
Step 7: Compression
The press applies the required compression force.
This helps the rubber fill the mould cavity and contact the mould surfaces.
Step 8: Vulcanisation
The mould remains closed for the specified curing time.
Heat and pressure are maintained during this stage.
The curing process creates a cross-linked rubber structure.
Step 9: Mould Opening
After the required curing cycle, the press opens the mould.
The operator or an automatic ejection system removes the finished rubber component.
Step 10: Deflashing and Trimming
Excess rubber around the product is removed.
Common deflashing methods include:
- Manual trimming
- Mechanical trimming
- Cryogenic deflashing
- Die cutting
- Grinding, where suitable
Step 11: Inspection
The finished component is inspected for:
- Surface defects
- Dimensional accuracy
- Hardness
- Product weight
- Flash condition
- Curing quality
- Functional performance
Step 12: Packaging
Approved products are cleaned, counted, labelled, and packed according to customer requirements.
8. Important Process Parameters in Rubber Compression Moulding
Correct process parameters are essential for producing high-quality rubber components.
| Parameter | Importance |
|---|---|
| Mould temperature | Controls the curing reaction |
| Compression pressure | Helps rubber fill the cavity |
| Curing time | Determines the extent of vulcanisation |
| Rubber charge weight | Controls material quantity |
| Material placement | Influences cavity filling |
| Mould closing speed | Affects material flow and air escape |
| Venting | Allows trapped air and gases to escape |
| Mould condition | Influences product appearance and dimensions |
8.1 Mould Temperature
Mould temperature is one of the most important parameters.
If the temperature is too low:
- Curing may take longer.
- The product may remain under-cured.
- Production cycle time may increase.
If the temperature is too high:
- Rubber may cure too quickly.
- Premature curing may occur.
- Material degradation may occur.
- Product defects may develop.
8.2 Compression Pressure
Compression pressure ensures that the rubber compound is compressed and distributed throughout the mould cavity.
If pressure is too low:
- Incomplete filling may occur.
- Air pockets may remain.
- Product dimensions may become inconsistent.
If pressure is too high:
- Excessive flash may develop.
- Mould stress may increase.
- Tooling damage may occur.
8.3 Curing Time
Curing time is the period required for the rubber compound to reach its specified vulcanisation state.
It depends on:
- Rubber type
- Compound formulation
- Product thickness
- Mould temperature
- Heat transfer characteristics
- Required product properties
Insufficient curing can result in weak or soft products, while excessive curing can cause degradation in some compounds.
8.4 Rubber Charge Weight
The correct charge weight is essential for achieving proper cavity filling.
Insufficient material can produce short mouldings.
Excessive material can produce unnecessary flash and increase material waste.
9. Common Defects in Rubber Compression Moulding
Several defects may occur during the compression moulding process.
9.1 Short Filling
Definition: The rubber compound does not completely fill the mould cavity.
Causes:
- Insufficient rubber charge
- Low mould temperature
- Poor material placement
- Insufficient pressure
- Restricted material flow
Corrective actions:
- Check the charge weight.
- Improve material positioning.
- Verify mould temperature.
- Check the mould cavity and venting.
- Review the press settings.
9.2 Excessive Flash
Definition: Excess rubber escapes through the mould parting line and forms a thin layer around the product.
Causes:
- Excessive rubber charge
- Damaged parting surfaces
- Incorrect mould alignment
- Excessive compression force
- Worn mould tooling
Corrective actions:
- Adjust charge weight.
- Inspect the mould parting line.
- Check mould alignment.
- Repair damaged mould surfaces.
- Verify the press settings.
9.3 Air Traps
Definition: Air becomes trapped inside the mould cavity and creates voids or incomplete surface areas.
Causes:
- Poor venting
- Incorrect material placement
- Fast mould closing
- Improper cavity filling
Corrective actions:
- Clean the mould vents.
- Improve charge placement.
- Adjust mould closing speed.
- Inspect the mould design.
9.4 Under-Curing
Definition: The rubber does not receive sufficient curing to achieve the required properties.
Causes:
- Insufficient curing time
- Low mould temperature
- Incorrect compound formulation
- Inadequate heat transfer
Corrective actions:
- Verify curing time.
- Check mould temperature.
- Confirm compound formulation.
- Review product thickness and heat transfer.
9.5 Over-Curing
Definition: The rubber receives excessive thermal exposure, which can negatively affect its properties.
Causes:
- Excessive curing time
- Excessive mould temperature
- Incorrect process settings
Corrective actions:
- Adjust curing time.
- Verify temperature controller accuracy.
- Follow the compound supplier’s curing recommendations.
9.6 Surface Blemishes
Definition: Unwanted marks, rough areas, or surface irregularities appear on the rubber product.
Causes:
- Dirty mould cavity
- Damaged mould surface
- Contaminated rubber compound
- Incorrect release agent application
- Trapped air
Corrective actions:
- Clean the mould.
- Inspect and polish the cavity where appropriate.
- Check raw material quality.
- Review release agent application.
- Improve venting.
9.7 Blisters and Bubbles
Definition: Gas-filled cavities appear on the product surface or inside the rubber component.
Causes:
- Moisture or volatile substances
- Trapped air
- Poor venting
- Incorrect curing conditions
- Contamination
Corrective actions:
- Check compound quality and storage.
- Improve mould venting.
- Review the mould closing procedure.
- Verify the curing cycle.
10. Advantages of Compression Moulding
Compression moulding offers several advantages for rubber manufacturing.
- Simple manufacturing process: The equipment and operating principle are relatively straightforward.
- Suitable for large components: It can produce relatively large and thick rubber products.
- Lower tooling complexity: Some compression moulds are simpler and less expensive than complex injection moulds.
- Wide material compatibility: Many rubber compounds can be processed using compression moulding.
- Good product strength: Properly cured products can have excellent mechanical properties.
- Low material waste in suitable applications: Correct charge preparation can reduce material waste.
- Suitable for low and medium production volumes: It can be economical for many specialised products.
- Flexible product design: Different shapes and sizes can be manufactured.
11. Disadvantages of Compression Moulding
Although compression moulding has many advantages, it also has certain limitations.
- Longer cycle times compared with some automated moulding processes.
- Manual material loading may be required.
- Flash removal may be necessary.
- Product consistency can depend on operator skill.
- Complex shapes may be difficult to manufacture.
- Accurate charge preparation is important.
- Labour requirements may be relatively high.
- Mould cleaning and maintenance are necessary.
12. Applications of Compression-Moulded Rubber Products
Compression moulding is used in many industries.
12.1 Automotive Industry
Common products include:
- Rubber bushes
- Engine mounts
- Suspension components
- Gaskets
- Oil seals
- Vibration dampers
12.2 Electrical Industry
Common products include:
- Insulating rubber components
- Electrical gaskets
- Cable protection parts
- Rubber covers
- Protective sealing components
12.3 Medical Industry
Depending on the material grade and applicable regulatory requirements, compression moulding can produce:
- Silicone seals
- Rubber stoppers
- Diaphragms
- Flexible components
- Specialised sealing parts
12.4 Industrial Applications
Common products include:
- Industrial gaskets
- Rubber pads
- Machine mounts
- Rubber rollers
- Protective bumpers
- Vibration isolation components
12.5 Household Products
Examples include:
- Rubber feet
- Door buffers
- Washers
- Sealing rings
- Anti-slip pads
13. Compression Moulding Compared with Other Rubber Moulding Processes
Rubber products can also be manufactured using transfer moulding and injection moulding.
| Feature | Compression moulding | Transfer moulding | Injection moulding |
|---|---|---|---|
| Material loading | Directly into cavity | Into transfer pot | Into injection unit |
| Material movement | Press compression | Forced through runners | Injected under pressure |
| Production speed | Generally slower | Intermediate | Generally faster |
| Tooling complexity | Often simpler | More complex | Generally more complex |
| Automation | Low to high | Moderate to high | High |
| Flash | Often requires trimming | Can occur | Depends on mould design |
| Suitable applications | Simple and larger rubber parts | More complex shapes and inserts | High-volume precision components |
The best method depends on product design, compound characteristics, production volume, and cost requirements.
14. Quality Control in Rubber Compression Moulding
Quality control ensures that manufactured rubber products meet customer specifications and industry requirements.
Important quality checks include:
14.1 Visual Inspection
Checks for:
- Cracks
- Bubbles
- Surface marks
- Short filling
- Excessive flash
- Contamination
- Discolouration
14.2 Dimensional Inspection
Checks:
- Length
- Width
- Height
- Thickness
- Inner diameter
- Outer diameter
- Hole positions
- Product geometry
14.3 Hardness Testing
Hardness is commonly measured using a Shore durometer.
For rubber products, Shore A is frequently used for softer and medium-hardness materials. Other scales may be suitable depending on the material.
14.4 Tensile Strength Testing
Tensile testing measures the force required to stretch and eventually break a rubber specimen.
It helps assess the mechanical strength of the compound.
14.5 Elongation Testing
Elongation testing measures how much a rubber specimen can stretch before breaking.
14.6 Compression Set Testing
Compression set testing evaluates the ability of rubber to recover its original thickness after being compressed for a specified period under defined conditions.
This is particularly important for sealing applications.
14.7 Cure Testing
A moving die rheometer (MDR) or other suitable cure-testing equipment can be used to evaluate the curing characteristics of rubber compounds.
It helps determine important characteristics such as:
- Scorch time
- Cure rate
- Optimum cure time
- Minimum torque
- Maximum torque
15. Preventive Maintenance of Compression Moulding Machines
Regular preventive maintenance improves product quality and reduces unexpected machine downtime.
Important maintenance activities include:
- Clean mould cavities regularly.
- Inspect mould parting lines.
- Check mould alignment.
- Inspect heating elements.
- Verify temperature controller accuracy.
- Check hydraulic oil condition.
- Inspect hydraulic hoses and connections.
- Check hydraulic cylinder operation.
- Inspect platen surfaces.
- Check pressure gauges and sensors.
- Inspect ejector mechanisms.
- Lubricate moving parts according to the manufacturer’s instructions.
- Maintain records of maintenance activities.
16. Safety Precautions During Compression Moulding
Compression moulding involves high temperatures, heavy moulds, and powerful hydraulic systems.
Operators must follow proper safety procedures.
Important precautions include:
- Wear heat-resistant gloves when handling hot moulded products.
- Use suitable safety shoes and protective clothing.
- Keep hands away from the closing mould area.
- Never bypass machine safety guards.
- Ensure that emergency stops are working.
- Use appropriate tools to remove stuck products.
- Follow lockout/tagout procedures during maintenance.
- Avoid direct contact with hot mould surfaces.
- Keep the work area clean.
- Follow the machine manufacturer’s operating instructions.
17. Factors Affecting Production Efficiency
Production efficiency depends on several factors.
| Factor | Effect on production |
|---|---|
| Rubber charge preparation | Influences material consistency |
| Mould temperature | Influences curing time |
| Curing time | Determines cycle duration |
| Compression pressure | Influences mould filling |
| Mould design | Influences product quality and trimming |
| Operator skill | Influences handling and consistency |
| Preventive maintenance | Reduces breakdowns |
| Quality control | Reduces rejection and rework |
To improve production efficiency, manufacturers should standardise the process, control material quality, reduce unnecessary handling, and maintain stable operating conditions.
18. Example of a Rubber Compression Moulding Production Cycle
The following is an illustrative sequence for producing a rubber gasket. Actual temperatures, pressures, and curing times must be established from the rubber compound supplier’s recommendations and validated production trials.
| Stage | Operation | Purpose |
|---|---|---|
| 1 | Prepare rubber compound | Ensure correct material formulation |
| 2 | Cut and weigh rubber | Achieve the correct charge quantity |
| 3 | Clean and inspect mould | Ensure tooling is ready |
| 4 | Heat the mould | Reach the specified curing temperature |
| 5 | Load rubber charge | Position material in the cavity |
| 6 | Close mould | Compress material |
| 7 | Apply pressure | Fill the cavity |
| 8 | Cure rubber | Develop required rubber properties |
| 9 | Open mould | Release the product |
| 10 | Remove product | Extract the moulded component |
| 11 | Trim flash | Achieve required appearance |
| 12 | Inspect product | Verify quality requirements |
| 13 | Package product | Prepare for delivery |
19. Conclusion
Compression moulding is an important manufacturing process used to produce a wide range of rubber products. It works by placing a measured quantity of uncured rubber compound into a heated mould and applying pressure until the material fills the cavity and undergoes vulcanisation.
The quality of the finished product depends on several important factors, including rubber compound formulation, charge weight, mould temperature, compression pressure, curing time, mould design, and venting.
Common defects such as short filling, excessive flash, air traps, under-curing, over-curing, and surface blemishes can be reduced through proper process control and regular maintenance.
The key to successful rubber compression moulding is to maintain the correct balance of material quantity, temperature, pressure, curing time, and mould condition.