Mould Temperature Control: Importance, Methods, Effects, and Best Practices
1. Introduction
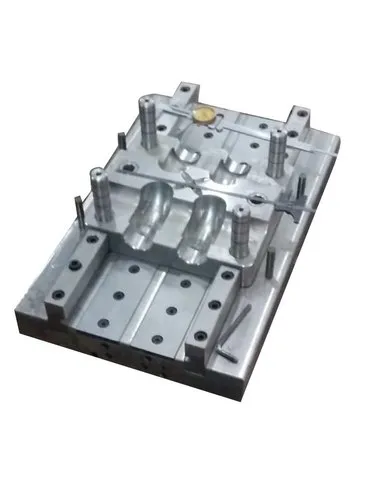
Mould temperature control is one of the most important factors in manufacturing processes such as injection moulding, compression moulding, thermoforming, candle moulding, and resin casting. The temperature of a mould directly affects how the material flows, fills the cavity, cools, solidifies, and forms the final product.
Proper mould temperature control helps manufacturers achieve consistent product dimensions, smooth surface finishes, improved material properties, reduced defects, and shorter production cycles.
If the mould temperature is too high or too low, the finished product may develop defects such as warping, shrinkage, cracks, surface marks, incomplete filling, or uneven solidification.
The main objective of mould temperature control is to maintain a suitable and consistent temperature throughout the moulding process.
This article explains the importance of mould temperature control, the equipment used, common problems, and practical methods for achieving better product quality.
2. What Is Mould Temperature Control?
Mould temperature control is the process of regulating and maintaining the temperature of a mould during manufacturing.
Depending on the material and process, the mould may need to be heated, cooled, or maintained within a specific temperature range.
For example:
- In injection moulding, the mould is usually temperature-controlled to help the plastic fill, cool, and solidify correctly.
- In compression moulding, the mould may be heated to support material flow and curing.
- In thermoforming, the mould temperature affects how the heated plastic cools and retains its shape.
- In candle making, mould temperature influences wax cooling, shrinkage, surface appearance, and release from the mould.
- In resin casting, mould temperature can influence viscosity, curing rate, bubble formation, and dimensional stability.
The ideal mould temperature depends on the material, mould design, product geometry, and production method. Therefore, there is no single temperature that is suitable for every moulding application.
3. Why Is Mould Temperature Control Important?
Mould temperature affects nearly every stage of product formation.
A. Improves Product Quality
Maintaining the correct temperature helps the material form properly and reduces temperature-related defects.
It can improve:
- Surface smoothness.
- Dimensional accuracy.
- Shape consistency.
- Product appearance.
- Reproduction of fine details.
B. Reduces Manufacturing Defects
Incorrect mould temperature can cause uneven cooling, poor material flow, excessive shrinkage, warping, and other defects.
A stable temperature helps reduce these problems when the underlying cause is temperature-related.
C. Improves Production Efficiency
Proper temperature control helps manufacturers establish repeatable production cycles.
In processes that require cooling, an efficient cooling system may reduce cycle time. In processes requiring curing or solidification, suitable heating can help the material reach the required condition.
D. Maintains Dimensional Accuracy
Materials expand when heated and contract when cooled. Uneven temperature distribution can therefore cause different parts of a product to shrink or solidify at different rates.
Consistent mould temperature helps reduce dimensional variation.
E. Improves Material Properties
Temperature influences material crystallisation, curing, solidification, and internal stress development.
Correct temperature conditions can help the material achieve its intended mechanical and physical properties.
F. Extends Mould Life
Large temperature fluctuations can contribute to thermal stress, particularly in moulds subjected to repeated heating and cooling.
Appropriate temperature control can reduce unnecessary thermal cycling and help protect mould components.
4. Types of Mould Temperature Control
Mould temperature control can be divided into three main categories.
4.1 Heating Control
Heating control raises the mould temperature to the level required for processing.
It is commonly used in:
- Compression moulding.
- Thermosetting plastic moulding.
- Rubber moulding.
- Certain resin-curing processes.
- Candle moulding when preheating is required.
Heating helps materials flow, soften, react, or cure as required by the process.
Common heating methods include electric heaters, heating cartridges, heated platens, and circulating hot fluids.
4.2 Cooling Control
Cooling control removes heat from the mould and product.
It is widely used in:
- Plastic injection moulding.
- Thermoforming.
- Some resin-casting processes.
- Candle production where controlled cooling is necessary.
Cooling allows the material to solidify or reach a condition suitable for removal from the mould.
Common cooling methods include circulating water, temperature-controlled water systems, air cooling, and specialised cooling channels.
4.3 Combined Heating and Cooling
Some processes require the mould temperature to increase during one stage and decrease during another.
A combined system may use heating and cooling circuits controlled by a temperature-control unit.
Such systems are useful when precise thermal conditions are required or when the process involves multiple temperature stages.
5. Equipment Used for Mould Temperature Control
Several types of equipment are used to regulate mould temperature.
| Equipment | Main Function | Typical Application |
|---|---|---|
| Electric cartridge heaters | Generate heat inside or near the mould | Heated moulds and tooling |
| Band heaters | Heat cylindrical components or selected mould assemblies | Specialised tooling and processing equipment |
| Heated platens | Transfer heat to the mould through contact | Compression moulding |
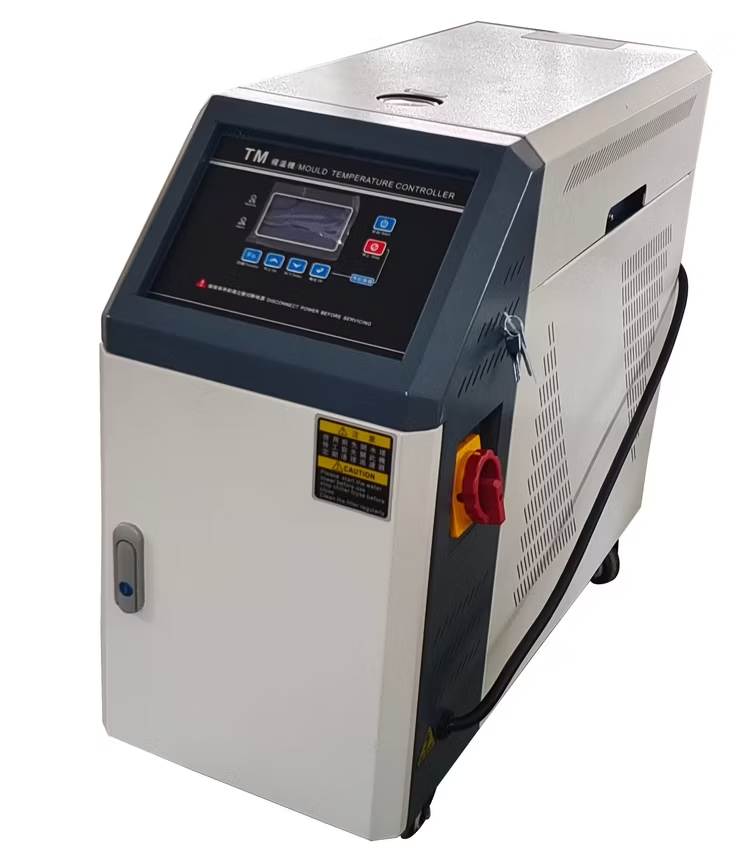
| Temperature-control units | Regulate heating and circulating fluid temperature | Injection and compression moulding |
| Water circulation systems | Remove heat from the mould | Plastic moulding and other cooling applications |
| Chillers | Supply cooled fluid to control heat removal | Industrial mould cooling |
| Thermocouples | Measure temperature at specific locations | Process monitoring |
| Resistance temperature detectors (RTDs) | Measure temperature accurately in suitable systems | Industrial temperature control |
| Temperature controllers | Compare measured temperature with the target and regulate heating or cooling | Automated mould temperature management |
| Flow meters | Monitor fluid flow through cooling circuits | Mould cooling systems |
The appropriate equipment depends on the required temperature range, mould size, production rate, material, and accuracy requirements.
6. Methods of Controlling Mould Temperature
6.1 Manual Temperature Control
Manual control involves checking temperatures and adjusting heating or cooling settings by an operator.
Advantages:
- Simple to implement.
- Suitable for some small-scale operations.
- Requires relatively basic control equipment.
Disadvantages:
- Depends heavily on operator skill.
- Temperature fluctuations may be greater.
- Difficult to maintain precise conditions during continuous production.
Manual control may be suitable for small candle-making operations or simple moulding tasks, but it is less appropriate when tight temperature tolerances are required.
6.2 Automatic Temperature Control
Automatic temperature control uses sensors and controllers to maintain a selected temperature.
The controller compares the measured temperature with the target temperature and adjusts the heating or cooling system accordingly.
Advantages:
- Better repeatability.
- Reduced operator workload.
- More consistent processing conditions.
- Easier monitoring of temperature changes.
Automatic control is commonly used in industrial moulding equipment.
6.3 PID Temperature Control
PID stands for proportional-integral-derivative control.
A PID controller adjusts its output based on the difference between the target temperature and the measured temperature, as well as how that difference changes over time.
A properly tuned PID controller can help reduce temperature fluctuations and improve stability.
However, poor tuning or unsuitable sensor placement can cause overshooting, slow response, or oscillation.
6.4 Circulating Fluid Temperature Control
Some moulds contain internal channels through which water or another suitable heat-transfer fluid circulates.
The fluid transfers heat to or from the mould, helping maintain a more consistent temperature.
The effectiveness of this method depends on:
- Channel design.
- Fluid temperature.
- Flow rate.
- Fluid properties.
- Mould material.
- Distance between channels and the mould cavity.
- Scale or deposits inside the channels.
Poorly designed or blocked channels may create temperature differences across the mould.
7. Effect of Mould Temperature on Product Quality
Mould temperature can influence several important product characteristics.
| Product Characteristic | Effect of Suitable Temperature | Possible Problem with Unsuitable Temperature |
|---|---|---|
| Surface finish | Helps produce a consistent surface | Dull areas, marks, roughness, or uneven texture |
| Dimensional accuracy | Supports predictable shrinkage and solidification | Warping, dimensional variation, or distortion |
| Material flow | Supports suitable filling and forming | Incomplete filling or poor detail reproduction |
| Solidification | Promotes consistent cooling or curing | Uneven solidification or incomplete curing |
| Internal stress | Can help reduce stress caused by uneven temperature changes | Cracking or distortion in susceptible materials |
| Product strength | Supports appropriate material development | Weak areas or inconsistent properties |
| Cycle time | Helps optimise processing time | Excessive cooling or heating time |
| Product appearance | Improves consistency between products | Colour variation, surface defects, or uneven finish |
The exact effects vary by material and process. For example, a higher mould temperature may improve surface quality in one plastic moulding application but increase cooling time.
8. Effects of High Mould Temperature
When the mould temperature is higher than the process requires, several problems may occur.
A. Longer Cooling Time
In processes where the product must cool and solidify, a hotter mould may slow the removal of heat from the material.
This can increase cycle time and reduce production output.
B. Product Deformation
If a product is removed before it has sufficient stiffness, it may bend, sag, or lose its intended shape.
This is particularly important for thin-walled plastic parts and products with large unsupported areas.
C. Excessive Material Flow
In some processes, a higher temperature can reduce material viscosity or increase the time during which the material remains soft.
Depending on the process, this may contribute to flash, sagging, or dimensional variation.
D. Material Degradation
Some materials are sensitive to heat. Excessive temperature or prolonged exposure may cause discolouration, degradation, or changes in material properties.
E. Increased Energy Consumption
Unnecessarily high mould temperatures increase energy use and may place additional demands on the heating or cooling system.
How to Correct High Mould Temperature
- Verify the actual mould temperature using a suitable sensor.
- Check the temperature-controller settings.
- Inspect cooling circuits and fluid flow.
- Confirm that the temperature target matches the material supplier’s recommendations.
- Review the cycle time and product-removal conditions.
- Investigate uneven temperature distribution.
Do not lower the temperature arbitrarily. Some materials require a relatively high mould temperature to achieve proper curing, crystallisation, or surface quality.
9. Effects of Low Mould Temperature
A mould that is too cold can also cause serious manufacturing problems.
A. Poor Material Flow
In processes where the material must flow into small features, low temperature may increase viscosity or cause the material to solidify too quickly.
This can result in incomplete filling or poor detail reproduction.
B. Poor Surface Finish
The material may not reproduce the mould’s surface accurately if it cools or solidifies before sufficient contact is established.
C. Uneven Product Formation
Inconsistent temperature across the mould may cause different areas of the product to form or solidify at different rates.
D. Incomplete Curing
For some thermosetting materials, rubber compounds, and resin systems, a mould temperature below the recommended range may delay or prevent adequate curing within the intended cycle.
E. Increased Residual Stress
Rapid or uneven cooling may create internal stresses in certain materials, potentially contributing to warping or cracking.
How to Correct Low Mould Temperature
- Check heater operation and controller settings.
- Confirm that the mould has reached the target temperature before production begins.
- Inspect temperature sensors and their placement.
- Check for heat loss through the mould base or mounting structure.
- Review the heating time.
- Verify the recommended processing temperature for the material.
10. Mould Temperature Control in Candle Making
Mould temperature is especially important in candle production because wax changes from liquid to solid over a relatively narrow temperature range.
The mould temperature influences how the wax cools, contracts, releases from the mould, and develops its final appearance.
A. Surface Finish
An unsuitable mould temperature may contribute to uneven surfaces, rough patches, frosting, or other visual imperfections.
However, these defects may also result from wax formulation, fragrance compatibility, pouring temperature, cooling conditions, and handling.
B. Shrinkage and Air Gaps
Wax contracts as it cools. If the cooling conditions are unsuitable, the candle may develop shrinkage cavities or gaps, particularly around thicker sections.
Controlled cooling and an appropriate pouring procedure can help reduce these problems.
C. Mould Release
A suitable mould temperature can help the candle solidify consistently and release more easily.
If the wax is removed too early, the candle may deform. If the material is excessively cold or the mould design is unsuitable, release may also become difficult.
D. Candle Shape and Dimensions
Uneven mould temperature can cause different areas of the candle to cool at different rates, potentially contributing to dimensional variation or distortion.
E. Fragrance and Colour Consistency
Mould temperature is only one factor affecting fragrance and colour appearance. Wax temperature, mixing, cooling rate, and material compatibility also influence the final result.
Practical Tips for Candle Makers
- Follow the wax supplier’s recommended melting and pouring temperatures.
- Preheat moulds only when appropriate for the wax and mould material.
- Keep mould temperatures consistent between production batches.
- Avoid placing freshly poured candles in locations with strong temperature differences or drafts.
- Allow candles to cool sufficiently before demoulding.
- Record mould temperature, wax temperature, and cooling time for each test batch.
- Test different settings systematically instead of changing several variables at once.
Important: There is no universal mould temperature for all candles. The ideal setting depends on the wax type, candle size, mould material, and desired finish.
11. Mould Temperature Control in Plastic Injection Moulding
In injection moulding, the mould temperature affects how molten plastic flows, cools, shrinks, and solidifies.
A suitable mould temperature helps balance product quality with production efficiency.
Main Benefits
- Improved surface appearance.
- More consistent dimensions.
- Better reproduction of mould details.
- Controlled shrinkage.
- Reduced risk of certain flow-related defects.
- Improved repeatability.
Common Temperature-Related Problems
Warpage: Uneven cooling or residual stress can cause a moulded part to distort.
Sink marks: Localised shrinkage can produce depressions on the surface, especially in thicker areas. Mould temperature may contribute, but packing pressure, gate design, and part geometry are also important.
Weld-line visibility: Temperature can affect how melt fronts meet and bond, although material flow, injection conditions, and venting also play significant roles.
Incomplete filling: A low mould temperature can contribute to premature solidification in some applications, but inadequate injection pressure, poor venting, or insufficient melt temperature may also be responsible.
Long cycle time: Excessive mould temperature can increase the time required for a part to cool sufficiently for ejection.
Recommended Control Practices
- Follow the resin supplier’s recommended mould-temperature range.
- Ensure cooling channels are clean and properly balanced.
- Monitor temperature at relevant locations.
- Maintain suitable melt temperature and injection conditions.
- Check part dimensions and appearance during production.
- Adjust one variable at a time when troubleshooting.
Different plastics may require substantially different mould temperatures. Amorphous and semicrystalline polymers, for example, respond differently to mould temperature because their solidification and crystallisation behaviours differ.
12. Mould Temperature Control in Compression Moulding
Compression moulding often uses heated moulds to soften, shape, and cure materials under pressure.
It is commonly used for thermosetting plastics, rubber, and certain composite materials.
Why Temperature Control Matters
Material flow: Temperature affects how readily the material moves into the mould cavity.
Curing: Thermosetting materials often require a specified temperature and time to develop the required properties.
Surface quality: Suitable mould temperature helps the material contact the mould surface and form the intended finish.
Dimensional stability: Uniform heating helps reduce differences in curing and shrinkage across the product.
Problems Caused by Incorrect Temperature
- Incomplete curing.
- Over-curing or thermal degradation.
- Surface defects.
- Uneven material flow.
- Dimensional variation.
- Inconsistent mechanical properties.
Best Practices
- Check the temperature at more than one relevant location when necessary.
- Allow the mould to reach a stable temperature before production.
- Follow the material supplier’s curing specifications.
- Check heater performance and temperature-sensor accuracy.
- Maintain consistent mould-closing pressure and curing time.
- Inspect products for defects associated with incomplete or uneven curing.
Temperature should be considered together with pressure and curing time. Correct temperature alone cannot compensate for an unsuitable compression-moulding cycle.
13. Methods for Measuring Mould Temperature
Accurate temperature measurement is essential for reliable control.
A. Thermocouples
Thermocouples measure temperature using the electrical response of two dissimilar metals.
They are commonly used in industrial moulds because they can respond quickly and are available in different temperature ranges.
Advantages:
- Suitable for many industrial applications.
- Available in a wide range of configurations.
- Can provide relatively fast temperature response.
Limitations:
- Accuracy depends on the thermocouple type, installation, calibration, and measurement system.
- Poor sensor placement may produce misleading readings.
B. Resistance Temperature Detectors
Resistance temperature detectors, or RTDs, measure temperature through changes in electrical resistance.
They are often used when stable and accurate temperature measurement is required.
Advantages:
- Good accuracy in suitable operating ranges.
- Stable measurement performance.
- Useful for automated temperature-control systems.
Limitations:
- Response time depends on sensor design and installation.
- Some configurations are less suitable for rapid temperature changes than others.
C. Infrared Thermometers
Infrared thermometers estimate surface temperature by measuring emitted infrared radiation.
They are useful for checking accessible mould surfaces without physical contact.
However, readings can be affected by surface emissivity, reflections, viewing angle, distance, and surface condition. They also cannot directly measure the internal temperature of a mould.
D. Temperature Sensors Installed in the Mould
Embedded sensors can monitor temperatures at selected positions within the mould.
This can help identify temperature differences between areas that are difficult to measure externally.
Sensor location should be selected according to the mould design and the thermal conditions that matter to product quality.
14. Common Mould Temperature Control Problems and Solutions
| Problem | Possible Cause | Recommended Solution |
|---|---|---|
| Temperature fluctuates continuously | Poor controller tuning or unstable heating/cooling | Check controller settings and system response |
| Mould heats too slowly | Undersized heater, poor contact, or excessive heat loss | Inspect heater capacity, mounting, and insulation |
| Uneven mould temperature | Poor channel design or uneven heater distribution | Check thermal layout and temperature measurements |
| Product warpage | Uneven cooling or residual stress | Review temperature distribution and the complete cycle |
| Incomplete material filling | Low mould temperature or other flow restrictions | Check material temperature, mould temperature, pressure, and venting |
| Long production cycle | Excessive mould temperature or inefficient cooling | Review cooling performance and required ejection conditions |
| Surface defects | Incorrect temperature or inconsistent material conditions | Inspect temperature, material preparation, and mould finish |
| Incomplete curing | Insufficient temperature or curing time | Verify the material’s recommended curing conditions |
| Temperature reading is incorrect | Sensor fault, poor placement, or calibration error | Inspect and verify the measurement system |
| Cooling performance decreases | Blocked channels, deposits, or inadequate flow | Clean the system and verify fluid circulation |
These symptoms can have multiple causes. Troubleshooting should confirm the underlying problem before process settings are changed.
15. How to Establish the Correct Mould Temperature
Selecting the correct temperature requires a systematic approach.
Step 1: Identify the Material
Determine whether the material is wax, thermoplastic, thermosetting resin, rubber, or another compound.
Each material has different processing and temperature requirements.
Step 2: Check the Supplier’s Recommendations
Review the material technical data sheet and processing instructions.
Use these recommendations as the starting point for determining mould temperature.
Step 3: Inspect the Mould Design
Consider the mould material, wall thickness, cavity geometry, heating arrangement, and cooling-channel layout.
Large or complex moulds may develop temperature differences between locations.
Step 4: Check the Temperature-Control Equipment
Verify that heaters, cooling circuits, sensors, and controllers operate correctly.
Check for leaks, blocked channels, damaged wiring, and inaccurate sensors.
Step 5: Allow the Mould to Stabilise
Do not begin production until the mould has reached the required temperature and is sufficiently stable.
The time required depends on the mould size, material, and heating or cooling system.
Step 6: Produce Trial Samples
Make test products under controlled conditions.
Inspect their dimensions, surface finish, strength where applicable, and other relevant quality characteristics.
Step 7: Adjust the Temperature Gradually
If defects appear to be temperature-related, make small, controlled adjustments within the recommended processing range.
Avoid changing temperature, pressure, and cycle time simultaneously unless the process requires a coordinated change.
Step 8: Record the Results
Document:
- Target mould temperature.
- Actual measured temperature.
- Material temperature.
- Heating or cooling time.
- Cycle time.
- Product inspection results.
- Any process adjustments.
Step 9: Standardise the Process
Once a stable operating range has been validated, establish documented process settings and inspection procedures.
Continue monitoring the process to identify drift or equipment deterioration.
16. Best Practices for Maintaining Stable Mould Temperature
Maintaining the correct temperature is an ongoing task rather than a one-time adjustment.
Follow these practices:
- Calibrate temperature sensors: Ensure that readings are accurate enough for the process.
- Inspect heating elements: Replace damaged or deteriorated heaters.
- Maintain cooling channels: Remove deposits and obstructions that restrict fluid flow.
- Check fluid circulation: Confirm that the cooling or heating medium flows at the required rate.
- Monitor multiple locations: Where necessary, measure temperature at several points to identify uneven heating or cooling.
- Maintain consistent cycle times: Avoid unnecessary variation between production cycles.
- Inspect mould insulation: Reduce unwanted heat loss where appropriate.
- Use automatic controls when needed: Automated regulation can improve repeatability.
- Keep maintenance records: Document repairs, calibration, cleaning, and changes to settings.
- Review product quality regularly: Use inspection results to determine whether the temperature-control process remains effective.
17. Relationship Between Mould Temperature, Cycle Time, and Production Cost
Mould temperature affects both product quality and manufacturing cost.
A mould that is too hot may require additional cooling time before the product can be removed safely. A mould that is too cold may cause poor filling or incomplete curing, resulting in rejected products or additional processing time.
The ideal temperature is therefore not necessarily the lowest or highest possible setting.
Instead, manufacturers should find a suitable operating range that balances:
- Product quality.
- Cycle time.
- Energy consumption.
- Material properties.
- Equipment limitations.
- Mould durability.
- Scrap and rejection rates.
For example, lowering the mould temperature may shorten cooling time in some injection-moulding applications, but it can also increase warpage, reduce surface quality, or affect crystallisation. The change should be evaluated through controlled trials.
A useful performance measurement is the rejection rate:\[ \text{Rejection Rate (\%)}= \frac{\text{Number of Rejected Products}}{\text{Total Products Produced}}\times100 \]
Tracking rejection rate alongside cycle time and energy consumption helps manufacturers evaluate whether a temperature adjustment genuinely improves production efficiency.
18. Important Safety Precautions
Mould temperature control systems may involve hot surfaces, pressurised fluids, electrical equipment, and high-temperature materials.
To operate them safely:
- Follow the equipment manufacturer’s operating instructions.
- Use appropriate gloves and other personal protective equipment.
- Avoid touching hot mould surfaces without suitable protection.
- Isolate electrical power before carrying out maintenance.
- Release pressure safely before opening fluid circuits.
- Check hoses and fittings for leaks or damage.
- Never exceed the rated temperature or pressure of the equipment.
- Ensure that heating and cooling systems have suitable protective controls.
- Use appropriate ventilation when processing materials that release fumes.
- Allow the mould and associated equipment to reach a safe condition before cleaning or servicing.
Temperature-control equipment should be inspected and maintained by personnel with suitable training.
Conclusion
Mould temperature control is a fundamental part of producing high-quality products in candle making, injection moulding, compression moulding, thermoforming, and resin casting.
Proper temperature control helps improve surface finish, dimensional accuracy, material flow, curing, and production consistency. It can also reduce defects, unnecessary waste, and production delays.
However, incorrect temperature settings may cause warpage, shrinkage, incomplete filling, poor surface quality, uneven curing, or longer cycle times.
The best results are achieved by selecting the appropriate temperature for the material and mould, maintaining uniform heat distribution, using accurate sensors, and monitoring product quality throughout production.
The key principle is simple: maintain the correct mould temperature, keep it stable, and adjust it according to the material, mould design, and manufacturing process.