1. Introduction to Compression Mould Repair and Refurbishment
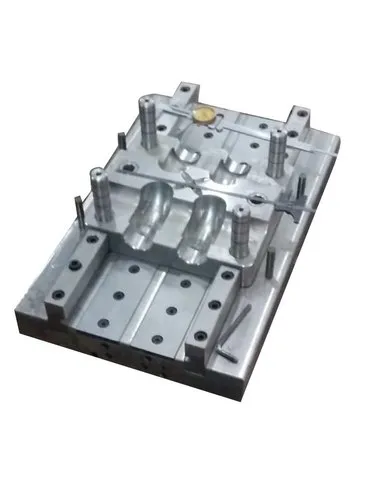
Compression moulding is an important manufacturing process used to produce plastic, rubber, composite, and other moulded components. In this process, a measured quantity of raw material is placed inside a heated mould cavity. The mould is then closed under pressure, allowing the material to flow, take the shape of the cavity, and become a finished product through heating and curing or solidification.
Compression moulds are repeatedly exposed to high temperatures, pressure, friction, and mechanical stress during production. Over time, these operating conditions can cause wear, surface damage, cracks, corrosion, dimensional changes, and other defects.
To maintain the quality and performance of moulds, regular maintenance, repair, and refurbishment are necessary.
Compression mould repair refers to the process of identifying and correcting defects or damage in a mould to restore its proper working condition.
Compression mould refurbishment refers to the process of restoring and improving an existing mould through cleaning, repairing, polishing, replacing damaged components, and performing necessary modifications.
The main objective of mould repair and refurbishment is to extend mould life, maintain product quality, reduce production downtime, and minimise the cost of purchasing new moulds.
2. What Is Compression Moulding?
Compression moulding is a manufacturing technique in which a pre-measured quantity of material is placed directly into an open, heated mould cavity.
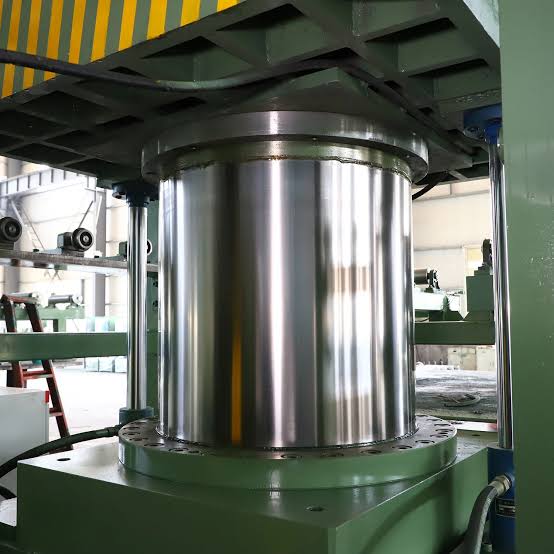
The mould is then closed using a hydraulic or mechanical press. Pressure and heat cause the material to spread throughout the cavity and take the required shape.
After sufficient heating and curing or solidification, the mould is opened and the finished component is removed.
Basic Steps of Compression Moulding
Step 1: Material Preparation
The raw material is prepared according to the required quantity and specifications.
Common materials include:
- Thermosetting plastics.
- Rubber compounds.
- Phenolic materials.
- Silicone compounds.
- Fibre-reinforced composites.
Step 2: Material Loading
The measured quantity of material is placed inside the mould cavity.
Step 3: Mould Closing
The upper mould half moves towards the lower mould half and closes the cavity.
Step 4: Application of Pressure and Heat
The moulding press applies the required pressure while the mould is maintained at the specified temperature.
Step 5: Curing or Solidification
The material takes the shape of the cavity and develops the required physical properties.
Step 6: Product Removal
The mould opens, and the finished product is removed using the appropriate ejection or demoulding method.
Step 7: Cleaning and Inspection
The mould is inspected and cleaned before the next production cycle.
3. What Is Compression Mould Repair?
Compression mould repair is the process of identifying, analysing, and correcting defects in a mould that may affect its performance or the quality of manufactured products.
During continuous production, mould surfaces and components may experience damage due to repeated pressure, heat exposure, material residue, corrosion, and improper handling.
Repair work is performed to restore the mould’s original dimensions, surface condition, alignment, and functional performance.
Main Objectives of Mould Repair
- Restore the original mould dimensions.
- Repair damaged mould surfaces.
- Remove cracks and other surface defects where safely repairable.
- Improve mould alignment and closing accuracy.
- Restore proper operation of ejector systems.
- Prevent material leakage and flash formation.
- Improve product quality.
- Reduce production interruptions.
- Extend mould service life.
- Reduce the cost of mould replacement.
4. What Is Compression Mould Refurbishment?
Compression mould refurbishment is a more comprehensive process than ordinary repair.
It involves restoring an existing mould to a suitable operating condition through inspection, cleaning, surface restoration, component replacement, machining, polishing, and testing.
Refurbishment may also include modifications to improve mould performance and make production more reliable.
Main Activities Involved in Refurbishment
- Complete mould disassembly.
- Removal of dirt, dust, and material deposits.
- Cleaning of mould cavities.
- Removal of rust and corrosion.
- Surface polishing.
- Repair of damaged edges.
- Replacement of worn-out components.
- Restoration of dimensional accuracy.
- Repair of cooling or heating channels.
- Inspection of alignment and fitting.
- Final assembly and testing.
Refurbishment is particularly useful when a mould is still structurally suitable for production but has deteriorated due to extended use.
5. Common Problems Found in Compression Moulds
Compression moulds can develop different types of defects during their operating life.
Understanding these problems helps maintenance technicians select the correct repair method.
1. Surface Wear
Surface wear occurs when mould surfaces gradually deteriorate due to repeated contact, pressure, friction, and material movement.
Effects:
- Changes in product dimensions.
- Poor surface finish.
- Loss of mould details.
- Increased product rejection.
Repair method:
Damaged areas may be restored through polishing, precision grinding, machining, or suitable surface treatment, depending on the severity of the damage.
2. Cracks in the Mould
Cracks may develop due to repeated thermal cycling, excessive loading, stress concentration, material defects, or improper operation.
Effects:
- Structural weakness.
- Material leakage.
- Poor product quality.
- Risk of mould failure.
Repair method:
The damaged area should be inspected to determine crack depth, location, and extent. Depending on the mould material and damage, qualified specialists may use approved welding, machining, or component replacement procedures.
Cracks affecting critical structural areas require engineering assessment before repair.
3. Corrosion and Rust
Corrosion occurs when metal mould surfaces react with moisture, chemicals, or environmental contaminants.
Effects:
- Surface roughness.
- Poor product appearance.
- Difficulty in releasing products.
- Damage to mould cavity details.
Repair method:
Corrosion is removed using suitable cleaning, polishing, or controlled surface-restoration methods. Protective coatings or suitable rust-prevention treatments may be applied where appropriate.
4. Flash Formation
Flash is excess moulding material that escapes through the parting line or gaps between mould components.
Possible causes:
- Damaged parting surfaces.
- Improper mould alignment.
- Excessive moulding pressure.
- Worn-out locating components.
- Incorrect mould closing conditions.
Repair method:
The parting surfaces are inspected and restored. Alignment, clamping conditions, and mould closure are also checked.
5. Damage to the Parting Line
The parting line is the contact area where the upper and lower mould halves meet.
Repeated opening and closing can cause wear, dents, scratches, and deformation.
Effects:
- Flash formation.
- Dimensional problems.
- Material leakage.
- Poor product appearance.
Repair method:
The parting surfaces may require precision grinding, lapping, polishing, or local restoration to achieve proper contact.
6. Ejector System Problems
Ejector pins and related components help remove the finished product from the mould.
Common problems include:
- Bent ejector pins.
- Worn ejector holes.
- Sticking pins.
- Broken springs.
- Improper ejector movement.
Repair method:
Damaged components are inspected, cleaned, repaired, or replaced. Proper movement and alignment are checked during reassembly.
7. Heating System Problems
Compression moulds commonly operate at controlled temperatures.
Heating-related problems may occur due to damaged heaters, faulty wiring, defective thermocouples, or uneven temperature distribution.
Effects:
- Incomplete curing.
- Uneven product quality.
- Increased cycle time.
- Product deformation.
Repair method:
Heating elements, temperature sensors, wiring, and temperature-control systems are inspected and replaced or repaired as required.
8. Cooling System Problems
Some compression moulds use cooling channels or controlled cooling arrangements.
Problems may include leakage, blockages, corrosion, and uneven cooling.
Repair method:
Cooling passages are inspected, cleaned, tested, and repaired where necessary.
6. Tools and Equipment Required for Mould Repair and Refurbishment
Different tools and equipment are used depending on the type of mould and the repair work required.
| Tool or Equipment | Purpose |
|---|---|
| Vernier caliper | Measures external and internal dimensions |
| Micrometer | Measures dimensions with high precision |
| Dial indicator | Checks alignment and runout |
| Height gauge | Measures vertical dimensions |
| Surface plate | Provides a reference surface for inspection |
| Grinding machine | Restores damaged surfaces |
| Milling machine | Performs machining operations |
| Lathe machine | Repairs cylindrical components |
| Polishing tools | Improves mould surface finish |
| Welding equipment | Repairs suitable metal components |
| Ultrasonic cleaner | Removes dirt and material deposits |
| Torque wrench | Tightens fasteners to specified torque |
| Surface roughness tester | Measures surface finish |
| Hardness tester | Checks material hardness |
| Dye penetrant testing kit | Detects surface-breaking defects |
The selection of tools depends on mould construction, material, dimensions, and repair requirements.
7. Step-by-Step Process of Compression Mould Repair
Mould repair should follow a systematic procedure to ensure that the mould is restored safely and accurately.
Step 1: Initial Inspection
The mould is visually inspected to identify visible defects and operating problems.
The technician checks:
- Cracks.
- Surface damage.
- Rust.
- Wear.
- Flash-related damage.
- Loose components.
- Misalignment.
- Damaged ejector pins.
The inspection findings should be recorded.
Step 2: Mould Disassembly
The mould is carefully removed from the machine and disassembled according to the manufacturer’s instructions.
All components should be identified and organised to avoid incorrect assembly.
Before disassembly, ensure the machine is isolated from energy sources and the mould has cooled to a safe handling temperature.
Step 3: Cleaning the Mould
The mould components are cleaned to remove:
- Dust.
- Oil.
- Grease.
- Moulding compound residue.
- Rust.
- Carbon deposits.
- Other contaminants.
Suitable cleaning chemicals and methods should be selected according to the mould material and surface treatment.
Step 4: Detailed Damage Inspection
After cleaning, the mould is inspected more carefully.
Measurements are taken to determine the extent of wear, dimensional variation, cracks, and deformation.
Where necessary, non-destructive testing methods are used to identify hidden defects.
Step 5: Identification of Repair Requirements
The technician determines which components require repair, replacement, machining, or polishing.
A repair plan is prepared based on:
- Defect severity.
- Mould material.
- Original design specifications.
- Dimensional requirements.
- Expected production conditions.
Step 6: Surface Repair
Damaged mould surfaces are restored using suitable methods.
Common techniques include:
- Precision grinding.
- Manual polishing.
- Lapping.
- Controlled machining.
- Approved metal deposition or welding.
The selected method must not compromise the mould’s hardness, strength, or heat-treatment condition.
Step 7: Component Replacement
Worn or damaged components are replaced where repair is not suitable.
Examples include:
- Ejector pins.
- Guide pins.
- Bushes.
- Springs.
- Fasteners.
- Heaters.
- Thermocouples.
- Seals.
Replacement components should meet the original design requirements.
Step 8: Dimensional Inspection
After repair, important mould dimensions are measured.
The technician checks:
- Cavity dimensions.
- Core dimensions.
- Parting surfaces.
- Alignment.
- Flatness.
- Parallelism.
- Component clearances.
All critical measurements should be compared with the engineering drawing or approved specifications.
Step 9: Final Assembly
The mould is reassembled carefully.
All components must be installed in their correct positions, and moving parts should operate smoothly.
Fasteners are tightened according to the specified requirements.
Step 10: Trial Testing
The repaired mould is installed in the machine and tested under controlled operating conditions.
The trial checks:
- Mould closing and opening.
- Heating performance.
- Pressure application.
- Ejection operation.
- Product dimensions.
- Surface finish.
- Flash formation.
- Overall production performance.
Any remaining issues should be corrected before the mould is released for regular production.
8. Step-by-Step Process of Compression Mould Refurbishment
Refurbishment generally involves a more extensive restoration process.
Step 1: Collection of Mould History
Before refurbishment, the technician reviews the mould’s operating history.
Important information includes:
- Total production cycles.
- Previous repair records.
- Common product defects.
- Material types used.
- Operating temperatures.
- Pressing conditions.
- Previous modifications.
This information helps identify recurring problems.
Step 2: Complete Disassembly
The mould is dismantled into its major components.
Each component is labelled and inspected separately.
Step 3: Deep Cleaning
All mould surfaces, cavities, channels, and components are thoroughly cleaned.
Old material deposits, carbon residue, oil, and corrosion are removed using suitable techniques.
Step 4: Restoration of Mould Surfaces
The cavity and core surfaces are restored according to the required surface-finish specifications.
Depending on the mould, restoration may include grinding, polishing, lapping, or surface treatment.
Step 5: Repair of Damaged Areas
Cracks, dents, worn surfaces, and damaged edges are evaluated and repaired where technically appropriate.
Critical structural repairs require approved engineering procedures.
Step 6: Replacement of Worn Components
Components that cannot meet the required tolerances are replaced.
This may include guide systems, ejector components, heaters, springs, and fasteners.
Step 7: Restoration of Heating and Cooling Systems
Heating elements, thermocouples, wiring, cooling passages, and temperature-control components are checked.
The objective is to ensure uniform and reliable temperature control.
Step 8: Surface Protection
Where appropriate, protective coatings or treatments are applied to improve corrosion resistance and wear performance.
The coating must be compatible with the mould material and operating conditions.
Step 9: Dimensional and Functional Inspection
All critical dimensions and mechanical functions are checked against the original design specifications.
Step 10: Final Assembly and Trial Production
The mould is assembled, installed, and tested under controlled production conditions.
Sample products are inspected to confirm that the refurbished mould meets the required quality standards.
9. Difference Between Mould Repair and Mould Refurbishment
Although these terms are closely related, they have different meanings.
| Basis | Mould Repair | Mould Refurbishment |
|---|---|---|
| Meaning | Correcting specific defects | Restoring the overall mould condition |
| Scope | Usually limited | Usually comprehensive |
| Objective | Fix a particular problem | Improve overall mould performance |
| Cleaning | As required | Usually extensive |
| Component replacement | Only damaged parts | Worn parts may be replaced |
| Surface restoration | Localised | May cover multiple mould surfaces |
| Inspection | Focused on the defect | Comprehensive |
| Cost | Generally lower | Generally higher |
| Time required | Usually shorter | Usually longer |
| Expected result | Restores affected functionality | Restores broader operating condition |
Example: If a mould has one damaged ejector pin, replacing that pin is a repair. If the entire mould is dismantled, cleaned, polished, realigned, and fitted with new worn components, it is refurbishment.
10. Importance of Compression Mould Repair and Refurbishment
Repair and refurbishment are essential for maintaining the long-term performance of compression moulds.
1. Extends Mould Life
Regular repair and refurbishment help restore worn or damaged areas, allowing the mould to remain useful for a longer period.
2. Improves Product Quality
A properly maintained mould produces components with better dimensional accuracy, surface finish, and consistency.
3. Reduces Production Costs
Repairing an existing mould is often more economical than manufacturing a completely new mould.
4. Reduces Production Downtime
Identifying and correcting mould problems early helps prevent unexpected breakdowns and production interruptions.
5. Maintains Dimensional Accuracy
Precision repair and inspection help maintain the original cavity and core dimensions.
6. Improves Production Efficiency
A properly functioning mould supports smooth operation, consistent cycle times, and reduced rejection rates.
7. Prevents Major Failures
Regular inspection helps identify small defects before they develop into serious structural problems.
8. Improves Operational Safety
Repairing damaged components, loose fittings, heating systems, and other faulty parts helps reduce operational risks.
9. Maintains Surface Finish
Polishing and surface restoration help improve the appearance and release characteristics of moulded products.
10. Supports Sustainable Manufacturing
Refurbishing existing moulds can reduce material consumption and waste associated with manufacturing replacement tooling.
11. Common Techniques Used in Compression Mould Repair
Different repair techniques are selected according to the type and severity of mould damage.
A. Grinding
Grinding is used to remove small amounts of material and restore the required surface geometry.
Applications:
- Repairing flat surfaces.
- Removing minor surface damage.
- Correcting uneven contact surfaces.
- Restoring parting surfaces.
B. Polishing
Polishing improves the smoothness and appearance of mould surfaces.
Applications:
- Removing minor scratches.
- Improving cavity finish.
- Reducing surface roughness.
- Improving product release.
C. Lapping
Lapping is a precision finishing process used to improve surface flatness and contact between mating surfaces.
Applications:
- Restoring parting surfaces.
- Improving contact accuracy.
- Correcting minor surface irregularities.
D. Welding and Metal Deposition
Suitable welding or metal-deposition techniques can restore damaged mould areas.
Applications:
- Repairing localised material loss.
- Restoring worn edges.
- Correcting certain damaged surfaces.
However, welding must be carefully controlled because excessive heat can change the hardness, microstructure, and dimensional stability of mould materials.
E. CNC Machining
CNC machining is used to restore complex mould features and critical dimensions.
Applications:
- Repairing cavity profiles.
- Restoring mould details.
- Machining replacement components.
- Correcting damaged surfaces.
F. Surface Coating
Protective coatings may be applied to improve wear resistance, corrosion resistance, or release properties.
The coating must be selected according to the mould material, operating temperature, and production requirements.
12. Quality Inspection After Mould Repair and Refurbishment
Quality inspection is an essential stage because the mould must perform reliably after repair.
The following checks are commonly performed.
| Inspection parameter | Purpose |
|---|---|
| Dimensional inspection | Confirms mould dimensions |
| Surface inspection | Checks scratches, dents, and defects |
| Hardness testing | Verifies material hardness where required |
| Crack inspection | Identifies surface or subsurface defects using suitable methods |
| Alignment inspection | Confirms correct positioning of mould components |
| Flatness inspection | Checks mating surfaces |
| Heating inspection | Confirms temperature-control performance |
| Cooling inspection | Checks cooling passages and leakage |
| Ejector inspection | Confirms proper ejection movement |
| Trial production | Verifies actual moulding performance |
All inspection results should be documented for future maintenance and traceability.
13. Preventive Maintenance of Compression Moulds
Preventive maintenance means regularly inspecting and maintaining moulds to prevent failures before they occur.
A planned maintenance schedule helps maintain mould performance.
Daily Maintenance
- Clean the mould after production.
- Remove material residue.
- Check visible surface damage.
- Inspect ejector movement.
- Check for unusual operating conditions.
- Apply suitable protective treatment when required.
Weekly Maintenance
- Inspect parting surfaces.
- Check guide pins and bushes.
- Examine fasteners.
- Inspect heating and temperature-control connections.
- Check for corrosion and wear.
Monthly Maintenance
- Perform detailed surface inspection.
- Check critical dimensions where necessary.
- Inspect heating and cooling systems.
- Examine ejector components.
- Review mould performance and production defects.
Periodic Maintenance
- Complete mould disassembly when required.
- Conduct detailed dimensional inspection.
- Perform appropriate non-destructive testing.
- Replace worn components.
- Carry out surface restoration.
- Review the mould’s remaining service life.
The maintenance frequency should depend on production volume, mould material, operating conditions, and manufacturer recommendations.
14. Safety Precautions During Mould Repair and Refurbishment
Safety is extremely important because mould repair involves heavy components, high temperatures, machinery, electrical systems, and specialised tools.
Important precautions include:
- Disconnect and isolate the machine from all energy sources before maintenance.
- Follow lockout/tagout procedures.
- Allow the mould to cool before handling.
- Use suitable lifting equipment for heavy mould components.
- Wear safety gloves, protective footwear, and safety glasses.
- Use appropriate protection during grinding and polishing.
- Follow welding safety procedures when welding is required.
- Ensure proper ventilation when using cleaning chemicals.
- Use approved tools and equipment.
- Avoid handling sharp or damaged mould surfaces without protection.
- Check electrical connections before operating heating systems.
- Verify that all components are correctly assembled before testing.
Following these precautions helps prevent accidents and equipment damage.
15. Factors Affecting the Cost of Mould Repair and Refurbishment
The total cost depends on the condition of the mould and the amount of work required.
Major cost factors include:
- Type and size of the mould.
- Material used in mould construction.
- Severity of damage.
- Number of damaged components.
- Machining requirements.
- Welding and surface-restoration requirements.
- Replacement component costs.
- Labour and technician expertise.
- Inspection and testing requirements.
- Transportation and handling expenses.
A detailed inspection should be completed before preparing a repair or refurbishment quotation.
16. Advantages of Compression Mould Refurbishment
Compression mould refurbishment provides several benefits to manufacturing organisations.
1. Cost Savings: Refurbishment may cost less than purchasing a new mould.
2. Longer Service Life: Restoring worn components helps extend mould usability.
3. Better Performance: Improved surfaces and functional components support reliable production.
4. Reduced Waste: Proper mould maintenance reduces defective products and material wastage.
5. Improved Productivity: A well-maintained mould helps reduce unnecessary production interruptions.
6. Better Product Consistency: Restored dimensions and alignment improve manufacturing repeatability.
7. Resource Efficiency: Reusing existing mould structures reduces the need for new tooling materials.
17. Challenges in Compression Mould Repair and Refurbishment
Although repair and refurbishment provide many advantages, certain challenges may arise.
1. Identification of Hidden Defects
Some cracks and internal defects cannot be detected through visual inspection alone.
2. Dimensional Accuracy
Restoring the original mould dimensions can be difficult, particularly when the mould has experienced severe wear.
3. Material Compatibility
Repair materials, welding processes, and surface treatments must be compatible with the original mould material.
4. Heat Treatment Changes
Welding and other high-temperature repair processes may affect mould hardness and structural properties.
5. Availability of Replacement Parts
Some mould components may be difficult to obtain, particularly for older or customised moulds.
6. Production Downtime
Extensive refurbishment may require significant time, temporarily stopping production.
7. Skilled Labour Requirements
Precision repair requires trained technicians who understand mould design, machining, metallurgy, and inspection procedures.
18. Applications of Compression Mould Repair and Refurbishment
Compression mould repair and refurbishment are used across various manufacturing industries.
1. Automotive Industry
Used for maintaining moulds that manufacture rubber seals, gaskets, vibration-control components, and plastic or composite parts.
2. Electrical Industry
Used for moulds that manufacture electrical insulation components, switch parts, and protective housings.
3. Rubber Industry
Used for repairing moulds that produce rubber seals, washers, grommets, and other rubber components.
4. Household Products Industry
Used for moulds that manufacture handles, containers, kitchen accessories, and other household components.
5. Aerospace Industry
Used for maintaining specialised moulds involved in manufacturing certain composite components.
6. Medical Products Industry
Used for maintaining suitable moulds for selected rubber and polymer components used in medical products.
19. Documentation Required for Mould Repair and Refurbishment
Proper documentation helps maintain maintenance history and ensures that all repair work can be traced.
Important documents include:
- Mould inspection report.
- Mould repair report.
- Damage identification report.
- Dimensional inspection report.
- Material and welding records, where applicable.
- Component replacement report.
- Maintenance history.
- Trial production report.
- Final quality approval report.
Documentation also helps technicians identify recurring problems and plan future preventive maintenance.
20. Conclusion
Compression mould repair and refurbishment are essential activities for maintaining the performance, reliability, and service life of compression moulds.
During continuous production, moulds are exposed to high temperatures, pressure, friction, and repeated mechanical loading. These conditions can result in surface wear, cracks, corrosion, dimensional variations, damaged parting lines, and problems with ejector or heating systems.
Through systematic inspection, cleaning, machining, polishing, component replacement, surface restoration, and testing, damaged moulds can often be returned to a suitable working condition.
Mould repair focuses on correcting specific defects, whereas refurbishment involves a more comprehensive restoration of the mould.
Both processes help reduce production costs, improve product quality, minimise downtime, prevent major failures, and increase manufacturing efficiency.
Overall, compression mould repair and refurbishment are important parts of effective mould maintenance management. Proper inspection, skilled repair techniques, quality testing, and preventive maintenance ensure that compression moulds continue to deliver reliable performance and consistent product quality over an extended service life.