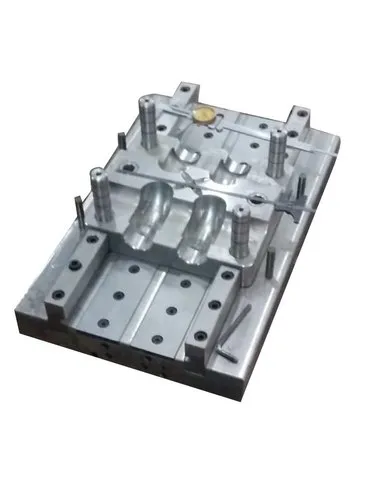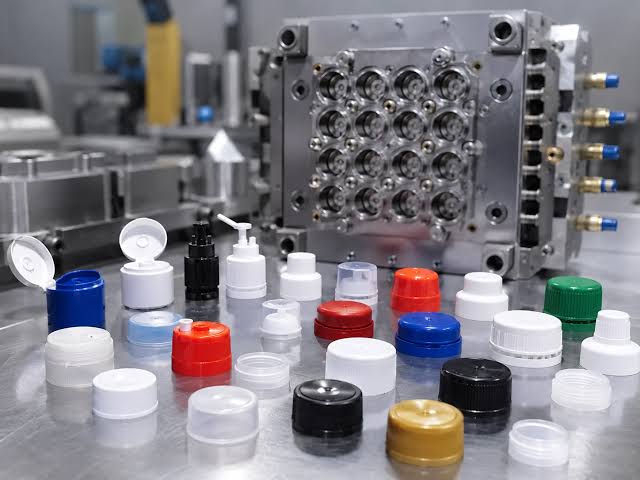
Thermoforming is a manufacturing process in which a plastic sheet is heated until it becomes soft and flexible, then shaped over or inside a mould using vacuum, pressure, or mechanical force. After cooling, the formed plastic is removed, trimmed, and inspected.
Thermoforming is widely used to manufacture packaging trays, food containers, cups, lids, automotive components, appliance panels, medical packaging, and many other plastic products.
Although thermoforming is relatively fast and cost-effective, several defects can occur during production. These defects may affect product appearance, wall thickness, strength, dimensions, and overall quality.
Understanding the causes of thermoforming defects is essential for improving production efficiency, reducing material waste, and maintaining consistent product quality.
This guide explains the most common thermoforming moulding defects, their causes, corrective actions, and prevention methods.
1. Uneven Wall Thickness
What Is Uneven Wall Thickness?
Uneven wall thickness occurs when the plastic sheet stretches unevenly during forming. Some areas become excessively thin, while other areas remain relatively thick.
This is one of the most common problems in thermoforming, particularly when manufacturing deep containers, trays, and complex shapes.
Common Causes
- Uneven heating of the plastic sheet.
- Incorrect heating temperature.
- Excessive stretching during forming.
- Poor mould design.
- Insufficient plug assistance.
- Incorrect vacuum or pressure settings.
- Inadequate control of sheet sag.
- Improper material distribution.
Effects on Product Quality
- Reduced mechanical strength.
- Thin corners and sidewalls.
- Increased risk of cracking or tearing.
- Poor impact resistance.
- Inconsistent product performance.
- Increased rejection rates.
Solutions
- Improve heating uniformity: Adjust heating zones so the sheet reaches a consistent forming temperature.
- Optimize forming temperature: Avoid overheating or underheating the material.
- Use plug assist where appropriate: A properly designed plug can help distribute material more evenly into deep mould cavities.
- Adjust vacuum and pressure: Ensure the sheet conforms to the mould without excessive localized stretching.
- Review mould geometry: Rounded corners and gradual transitions can reduce excessive stretching.
- Control sheet sag: Adjust heating time and support methods to prevent excessive drooping before forming.
Prevention
Monitor wall thickness during production and establish acceptable minimum thickness limits for critical areas.
2. Webbing
What Is Webbing?
Webbing is the formation of unwanted folds or stretched plastic bridges between mould features. It commonly occurs in products with deep cavities, closely spaced features, or complicated shapes.
The plastic sheet may fold over itself instead of entering the mould cavity smoothly.
Common Causes
- Excessive sheet sag.
- Incorrect sheet temperature.
- Poor mould layout.
- Closely spaced cavities.
- Improper plug-assist design.
- Incorrect forming speed.
- Poor material distribution.
Effects on Product Quality
- Unacceptable surface appearance.
- Incorrect product shape.
- Uneven wall thickness.
- Difficulty removing the product from the mould.
- Increased trimming waste.
Solutions
- Adjust the heating cycle to reduce excessive sag.
- Optimize plug-assist movement and shape.
- Increase spacing between mould features where possible.
- Modify mould geometry to allow smoother material flow.
- Adjust forming speed and pressure.
- Review sheet temperature distribution.
Prevention
Conduct forming trials when designing new moulds. Test cavity spacing, plug movement, sheet temperature, and forming sequence before starting full-scale production.
3. Incomplete Forming
What Is Incomplete Forming?
Incomplete forming occurs when the heated plastic sheet fails to reproduce all the details of the mould surface.
Corners, grooves, ribs, embossed features, and deep sections may appear rounded, shallow, or missing.
Common Causes
- Insufficient vacuum.
- Low compressed-air pressure in pressure-forming systems.
- Blocked or poorly positioned vacuum holes.
- Plastic sheet temperature too low.
- Insufficient forming time.
- Excessive distance between the sheet and mould.
- Poor venting.
- Material that is unsuitable for the required geometry.
Effects on Product Quality
- Missing details.
- Incorrect dimensions.
- Poor surface definition.
- Inconsistent appearance.
- Reduced functional performance.
Solutions
- Check the vacuum pump and vacuum lines for leaks.
- Clean blocked vacuum holes.
- Verify that vacuum ports are correctly positioned.
- Adjust the sheet temperature within the material supplier’s recommended range.
- Optimize forming pressure and timing.
- Improve mould venting.
- Consider pressure forming for products requiring finer detail.
Prevention
Inspect vacuum systems regularly and verify forming performance after mould changes, maintenance, or material changes.
4. Blisters and Air Bubbles
What Are Blisters and Air Bubbles?
Blisters are raised areas or bubbles that form on the plastic surface. They may develop between layers of material or within the plastic sheet when trapped gases expand during heating.
The exact cause depends on the plastic material and the type of forming process.
Common Causes
- Moisture in hygroscopic materials.
- Excessive heating temperature.
- Overheating for too long.
- Contamination within the sheet.
- Trapped air between the sheet and mould.
- Poor material storage.
- Inadequate drying when required.
Effects on Product Quality
- Rough or uneven surfaces.
- Reduced strength.
- Visible surface defects.
- Poor transparency.
- Increased rejection rates.
Solutions
- Follow the material supplier’s drying requirements.
- Store plastic sheets in clean, dry conditions.
- Reduce excessive heating.
- Check for contaminated or defective raw material.
- Improve vacuum evacuation and mould venting.
- Confirm that the heating cycle is suitable for the specific polymer.
Important: Not all thermoforming plastics require pre-drying. Drying should be based on the material’s moisture sensitivity and supplier recommendations.
Prevention
Maintain proper material storage procedures and inspect incoming sheets for bubbles, contamination, and other visible defects.
5. Excessive Sheet Sag
What Is Sheet Sag?
Sheet sag occurs when a heated plastic sheet droops excessively under its own weight before forming begins.
A small amount of sag may be acceptable or necessary in certain processes. Excessive sag, however, can cause uneven material distribution and interfere with forming.
Common Causes
- Excessive heating time.
- High sheet temperature.
- Large unsupported sheet areas.
- Uneven heating.
- Incorrect material thickness.
- Inadequate sheet support.
- Poorly coordinated heating and forming cycles.
Effects on Product Quality
- Uneven wall thickness.
- Webbing.
- Distorted product geometry.
- Contact with machine components.
- Inconsistent forming results.
Solutions
- Reduce heating time or temperature where appropriate.
- Balance the heating zones.
- Adjust sheet support and clamping.
- Use controlled heating sequences.
- Optimize the timing between heating and forming.
- Review sheet thickness and material selection.
Prevention
Establish a repeatable heating cycle for each material, sheet thickness, and product design. Avoid relying on visual judgment alone when setting production parameters.
6. Poor Surface Finish
What Is Poor Surface Finish?
Poor surface finish refers to unwanted marks, roughness, dull patches, scratches, or other imperfections on the formed product.
The defect may originate from the plastic sheet, mould surface, heating process, or handling procedures.
Common Causes
- Scratched or damaged mould surfaces.
- Dust and contamination.
- Overheating.
- Poor-quality raw material.
- Incorrect sheet-to-mould contact.
- Residue on the mould.
- Improper demoulding.
- Excessive friction during handling.
Effects on Product Quality
- Reduced visual appeal.
- Visible scratches or marks.
- Inconsistent texture.
- Poor product acceptance.
- Additional cleaning or rejection costs.
Solutions
- Clean the mould using suitable materials and methods.
- Repair or polish damaged mould surfaces when appropriate.
- Inspect incoming plastic sheets.
- Remove dust and contamination from the forming area.
- Adjust heating conditions.
- Improve handling and stacking procedures.
- Apply approved mould-release products only when required and compatible with the process.
Prevention
Establish a regular mould-cleaning schedule and protect finished products from scratches, dust, and handling damage.
7. Wrinkles and Folds
What Are Wrinkles and Folds?
Wrinkles are unwanted creases or folds that develop when the heated plastic sheet does not stretch and distribute evenly across the mould.
They are particularly common around deep cavities, corners, and areas where material gathers during forming.
Common Causes
- Excessive sheet sag.
- Incorrect sheet temperature.
- Poor material distribution.
- Improper plug-assist movement.
- Incorrect forming sequence.
- Poor mould geometry.
- Excessive material gathering in a localized area.
Effects on Product Quality
- Poor appearance.
- Incorrect dimensions.
- Localized thin areas.
- Reduced structural integrity.
- Problems during trimming and assembly.
Solutions
- Adjust heating temperature and uniformity.
- Optimize plug-assist design and movement.
- Review mould geometry.
- Adjust sheet clamping and forming sequence.
- Modify cavity spacing where possible.
- Control sheet sag before forming.
Prevention
Evaluate material movement during the mould-design stage and perform forming trials before approving production settings.
8. Cracking and Tearing
What Are Cracking and Tearing?
Cracking occurs when the formed plastic develops fractures. Tearing occurs when the material separates completely or partially, often in thin or highly stretched areas.
These defects can appear during forming, trimming, demoulding, or subsequent handling.
Common Causes
- Excessive stretching.
- Uneven wall thickness.
- Sheet temperature too low.
- Sharp mould corners.
- Inadequate material thickness.
- Brittle or degraded raw material.
- Excessive forming pressure.
- Poor trimming-tool condition.
Effects on Product Quality
- Product leakage.
- Reduced strength.
- Dimensional failure.
- Safety or functional problems.
- High scrap rates.
Solutions
- Verify that the sheet is within the correct forming-temperature range.
- Reduce excessive stretching by improving material distribution.
- Increase corner radii where the design permits.
- Review the starting sheet thickness.
- Inspect the material for degradation or damage.
- Optimize forming pressure and plug-assist settings.
- Check trimming blades and cutting conditions.
Prevention
Pay particular attention to corners, deep cavities, and thin sections. These areas often experience the highest stretching and are more susceptible to failure.
9. Dimensional Inaccuracy
What Is Dimensional Inaccuracy?
Dimensional inaccuracy occurs when the finished product does not meet its specified length, width, height, depth, or other dimensional requirements.
The product may be oversized, undersized, warped, or inconsistent from one production cycle to another.
Common Causes
- Incorrect mould dimensions.
- Uneven cooling.
- Excessive or insufficient forming temperature.
- Material shrinkage.
- Inconsistent vacuum or pressure.
- Poor machine calibration.
- Inadequate clamping.
- Inconsistent trimming.
Effects on Product Quality
- Assembly problems.
- Poor fit between components.
- Product instability.
- Failure to meet customer specifications.
- Increased inspection and rejection costs.
Solutions
- Verify mould dimensions and condition.
- Calibrate measuring and machine-control equipment.
- Standardize heating and cooling cycles.
- Maintain consistent vacuum and pressure.
- Check clamping and sheet positioning.
- Inspect trimming equipment.
- Account for the material’s shrinkage characteristics during mould design.
Prevention
Use a documented dimensional inspection plan. Measure critical dimensions at regular intervals and compare the results with the product’s engineering specifications.
10. Warping and Distortion
What Is Warping?
Warping is the unwanted bending, twisting, or deformation of a formed product.
It often becomes noticeable after the product has cooled or been removed from the mould.
Common Causes
- Uneven cooling.
- Uneven wall thickness.
- Removing the product while it is too hot.
- Excessive residual stress.
- Poor mould temperature control.
- Uneven material shrinkage.
- Inadequate support during cooling.
- Incorrect stacking of warm products.
Effects on Product Quality
- Poor dimensional stability.
- Uneven edges.
- Problems during assembly.
- Reduced appearance quality.
- Difficulty stacking or packaging products.
Solutions
- Improve cooling uniformity.
- Allow the product to cool sufficiently before demoulding.
- Check mould temperature distribution.
- Improve wall-thickness consistency.
- Review the mould design and cooling arrangement.
- Avoid applying pressure to products while they are still warm and flexible.
- Optimize storage and stacking procedures.
Prevention
Establish a stable cooling cycle for each product and avoid changing cooling time without checking its effect on dimensional stability.
11. Difficulty in Demoulding
What Is Demoulding Difficulty?
Demoulding difficulty occurs when the formed plastic cannot be removed from the mould easily or consistently.
The product may stick, deform, crack, or become damaged during removal.
Common Causes
- Insufficient draft angle.
- Deep undercuts.
- Rough mould surfaces.
- Excessive shrinkage around mould features.
- Incorrect demoulding temperature.
- Poorly positioned ejectors or release mechanisms.
- Insufficient air assistance where used.
- Incompatible mould-release products.
Effects on Product Quality
- Scratches and surface damage.
- Cracked edges.
- Distorted products.
- Longer production cycles.
- Increased machine downtime.
Solutions
- Increase draft angles where practical.
- Review undercuts and mould geometry.
- Polish or repair rough mould surfaces.
- Optimize demoulding temperature.
- Inspect ejector systems and release mechanisms.
- Use suitable air assistance if the machine and mould are designed for it.
- Confirm that any mould-release agent is compatible with the plastic and downstream requirements.
Prevention
Consider demoulding requirements during mould design rather than attempting to solve all release problems after production begins.
12. Excessive Shrinkage
What Is Excessive Shrinkage?
Shrinkage occurs when a formed plastic product becomes smaller as it cools. Some shrinkage is normal, but excessive or inconsistent shrinkage can cause dimensional problems.
Common Causes
- Incorrect mould-temperature control.
- Uneven cooling.
- Material-specific shrinkage characteristics.
- Excessive forming temperature.
- Inconsistent sheet thickness.
- Incorrect mould dimensions.
- Premature demoulding.
Effects on Product Quality
- Undersized products.
- Poor fit with mating components.
- Distorted geometry.
- Inconsistent dimensions.
- Increased rejection rates.
Solutions
- Review the material’s shrinkage data.
- Optimize mould dimensions to account for expected shrinkage.
- Improve cooling uniformity.
- Maintain stable heating and forming conditions.
- Standardize demoulding time.
- Monitor dimensions after the product has cooled and stabilized.
Prevention
Validate shrinkage during mould trials and use actual production measurements to refine the process where necessary.
13. Vacuum Marks and Surface Indentations
What Are Vacuum Marks?
Vacuum marks are visible indentations or small marks that appear when the plastic conforms to mould features, vacuum holes, or surface irregularities.
Some vacuum marks are caused by excessive local suction or by vacuum openings that are too large or poorly positioned.
Common Causes
- Oversized vacuum holes.
- Poorly positioned vacuum ports.
- Excessive local vacuum.
- Thin or overheated plastic.
- Rough mould surfaces.
- Inadequate vacuum-hole finishing.
- Incorrect forming sequence.
Effects on Product Quality
- Visible surface imperfections.
- Reduced surface consistency.
- Unacceptable appearance on cosmetic surfaces.
- Potential problems in high-quality packaging applications.
Solutions
- Inspect vacuum-hole size and placement.
- Use appropriately sized or designed vacuum ports.
- Finish vacuum openings to reduce unwanted impressions.
- Adjust local heating conditions.
- Review vacuum timing and intensity.
- Improve mould-surface condition.
Prevention
Design vacuum systems to evacuate air effectively without creating unnecessary marks on visible product surfaces.
14. Burn Marks and Discoloration
What Are Burn Marks and Discoloration?
Burn marks are darkened areas or localized discoloration caused by excessive heat or material degradation. Discoloration can also result from contamination, unsuitable processing conditions, or changes in the raw material.
Common Causes
- Excessive heating temperature.
- Excessive heating time.
- Uneven heater output.
- Contaminated plastic sheets.
- Material degradation.
- Residue on the mould.
- Incorrect processing conditions for the polymer.
Effects on Product Quality
- Poor appearance.
- Unacceptable colour variation.
- Reduced material performance in cases of degradation.
- Increased scrap and rework.
- Possible odour generation.
Solutions
- Reduce excessive heating.
- Check heater output and temperature controls.
- Clean the mould and surrounding equipment.
- Inspect the raw material for contamination.
- Confirm that the material is suitable for the selected process conditions.
- Review the recommended processing window supplied by the material manufacturer.
Prevention
Monitor heating zones, maintain temperature sensors, and inspect material quality before production.
15. Trimming Defects
What Are Trimming Defects?
Trimming defects occur when excess plastic is removed incorrectly after forming.
Common examples include rough edges, burrs, incomplete cuts, cracked edges, and dimensional errors.
Common Causes
- Dull cutting tools.
- Incorrect trimming alignment.
- Poorly designed trimming fixtures.
- Incorrect cutting pressure.
- Misaligned formed parts.
- Inadequate product support.
- Inconsistent product dimensions.
Effects on Product Quality
- Sharp or rough edges.
- Incorrect final dimensions.
- Cracking near the cut.
- Poor fit during assembly.
- Increased waste.
Solutions
- Sharpen or replace cutting tools.
- Inspect trimming fixtures and alignment.
- Use appropriate cutting conditions.
- Support the product correctly during trimming.
- Verify product positioning.
- Inspect finished edges and critical dimensions.
Prevention
Include trimming-tool inspection and replacement in the preventive-maintenance schedule. Check the first few parts after tool changes or machine adjustments.
Quick Reference: Thermoforming Defects and Solutions
| Defect | Likely Cause | Recommended Action |
|---|---|---|
| Uneven wall thickness | Uneven heating or excessive stretching | Balance heating and improve material distribution |
| Webbing | Excessive sag or poor material flow | Adjust heating, plug assist, and mould geometry |
| Incomplete forming | Insufficient vacuum or poor venting | Check vacuum performance and mould vents |
| Blisters | Moisture, overheating, or trapped gas | Follow material drying requirements and optimize heating |
| Excessive sheet sag | Excessive heating or unsupported sheet | Adjust heating time and sheet support |
| Poor surface finish | Dirty or damaged mould | Clean, inspect, and repair mould surfaces |
| Wrinkles and folds | Poor material distribution | Optimize temperature, clamping, and plug assist |
| Cracking and tearing | Excessive stretching or low forming temperature | Improve material distribution and temperature control |
| Dimensional inaccuracy | Incorrect shrinkage control or inconsistent process | Standardize forming and cooling conditions |
| Warping | Uneven cooling or early demoulding | Improve cooling uniformity and demould at the correct time |
| Difficult demoulding | Insufficient draft or rough mould surfaces | Improve mould geometry and release conditions |
| Excessive shrinkage | Material shrinkage or unstable cooling | Validate shrinkage and optimize cooling |
| Vacuum marks | Poor vacuum-hole design | Review hole size, position, and surface finish |
| Burn marks | Excessive heat or contamination | Correct heating settings and inspect material |
| Trimming defects | Dull tools or misalignment | Maintain cutting tools and verify alignment |
Best Practices for Preventing Thermoforming Defects
Preventing defects requires coordinated control of material quality, heating, mould design, forming pressure, cooling, and trimming.
1. Control Sheet Temperature
Temperature is one of the most important variables in thermoforming.
A sheet that is too cold may not reproduce mould details or may crack during stretching. A sheet that is too hot may sag excessively, develop thin areas, or degrade.
Best practice: Establish a suitable temperature range for each material and sheet thickness. Monitor heating zones and verify actual sheet-heating performance.
2. Maintain the Vacuum and Pressure Systems
Vacuum and pressure systems must deliver consistent performance to reproduce the mould geometry accurately.
Leaks, blocked lines, worn seals, and clogged vacuum holes can cause incomplete forming.
Best practice: Inspect vacuum lines, seals, filters, valves, and ports regularly. Record system performance during maintenance checks.
3. Optimize Mould Design
Mould design strongly influences material distribution and product quality.
Important design considerations include:
- Draft angles.
- Corner radii.
- Cavity depth.
- Cavity spacing.
- Vacuum-hole location.
- Venting.
- Cooling arrangements.
- Demoulding requirements.
Best practice: Evaluate deep sections, sharp corners, and closely spaced cavities during the design stage because these features can increase the risk of stretching and webbing.
4. Maintain Consistent Cooling
Uneven cooling can lead to warping, shrinkage variation, and dimensional instability.
Best practice: Check cooling arrangements, mould temperature, cooling time, and product support. Confirm that products have cooled sufficiently before demoulding or stacking.
5. Use Consistent Raw Materials
Changes in sheet thickness, polymer grade, moisture content, colour, or material quality can affect forming behaviour.
Best practice: Inspect incoming sheets, verify material specifications, and avoid mixing materials with different processing characteristics without validating the process.
6. Perform Preventive Maintenance
Machine and mould condition directly affect product consistency.
Regularly inspect:
- Heating elements.
- Temperature sensors.
- Vacuum pumps.
- Pressure regulators.
- Mould surfaces.
- Vacuum holes.
- Clamping mechanisms.
- Plug-assist systems.
- Trimming tools.
Best practice: Maintain a written preventive-maintenance schedule and document repairs, adjustments, and recurring defects.
7. Monitor Product Quality
Defects should be detected as early as possible.
Inspect products for:
- Wall thickness.
- Overall dimensions.
- Surface appearance.
- Cracks and tears.
- Webbing.
- Warping.
- Trimming quality.
- Functional performance.
Best practice: Use a consistent inspection plan and record results so that recurring defects can be traced to changes in material, machine settings, mould condition, or operating procedures.
A Systematic Troubleshooting Procedure
When a thermoforming defect appears, changing several machine settings at once can make the problem more difficult to diagnose.
A structured troubleshooting process is more effective.
Step 1: Identify the Defect
Determine whether the problem affects appearance, wall thickness, dimensions, forming accuracy, or demoulding.
Step 2: Identify Where It Occurs
Check whether the defect is concentrated in corners, deep cavities, edges, particular heating zones, or specific mould cavities.
Step 3: Review Recent Changes
Check whether the defect appeared after a change in:
- Raw material.
- Sheet thickness.
- Heating settings.
- Vacuum or pressure.
- Mould temperature.
- Cooling time.
- Mould maintenance.
- Trimming equipment.
Step 4: Check the Equipment
Inspect the heating system, vacuum lines, mould vents, clamping system, cooling arrangements, and trimming equipment as relevant to the defect.
Step 5: Adjust One Variable at a Time
Make controlled adjustments within the material and machine manufacturer’s recommended operating limits.
Step 6: Inspect the Results
Compare samples before and after the adjustment. Confirm that the original defect has improved without creating another problem.
Step 7: Record the Final Settings
Document the successful correction so that the process can be repeated consistently.
Conclusion
Common thermoforming defects include uneven wall thickness, webbing, incomplete forming, blisters, excessive sheet sag, poor surface finish, wrinkles, cracking, dimensional inaccuracy, warping, demoulding problems, excessive shrinkage, vacuum marks, burn marks, and trimming defects.
These problems are often associated with incorrect heating, poor material distribution, insufficient vacuum, unsuitable mould geometry, inconsistent cooling, raw-material issues, or inadequate maintenance.
The most effective way to reduce thermoforming defects is to control the entire production process rather than correcting each defect individually. Consistent material quality, accurate temperature control, effective vacuum and pressure systems, suitable mould design, uniform cooling, and regular inspection all contribute to better product quality.
By identifying defects early, adjusting process variables systematically, and documenting successful settings, manufacturers can reduce scrap, minimize downtime, improve product consistency, and extend mould service life.