1. Introduction to Surface Finishing of Injection Moulds
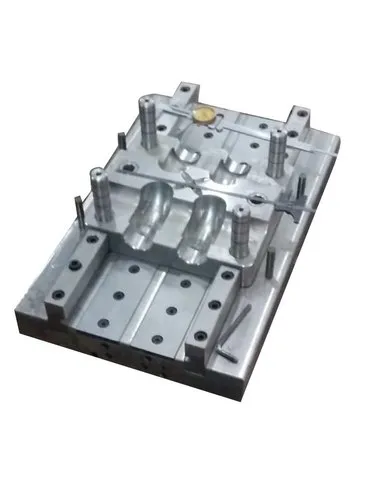
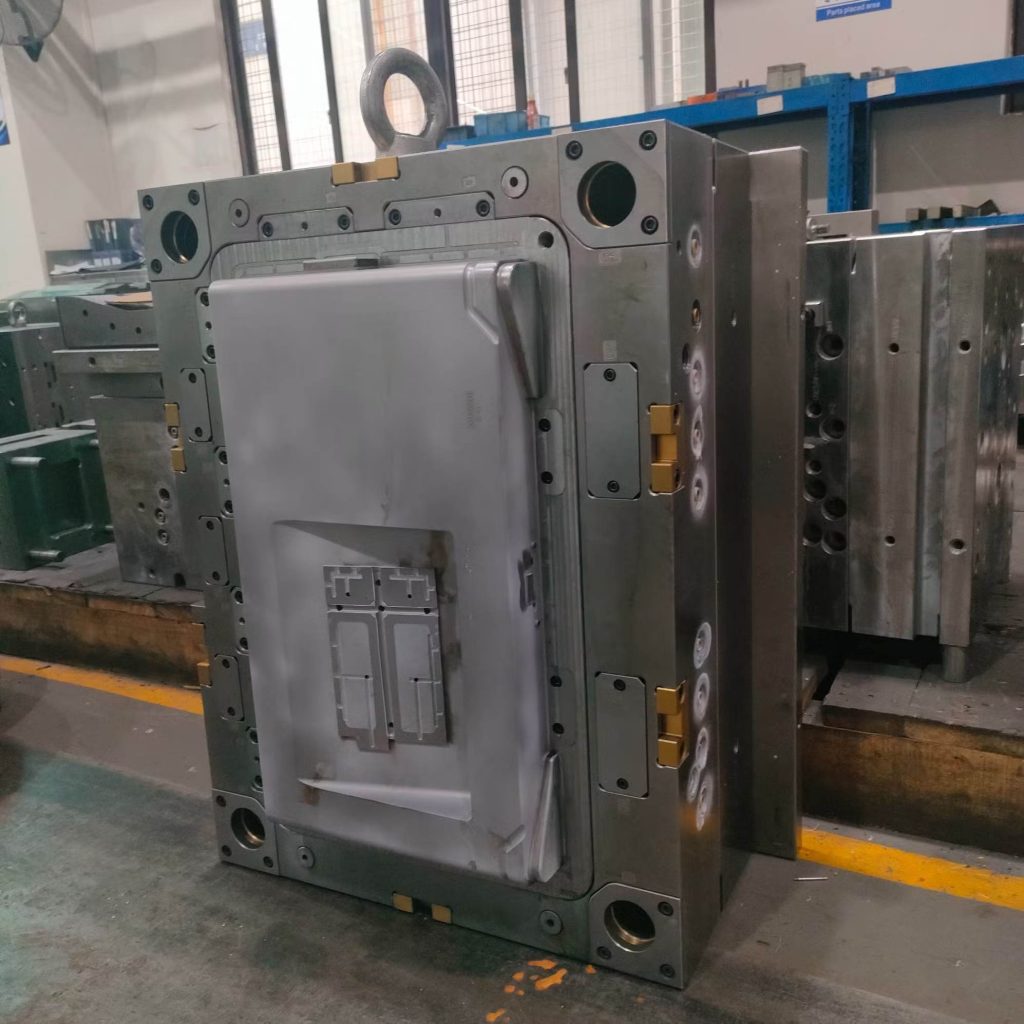
Surface finishing is an essential stage in injection mould manufacturing. It involves improving the surface quality of mould cavities, cores, and other functional areas to achieve the required appearance, dimensional accuracy, and performance of moulded plastic products.
In injection moulding, molten plastic is injected into a mould cavity under pressure. The plastic cools and solidifies, taking the shape and surface characteristics of the mould. Therefore, the condition of the mould surface directly influences the appearance and quality of the finished component.
A well-finished mould can produce smooth, glossy, textured, or patterned plastic surfaces, depending on the application. Proper surface finishing can also help improve mould cleanliness, reduce certain release problems, and make maintenance easier.
The appropriate finishing method depends on the mould material, plastic resin, product design, required surface appearance, and production volume.
2. Why Is Surface Finishing Important?
Surface finishing affects several aspects of injection mould performance.
A. Improves Product Appearance
The mould surface is transferred to the plastic component during moulding. A polished cavity can produce a glossy surface, while a textured cavity can create a matte or patterned finish.
B. Supports Consistent Product Quality
Uniform finishing helps produce consistent surface appearance across repeated moulding cycles.
Poorly finished or damaged surfaces may create visible defects, such as scratches, marks, and inconsistent textures.
C. Helps with Part Release
A suitable mould surface finish can help plastic components release more consistently.
However, a highly polished surface does not automatically guarantee easier ejection. Material shrinkage, draft angle, surface texture, mould temperature, and part geometry also affect release.
D. Reduces Surface Defects
Proper finishing can remove machining marks and reduce imperfections that might otherwise appear on moulded products.
E. Supports Mould Maintenance
Suitable surface finishes can make some mould surfaces easier to clean and inspect.
F. Improves Mould Service Life in Certain Applications
Appropriate finishing and surface treatments can help reduce corrosion or wear when correctly selected. However, finishing alone cannot compensate for unsuitable mould material or poor design.
3. Common Types of Injection Mould Surface Finishes
Different surface finishes are used to achieve specific product requirements.
A. Machined Finish
A machined finish is produced directly by machining operations such as milling, turning, or grinding.
It may retain visible tool marks, depending on the machining method and cutting conditions.
Characteristics:
- Relatively economical.
- Suitable for functional mould surfaces that do not require a highly polished appearance.
- Can be appropriate for selected prototype and industrial components.
- May require additional finishing to meet tighter appearance requirements.
Applications:
- Internal mould features.
- Functional plastic components.
- Prototype tooling.
- Surfaces where machining marks are acceptable.
B. Ground Finish
Grinding uses an abrasive wheel or similar tool to improve surface quality and dimensional accuracy.
It is commonly used on flat mould surfaces, plates, and other components requiring controlled dimensions.
Characteristics:
- Improves surface uniformity.
- Can achieve good dimensional accuracy.
- Removes certain machining irregularities.
- May be used before polishing.
Applications:
- Mould plates.
- Parting surfaces.
- Precision-ground inserts.
- Components requiring accurate flatness.
C. Polished Finish
Polishing is used to reduce surface roughness and create a smooth finish.
Depending on the mould material and polishing method, the result can range from a general smooth finish to a high-gloss or mirror-like surface.
Characteristics:
- Reduces visible surface irregularities.
- Can produce glossy moulded products.
- May improve cleaning and release under suitable conditions.
- Requires careful control to avoid rounding edges or altering critical dimensions.
Applications:
- Optical components.
- Transparent plastic parts.
- Glossy consumer products.
- Cosmetic packaging.
- Decorative plastic components.
D. Textured Finish
Texturing creates a controlled pattern or surface profile on the mould.
The texture may be produced through chemical etching, laser processing, controlled blasting, or other specialised techniques.
Characteristics:
- Produces matte or patterned surfaces.
- Can reduce the visibility of minor scratches and fingerprints.
- Provides decorative or functional surface characteristics.
- Requires appropriate draft angles to allow reliable part release.
Applications:
- Automotive interior panels.
- Appliance housings.
- Consumer electronics.
- Handles and grips.
- Decorative product surfaces.
E. Mirror Finish
A mirror finish is a highly refined polished surface that produces a reflective appearance.
It is often required when the moulded component must have excellent optical or cosmetic quality.
Characteristics:
- Very low surface roughness when properly achieved.
- High reflectivity.
- Requires careful preparation and polishing.
- Can be time-consuming and expensive to produce.
Applications:
- Optical lenses.
- Transparent covers.
- High-gloss packaging.
- Decorative components.
- Selected medical and precision plastic parts.
Important: A mirror-polished mould does not guarantee an optically perfect plastic component. Resin quality, processing conditions, mould design, and cleanliness also influence the final result.
4. Surface Finishing Methods Used for Injection Moulds
Several techniques are used to improve the surface of injection moulds.
A. Manual Polishing
Manual polishing uses abrasive stones, polishing papers, compounds, and other suitable tools to refine mould surfaces.
The operator progressively removes small surface irregularities until the required finish is achieved.
Advantages:
- Suitable for detailed and complex areas.
- Provides precise control when performed by a skilled technician.
- Useful for final finishing and local defect correction.
Disadvantages:
- Labour-intensive.
- Quality depends heavily on operator skill.
- Can produce inconsistent results if the process is poorly controlled.
- Excessive polishing may alter edges and dimensions.
Manual polishing is commonly used for final finishing of cavities, cores, and intricate mould features.
B. Mechanical Polishing
Mechanical polishing uses powered tools to move abrasive materials across the mould surface.
It may be used for larger areas or to reduce the time required for certain polishing operations.
Advantages:
- Can improve productivity.
- Suitable for selected broad or accessible surfaces.
- Can produce consistent results with controlled equipment and procedures.
Disadvantages:
- May create uneven finishing if pressure or movement is inconsistent.
- Can generate excessive local heat.
- May round edges or distort small features if used incorrectly.
Mechanical polishing must be carefully controlled, particularly on precision mould components.
C. Abrasive Stone Finishing
Abrasive stones are used to remove machining marks, tool marks, and other surface irregularities.
Different abrasive grades are selected according to the initial surface condition and required finish.
A common approach is to begin with an appropriate coarser abrasive and progressively move to finer grades.
Applications:
- Removing machining marks.
- Preparing surfaces for polishing.
- Finishing cavity and core surfaces.
- Correcting minor surface imperfections.
The abrasive sequence should be selected according to the mould material and finishing specification.
D. Diamond Polishing
Diamond compounds contain fine diamond particles used to produce highly refined surfaces.
They are particularly useful for polishing suitable tool steels and other mould materials when a high-quality finish is required.
Advantages:
- Can achieve very fine surface finishes.
- Suitable for high-gloss and mirror-finish applications.
- Offers a range of abrasive particle sizes.
Disadvantages:
- Requires careful control.
- Can be expensive.
- Incorrect use may create scratches or inconsistent polishing patterns.
Diamond polishing is commonly used for precision and high-gloss mould surfaces.
E. Sandblasting and Bead Blasting
Abrasive blasting directs particles towards a mould surface to clean it or create a controlled texture.
The resulting finish depends on the abrasive material, particle size, pressure, distance, and processing time.
Applications:
- Creating matte surfaces.
- Producing selected uniform textures.
- Cleaning certain mould surfaces when the process is appropriate.
Important: Abrasive blasting is not suitable for every mould surface. It may damage precision features, change critical dimensions, or contaminate delicate areas if improperly controlled.
F. Chemical Etching
Chemical etching uses controlled chemical reactions to create a pattern or texture on a mould surface.
The mould is prepared with a suitable masking pattern, and the exposed areas are treated to produce the desired texture.
Advantages:
- Can produce decorative patterns.
- Suitable for certain complex surface textures.
- Can create repeatable finishes when process control is adequate.
Disadvantages:
- Requires specialised process control.
- May be unsuitable for some mould materials or geometries.
- Chemical handling and waste disposal must be managed safely.
G. Laser Texturing
Laser texturing uses a focused laser beam to create controlled surface patterns directly on a mould.
It can produce fine details and complex textures that may be difficult to achieve using conventional methods.
Advantages:
- High precision.
- Good repeatability with suitable equipment.
- Can create complex or customised patterns.
- May reduce the need for some chemical texturing processes.
Disadvantages:
- Requires specialised equipment.
- Initial costs can be high.
- Process parameters must be optimised for the mould material and desired texture.
Laser texturing is used in automotive, consumer electronics, packaging, and other industries requiring specialised surface finishes.
5. Surface Roughness and Its Importance
Surface roughness describes the small irregularities present on a mould surface.
It is commonly measured using parameters such as Ra and Rz.
- Ra: The arithmetic average of the absolute surface-height deviations from the mean line over a measurement length.
- Rz: A roughness parameter based on the heights and depths of surface features, calculated according to the applicable measurement standard.
These parameters help manufacturers specify and verify surface quality.
Why Surface Roughness Matters
Surface roughness can influence:
- Gloss and reflectivity.
- Texture reproduction.
- Friction and part release.
- Cleaning requirements.
- Appearance of the moulded component.
- Performance of certain functional surfaces.
However, Ra alone does not fully describe a surface. Two mould surfaces with similar Ra values may have different patterns, directional marks, or textures.
For this reason, the required surface finish should be specified using appropriate roughness parameters and, where necessary, visual or texture standards.
Typical Surface Finish Categories
| Finish Category | General Characteristics | Common Applications |
|---|---|---|
| Machined | Visible machining marks may remain | Functional and prototype parts |
| Ground | More uniform and controlled surface | Precision mould plates and inserts |
| Fine polished | Smooth surface with reduced visible marks | General cosmetic components |
| High-gloss polished | Strong surface reflectivity | Consumer products and packaging |
| Mirror polished | Highly reflective, finely finished surface | Optical and premium cosmetic parts |
| Textured | Deliberate matte or patterned surface | Automotive panels and housings |
The appropriate roughness value depends on the application. There is no single Ra value that defines every polished or mirror-finished mould.
6. Factors Affecting Injection Mould Surface Finishing
Several factors determine which finishing method should be selected and how effectively it can be applied.
A. Mould Material
Different mould materials respond differently to grinding, polishing, etching, and texturing.
Hardened tool steels, pre-hardened steels, aluminium alloys, and copper alloys may require different finishing procedures.
The material’s hardness, microstructure, cleanliness, and heat treatment can affect the final surface quality.
B. Initial Machining Quality
Deep machining marks require more material removal than shallow marks.
Poor machining quality increases polishing time and may make it difficult to achieve a uniform finish.
Therefore, good machining practices are important before the mould enters the polishing stage.
C. Required Product Appearance
A transparent optical component may require a highly refined mould surface, while a textured industrial housing may require a deliberately patterned finish.
The required product appearance should guide the finishing method.
D. Mould Geometry
Deep cavities, narrow ribs, sharp corners, and small features can be difficult to polish uniformly.
Specialised tools and carefully controlled techniques may be needed to prevent damage to these areas.
E. Plastic Material
Different plastic materials reproduce mould surface characteristics differently.
For example, transparent plastics may reveal minor surface defects more clearly than opaque materials. Some filled or abrasive plastics may also increase mould wear.
F. Production Volume
High-volume production may justify investment in durable surface treatments or specialised finishing methods.
For low-volume production, a simpler finish may be sufficient if it meets the product requirements.
7. Surface Finishing for Different Mould Applications
The required finish depends on the intended plastic product.
A. Transparent Plastic Products
Transparent components, such as optical covers and selected lenses, may require highly polished mould surfaces.
Recommended considerations:
- Remove machining marks carefully.
- Use a suitable progressive polishing sequence.
- Avoid scratches and contamination.
- Inspect the mould surface under appropriate lighting.
- Validate the finished plastic component for optical quality.
B. Automotive Interior Components
Automotive interior panels often require controlled textures to achieve a specific appearance and tactile feel.
Recommended considerations:
- Select a texture appropriate for the product design.
- Ensure uniform texture across the mould surface.
- Provide adequate draft for textured areas.
- Verify the appearance of moulded samples.
C. Consumer Electronics Housings
Electronic housings may require glossy, matte, or textured finishes.
Recommended considerations:
- Define the required finish before mould manufacturing.
- Ensure consistent polishing or texturing.
- Avoid visible tool marks in cosmetic areas.
- Validate the finish under the intended lighting conditions.
D. Medical Plastic Components
Some medical components require controlled surface characteristics for cleaning, handling, sealing, or functional performance.
Recommended considerations:
- Define the surface specification according to the component’s intended use.
- Control contamination during finishing.
- Use suitable inspection and documentation procedures.
- Validate the moulding process against applicable quality and regulatory requirements.
A polished mould alone does not make a product sterile or suitable for medical use.
E. Packaging Components
Caps, closures, containers, and cosmetic packaging may require smooth or glossy surfaces.
Recommended considerations:
- Maintain consistent cavity finish.
- Check surface quality around gates and parting lines.
- Ensure suitable release characteristics.
- Inspect moulded products for visible defects.
8. Common Surface Finishing Defects in Injection Moulds
Surface finishing can introduce defects if the process is not properly controlled.
A. Scratches
Causes:
- Abrasive particles that are too coarse.
- Contaminated polishing tools.
- Incorrect polishing direction.
- Improper handling.
Solutions:
- Clean the surface and tools.
- Use a controlled progression of abrasive grades.
- Avoid cross-contamination between polishing stages.
- Inspect the surface regularly.
B. Orange-Peel Texture
Orange-peel texture is an irregular surface appearance that resembles the skin of an orange.
It may result from material structure, heat treatment, polishing technique, or other surface-processing conditions.
Solutions:
- Check the mould material and heat treatment.
- Review the polishing procedure.
- Determine whether the defect originates from the base material or finishing process.
- Use a qualified finishing specialist for demanding surfaces.
C. Rounded Edges
Excessive polishing can remove material from edges and corners, changing the intended geometry.
Solutions:
- Protect critical edges during finishing.
- Use suitable polishing tools.
- Control polishing pressure and duration.
- Measure critical features before and after finishing.
D. Uneven Gloss
Uneven polishing can produce areas with different levels of reflectivity.
Causes:
- Inconsistent polishing pressure.
- Uneven material removal.
- Different finishing directions.
- Inadequate preparation.
Solutions:
- Standardise the polishing sequence.
- Inspect surfaces under consistent lighting.
- Use suitable tools and compounds.
- Ensure uniform preparation before final polishing.
E. Pitting
Pitting appears as small pits or cavities in the mould surface.
It may be associated with corrosion, material defects, inclusions, or inappropriate surface-processing methods.
Solutions:
- Identify the underlying cause before attempting repair.
- Check for corrosion or material defects.
- Use a suitable repair and finishing procedure.
- Improve storage and corrosion protection where necessary.
F. Surface Contamination
Polishing compounds, oils, dust, or other residues can remain on the mould surface.
Solutions:
- Clean the mould using a method compatible with its material and finish.
- Use lint-free materials where appropriate.
- Avoid transferring abrasive particles between finishing stages.
- Inspect the mould before assembly and production.
9. Step-by-Step Surface Finishing Process
A controlled finishing procedure helps achieve the required surface quality.
Step 1: Inspect the Mould Surface
Inspect the cavity or core for machining marks, scratches, corrosion, dents, and other defects.
Determine whether the surface requires grinding, stoning, polishing, or texturing.
Step 2: Define the Required Finish
Identify the required surface roughness, gloss, texture, and dimensional tolerances.
Use drawings, specifications, approved samples, or recognised texture standards where applicable.
Step 3: Prepare the Surface
Remove contaminants and ensure the surface is suitable for finishing.
If deep machining marks are present, address them before moving to finer polishing stages.
Step 4: Remove Machining Marks
Use appropriate grinding stones, abrasive papers, or other suitable tools to remove machining irregularities.
The amount of material removed should be carefully controlled.
Step 5: Progress Through Finer Abrasives
Move gradually from coarser abrasives to finer grades.
Each stage should remove the marks left by the previous stage. Skipping steps can leave scratches that become visible during final polishing.
Step 6: Apply Final Polishing
Use a suitable polishing compound and tool to achieve the specified surface finish.
For high-gloss or mirror finishes, the process may require specialised compounds and diamond abrasives.
Step 7: Clean the Surface
Remove polishing residues and other contaminants using a compatible cleaning procedure.
Ensure that cleaning does not damage the finished surface.
Step 8: Inspect the Finish
Check the surface using appropriate lighting, visual inspection, roughness measurement, or other specified methods.
Verify that the finishing operation has not altered critical dimensions.
Step 9: Conduct a Moulding Trial
Produce sample components and inspect their appearance, dimensions, and release behaviour.
The moulded product should be evaluated because the final result also depends on the plastic material and processing conditions.
10. How to Maintain the Surface Finish of Injection Moulds
A good surface finish must be protected throughout the mould’s service life.
Recommended maintenance practices include:
- Clean the mould cavity and core using approved methods.
- Avoid abrasive cleaning tools unless specifically suitable for the surface.
- Inspect cosmetic surfaces regularly for scratches and deposits.
- Prevent corrosion during storage.
- Use suitable corrosion-protection products when appropriate.
- Handle polished inserts carefully.
- Avoid placing tools directly on finished surfaces.
- Check for damage caused by ejection components or sliding parts.
- Re-polish or repair surfaces only when necessary and using a controlled procedure.
- Keep records of repairs and surface inspections.
Important: Repeated polishing removes material. Excessive re-polishing may alter cavity dimensions, edge geometry, and product tolerances.
11. Surface Treatments vs. Surface Finishing
Surface finishing and surface treatment are related but different processes.
Surface finishing primarily modifies the surface’s texture, roughness, or appearance.
Surface treatment modifies or protects the surface through a process such as coating, nitriding, or another suitable treatment.
Examples include:
| Process | Main Purpose | Important Consideration |
|---|---|---|
| Polishing | Reduce roughness and improve reflectivity | Must preserve critical dimensions |
| Texturing | Create a controlled surface pattern | Requires suitable draft and release design |
| Nitriding | Increase surface hardness and wear resistance in suitable steels | Material and process compatibility are essential |
| Hard coating | Improve selected wear or corrosion properties | Coating thickness and adhesion must be considered |
| Corrosion-protection treatment | Reduce corrosion risk | Must be compatible with mould use and plastic material |
Not every mould requires a surface treatment. The choice depends on the mould material, operating conditions, plastic resin, production volume, and maintenance requirements.
12. How to Select the Right Surface Finish
Selecting a surface finish requires balancing product appearance, functionality, cost, and mould durability.
Consider the following factors:
- Product appearance: Determine whether the component needs a glossy, matte, textured, or mirror-like finish.
- Plastic material: Consider the resin’s surface-reproduction characteristics and any abrasive fillers.
- Mould material: Choose finishing techniques suitable for the alloy or steel.
- Dimensional tolerances: Ensure finishing will not alter critical cavity dimensions.
- Part release: Consider draft angles, shrinkage, surface texture, and ejection requirements.
- Production volume: Assess the durability required over the expected number of cycles.
- Budget: Balance the initial finishing cost against product quality and maintenance requirements.
- Inspection method: Define how the finished surface will be measured and approved.
Example Selection Guide
| Product Requirement | Potential Finishing Method |
|---|---|
| Functional component with limited cosmetic requirements | Machined or ground finish |
| Smooth consumer product | Fine polishing |
| High-gloss plastic housing | High-quality polishing |
| Transparent optical component | Precision polishing suited to optical requirements |
| Matte automotive panel | Controlled texturing or suitable blasting |
| Decorative patterned component | Chemical etching or laser texturing |
| Precision mould insert | Grinding followed by the specified finishing process |
The final choice should be based on an agreed specification rather than a finish name alone.
Conclusion
Surface finishing is a critical part of injection mould manufacturing because it directly influences the appearance, surface quality, release behaviour, and maintenance requirements of moulded plastic components.
Common methods include grinding, manual polishing, mechanical polishing, diamond polishing, abrasive blasting, chemical etching, and laser texturing. Each method serves different purposes, from removing machining marks to creating highly reflective surfaces or controlled textures.
The key to successful injection mould surface finishing is selecting the correct method, controlling material removal, and verifying the result against the required specification. Proper finishing, combined with suitable mould design and regular maintenance, helps manufacturers achieve consistent product quality and reliable mould performance.