A Complete Guide to Common Defects, Causes, and Solutions
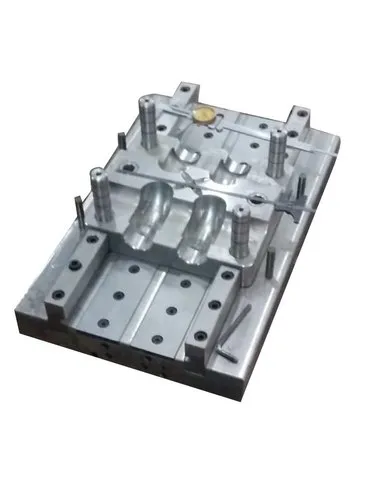
Compression moulding is a manufacturing process in which a measured amount of moulding material is placed into a heated mould cavity. The mould closes under pressure, forcing the material to flow and take the shape of the cavity. Heat and pressure are maintained for a specified period to cure or solidify the material before the finished component is removed.
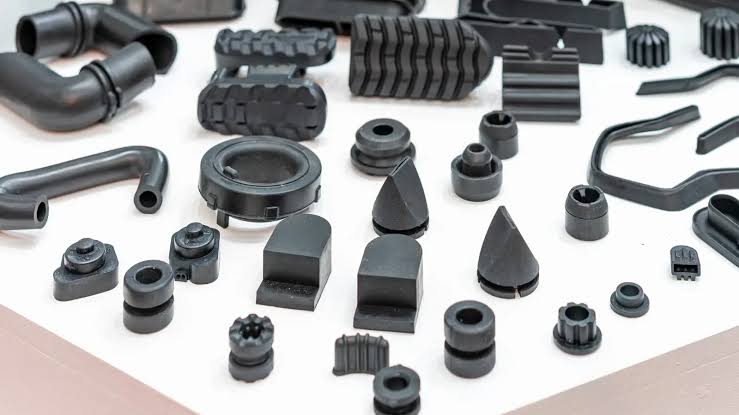
This process is widely used to manufacture automotive components, electrical insulators, appliance parts, rubber seals, gaskets, handles, and other industrial products.
Although compression moulding is relatively straightforward, various problems can occur during production. These may result in defective components, material waste, longer cycle times, and increased manufacturing costs.
Effective troubleshooting requires identifying the defect, understanding its root cause, and making controlled adjustments to the material, mould, temperature, pressure, or processing cycle.
1. Common Compression Moulding Problems
The most frequent compression moulding defects include:
- Incomplete filling
- Flash formation
- Air traps and voids
- Surface blisters
- Burn marks and scorching
- Warpage and dimensional instability
- Sink marks and shrinkage
- Poor surface finish
- Cracking and brittle components
- Sticking or difficult demoulding
- Inconsistent curing
- Weld lines and weak knit regions
Each defect has different causes, so the troubleshooting process should begin with careful inspection rather than changing several machine settings simultaneously.
2. Incomplete Filling
What is incomplete filling?
Incomplete filling occurs when the moulding material does not completely fill the cavity. The finished component may have missing sections, rounded edges, incomplete ribs, or unformed details.
This defect is also known as a short shot.
Common causes
- Insufficient charge material
- Incorrect material placement
- Low mould temperature
- Insufficient moulding pressure
- Premature curing or solidification
- Poor material flow
- Blocked vents
- Incorrect charge shape or size
Troubleshooting solutions
Increase the material charge when necessary.
Verify that the quantity of material is sufficient to fill the cavity and account for expected flash or other process losses.
Check material placement.
Position the charge so that it can flow efficiently into all sections of the mould. Poor placement may cause the material to reach some areas too late.
Verify mould temperature.
If the material is too cold, it may become difficult to flow. However, excessive temperature can cause premature curing, so the correct material-specific temperature must be maintained.
Inspect the pressure and closing sequence.
Confirm that the press develops the required pressure and that the mould closes correctly.
Clean the vents and cavity.
Blocked vents can prevent air from escaping and restrict material flow.
Review the curing characteristics.
For thermosetting materials, premature curing can prevent the material from filling the cavity completely.
3. Excessive Flash Formation
What is flash?
Flash is a thin layer of excess material that escapes between the mating surfaces of the mould. It commonly appears around the edges of the finished component.
A small amount of flash may be expected in some compression moulding operations, but excessive flash increases finishing work and material waste.
Common causes
- Excessive material charge
- Insufficient mould clamping force
- Worn or damaged mould parting surfaces
- Incorrect mould alignment
- Excessive moulding pressure
- Incorrect material viscosity or flow characteristics
- Contamination between mould surfaces
Troubleshooting solutions
Check the charge weight.
Use a consistent, accurately measured quantity of material. An oversized charge can force excess material through the parting line.
Inspect the mould parting surfaces.
Look for wear, dents, scratches, contamination, and damage that could create gaps between the mould halves.
Verify clamping force.
Confirm that the press provides the clamping force required for the mould and material. Do not simply increase pressure without checking the machine and tooling specifications.
Check mould alignment.
Misalignment can create uneven gaps and localised flash.
Review material condition.
Material that flows too readily under the selected processing conditions may escape through small gaps.
Avoid excessive pressure.
Use the recommended pressure range rather than applying additional pressure as a general solution to filling problems.
Important note
Flash should not automatically be corrected by increasing clamping force. If the mould is damaged, worn, or contaminated, the actual cause must be addressed.
4. Air Traps and Internal Voids
What are air traps and voids?
Air traps occur when air becomes trapped inside the mould cavity or within the material. Voids are empty spaces inside the finished component.
These defects may be visible as holes or bubbles, or they may remain hidden inside the part.
Internal voids can significantly reduce the strength and reliability of structural or safety-critical components.
Common causes
- Inadequate mould venting
- Incorrect charge placement
- Moisture or volatile substances in the material
- Rapid mould closure
- Inadequate material flow
- Insufficient or poorly timed venting
- Entrapped air between layers of the charge
Troubleshooting solutions
Inspect mould vents.
Clean the venting channels and verify that they are not blocked by resin deposits, rubber residue, or other contaminants.
Improve charge placement.
Arrange the charge to minimise the possibility of trapping air as the material spreads through the cavity.
Review the mould closing sequence.
Where the process permits, use an appropriate staged closing or venting sequence to allow air to escape before full pressure is applied.
Check material moisture.
Some materials require controlled drying or conditioning before moulding. Follow the material supplier’s recommendations.
Inspect the material for contamination.
Moisture, trapped gases, and volatile contaminants can produce internal voids or bubbles.
Evaluate the curing cycle.
Incorrect temperature and curing conditions may contribute to gas formation or prevent trapped air from escaping.
Why venting matters
Venting allows displaced air and certain gases to escape as the material fills the cavity. However, vents must be designed and maintained carefully: vents that are too deep or damaged may themselves create flash.
5. Surface Blisters
What are surface blisters?
Surface blisters are raised bubbles or swollen areas on the surface of a moulded component. They may appear immediately after moulding or become visible during cooling or later inspection.
Common causes
- Moisture in the material
- Trapped air or gas
- Excessive mould temperature
- Incorrect curing conditions
- Contamination
- Rapid pressure release
- Volatile substances within the material
Troubleshooting solutions
Check material preparation.
Dry moisture-sensitive materials according to the supplier’s specifications.
Verify mould temperature.
Excessive heat can cause volatile substances to expand or contribute to premature surface curing.
Inspect venting.
Make sure that gases can escape from the cavity during mould closure.
Review the curing cycle.
An unsuitable temperature or cure time may contribute to blistering. Make adjustments based on the material’s processing requirements.
Check the pressure-release sequence.
Sudden release of pressure may aggravate defects in some materials and processes. Use the recommended opening sequence.
Eliminate contamination.
Oil, release-agent buildup, moisture, and foreign particles can affect the surface.
6. Burn Marks and Scorching
What are burn marks?
Burn marks are darkened, discoloured, or scorched areas on a moulded component. They may result from excessive heat, material degradation, or trapped gases becoming overheated.
Common causes
- Excessive mould temperature
- Excessive curing time
- Poor venting
- Premature curing
- Material degradation
- Incorrect processing settings
- Contamination or residue in the cavity
Troubleshooting solutions
Verify the actual mould temperature.
Check temperature at relevant locations rather than relying solely on the heater controller’s displayed value. Uneven heating may cause localised scorching.
Review the curing time.
Excessive exposure to heat may degrade some materials. Use the recommended curing conditions for the specific compound.
Clean the mould cavity.
Remove degraded material, carbonised deposits, and other residue using an approved cleaning method.
Improve venting.
Trapped air and gases can become overheated, producing localised burn marks.
Check material storage and handling.
Material that has degraded before moulding may be more susceptible to scorching or inconsistent curing.
Important distinction
Dark marks do not always indicate excessive temperature. Trapped gases, contamination, or degraded material can create similar symptoms. Inspect the location and pattern of the defect before changing the temperature settings.
7. Warpage and Dimensional Instability
What is warpage?
Warpage occurs when a moulded component bends, twists, or deviates from its intended shape after removal from the mould.
The part may initially appear acceptable but distort during cooling, conditioning, or storage.
Common causes
- Uneven mould temperature
- Uneven cooling
- Non-uniform material distribution
- Uneven curing
- Excessive or inconsistent shrinkage
- Incorrect demoulding temperature
- Inadequate support during cooling
- Poor mould design
Troubleshooting solutions
Check temperature uniformity.
Verify that the mould is heated evenly. Differences in temperature between cavity sections can produce inconsistent curing or solidification.
Review the material distribution.
Ensure that the charge is positioned consistently and fills the cavity in a repeatable manner.
Optimise the curing or cooling cycle.
Follow the material supplier’s recommendations. Premature demoulding can allow the component to distort before it has sufficient stability.
Inspect the mould design.
Large differences in wall thickness and uneven geometry can contribute to dimensional variation.
Use appropriate support during cooling.
Where necessary, support the component in a suitable fixture while it stabilises.
Measure dimensions consistently.
Inspect parts after a defined cooling or conditioning period, particularly when the material continues to change dimensions after demoulding.
8. Sink Marks and Shrinkage
What are sink marks?
Sink marks are local depressions on the surface of a moulded component. They may occur when the material shrinks unevenly during cooling or curing.
Shrinkage is a natural characteristic of many moulding materials, but excessive or inconsistent shrinkage can produce unacceptable dimensions.
Common causes
- Uneven wall thickness
- Excessive local material thickness
- Uneven mould temperature
- Inconsistent curing
- Incorrect material formulation
- Poor mould design
- Inadequate process control
Troubleshooting solutions
Review component geometry.
Thick sections may shrink differently from thinner sections. Where possible, use more uniform wall thickness and avoid unnecessary heavy sections.
Check mould temperature distribution.
Temperature differences can lead to uneven curing and shrinkage.
Maintain consistent charge quantities.
Variations in material quantity can change how the cavity fills and how the component behaves during curing.
Verify material specifications.
Different formulations have different shrinkage characteristics. Use the correct material grade for the application.
Inspect critical dimensions.
Compare measurements from multiple parts and production cycles to determine whether the defect is systematic or intermittent.
9. Poor Surface Finish
What is poor surface finish?
Poor surface finish includes roughness, dull patches, pits, surface streaks, unwanted texture, and other visible imperfections.
The defect may originate from the material, mould surface, process settings, or contamination.
Common causes
- Dirty mould cavities
- Scratched or damaged mould surfaces
- Incorrect mould temperature
- Inconsistent material flow
- Contaminated material
- Excessive or unsuitable release agent
- Incomplete filling
- Improper curing
Troubleshooting solutions
Clean the mould regularly.
Remove material residue and deposits using cleaning methods compatible with the mould material and finish.
Inspect the cavity surface.
Scratches, corrosion, and wear may transfer directly to the moulded component.
Use release agents correctly.
Excessive release agent or uneven application may leave streaks, patches, or surface deposits.
Check the material condition.
Keep material free from dust, moisture, and foreign particles.
Verify temperature and curing settings.
The material must flow and cure under the conditions recommended for the specific formulation.
Avoid unnecessary polishing.
Polishing should only be used when appropriate to the required surface finish. Uncontrolled polishing can alter dimensions, edge details, and surface texture.
10. Cracking and Brittle Components
What is the problem?
Cracking may appear during demoulding, trimming, cooling, handling, or service. Components may also break more easily than expected, indicating inadequate strength or excessive brittleness.
Common causes
- Incorrect curing conditions
- Material degradation
- Incorrect material formulation
- Excessive internal stress
- Sharp corners or abrupt changes in thickness
- Premature demoulding
- Excessive force during ejection
- Material contamination
Troubleshooting solutions
Verify the curing cycle.
Both insufficient curing and excessive heat exposure can affect component properties, depending on the material.
Inspect the material batch.
Confirm that the correct material grade is being used and that it has been stored and handled properly.
Review the mould design.
Sharp internal corners can concentrate stress. Suitable radii may reduce stress concentration where the component design permits.
Check demoulding procedures.
Avoid excessive force and uneven loading when removing the component.
Inspect the trimming process.
Poorly controlled trimming can introduce cracks, particularly around thin edges and holes.
Test mechanical properties where necessary.
For critical applications, use appropriate material and component testing rather than relying only on visual inspection.
11. Sticking and Difficult Demoulding
What is sticking?
Sticking occurs when the moulded component adheres to the mould surface and cannot be removed easily. It can damage the part, increase cycle time, and cause mould wear.
Common causes
- Insufficient draft angles
- Rough or damaged mould surfaces
- Incorrect curing
- Excessive mould temperature
- Undercuts or unsuitable geometry
- Inappropriate release agent
- Residue accumulation
- Incorrect demoulding technique
Troubleshooting solutions
Inspect the mould surface.
Remove deposits and examine the cavity for corrosion, scratches, or damage.
Check the component design.
Where appropriate, introduce suitable draft angles to help the component release from the mould.
Review the curing conditions.
A component that has not reached the required state may deform during removal. Conversely, material degradation or excessive adhesion can also make release difficult.
Use a suitable release agent.
Choose a product compatible with the material, mould surface, and downstream finishing requirements.
Check the demoulding method.
Apply force evenly and use approved tools. Avoid sharp metal tools that can damage the mould.
Inspect for undercuts.
Features that mechanically lock the component into the cavity may require changes to the tooling or demoulding system.
12. Inconsistent Curing
What is inconsistent curing?
Inconsistent curing occurs when different areas of a component, or different components in the same production run, do not reach the required material properties uniformly.
The result may include soft areas, brittle regions, dimensional instability, poor mechanical strength, or variations in surface appearance.
Common causes
- Uneven mould temperature
- Incorrect curing time
- Inconsistent charge placement
- Variation in material quantity
- Incorrect material storage
- Unstable heating systems
- Variations in material composition
Troubleshooting solutions
Verify the temperature at different mould locations.
A single temperature reading may not reveal cold or hot spots.
Standardise the curing cycle.
Maintain consistent mould closing, heating, pressure, and curing procedures.
Control material handling.
Follow storage life, conditioning, and handling recommendations supplied by the material manufacturer.
Check the heating system.
Inspect heaters, temperature sensors, controllers, and other relevant equipment.
Use appropriate quality tests.
Depending on the material, checks may include hardness testing, dimensional inspection, mechanical testing, or material-specific cure evaluation.
Material-specific consideration
Thermosetting plastics and rubber compounds require appropriate curing, while thermoplastic materials are generally processed through heating and subsequent cooling rather than chemical curing. Troubleshooting must account for the type of material being moulded.
13. Weld Lines and Weak Knit Regions
What are weld lines?
Weld lines or knit lines may form when separate fronts of flowing material meet but do not bond adequately. These areas may appear as visible lines, marks, or weak regions.
Their significance depends on the material, component geometry, and application.
Common causes
- Poor charge placement
- Inadequate material flow
- Incorrect temperature
- Premature curing
- Contamination
- Complex cavity geometry
- Insufficient pressure or unsuitable pressure timing
Troubleshooting solutions
Review charge placement.
Position the material to encourage a more uniform flow pattern.
Check temperature and flow characteristics.
The material must remain capable of forming an adequate bond when the flow fronts meet.
Inspect cavity geometry.
Features that divide the material flow may create locations where separate fronts meet.
Review the pressure and curing sequence.
Confirm that the material can fill and consolidate correctly before curing or solidification prevents further flow.
Evaluate the strength of the affected region.
Where weld lines occur in structural components, determine whether they compromise performance through appropriate testing.
14. Troubleshooting by Process Parameter
Many compression moulding defects are connected to four major process variables: temperature, pressure, time, and charge quantity.
| Process parameter | If too low or insufficient | If too high or excessive |
|---|---|---|
| Mould temperature | Poor flow, incomplete filling, slow curing or solidification | Premature curing, degradation, scorching or excessive thermal stress |
| Moulding pressure | Incomplete consolidation, poor cavity filling or voids | Excessive flash, tool loading or damage if limits are exceeded |
| Curing time for thermosets | Undercuring and inadequate properties | Overcuring or degradation in susceptible materials |
| Cooling time for thermoplastics | Part may be too soft for stable demoulding | Longer cycle time and reduced productivity |
| Charge quantity | Incomplete filling | Excessive flash and material waste |
| Venting effectiveness | Trapped air, voids, blisters or burn marks | Excessively large or damaged vents may cause flash |
| Material condition | Poor flow or inconsistent properties | Excessive moisture or degradation may cause defects |
Important: These relationships are general guidelines, not universal rules. The effect of a parameter depends on the specific material, mould design, machine, and process conditions.
15. A Step-by-Step Compression Moulding Troubleshooting Procedure
A systematic troubleshooting procedure is more effective than making random adjustments.
Step 1: Identify the defect
Inspect the component and classify the problem.
Examples include:
- Incomplete filling
- Flash
- Blisters
- Cracking
- Warpage
- Surface defects
- Dimensional variation
Record the location, size, frequency, and appearance of the defect.
Step 2: Determine when the defect occurs
Establish whether the problem appears:
- During mould filling
- During curing or cooling
- During demoulding
- During trimming
- After the component has cooled or been stored
The timing can help narrow down the possible causes.
Step 3: Check the material
Verify:
- Correct material grade
- Charge weight
- Storage conditions
- Material age or shelf life
- Moisture content, where relevant
- Contamination
- Consistency between material batches
Material-related problems can be mistaken for mould or machine faults.
Step 4: Inspect the mould
Check for:
- Damaged parting surfaces
- Blocked vents
- Contamination
- Wear or corrosion
- Incorrect alignment
- Uneven heating
- Damaged cavity surfaces
- Problems with ejectors or release systems, where fitted
Clean and maintain the mould according to the manufacturer’s procedures.
Step 5: Verify machine settings
Confirm that the actual process conditions match the approved settings.
Check:
- Mould temperature
- Applied pressure
- Closing speed and sequence
- Curing or cooling time
- Clamping force
- Temperature-control performance
Do not assume that the displayed setting accurately represents the actual condition at every point in the mould.
Step 6: Change one variable at a time
If the cause is not immediately obvious, adjust one relevant variable within the approved processing range.
For example, if incomplete filling occurs, check charge weight and material placement before making a controlled adjustment to temperature or pressure.
Changing multiple parameters at once makes it difficult to identify which adjustment solved—or worsened—the problem.
Step 7: Inspect trial components
After each adjustment, inspect the resulting components and compare them with the previous results.
Check:
- Dimensional accuracy
- Surface finish
- Complete filling
- Flash
- Mechanical properties, where required
- Repeatability across several cycles
Step 8: Record and standardise the solution
Document the defect, identified cause, corrective action, and verified process settings.
Update the approved process instructions when the solution has been validated.
16. Preventive Maintenance for Compression Moulding
Preventive maintenance reduces defects and helps maintain consistent production quality.
Mould maintenance
- Clean the cavity and parting surfaces regularly.
- Inspect vents for blockage.
- Check for wear, corrosion, and surface damage.
- Verify mould alignment.
- Inspect heating channels and temperature-control components.
- Repair damaged sealing or parting surfaces.
- Apply suitable mould protection during storage.
Machine maintenance
- Inspect the hydraulic or mechanical press system.
- Verify pressure and clamping-force performance.
- Check temperature sensors and controllers.
- Inspect heaters and electrical connections.
- Confirm that the mould closes evenly.
- Maintain safety interlocks and protective systems.
Material management
- Store materials according to supplier recommendations.
- Control material shelf life.
- Prevent contamination.
- Maintain consistent charge weights.
- Follow specified drying or conditioning procedures.
- Keep material batches traceable.
Process control
- Establish approved processing windows.
- Standardise charge preparation and placement.
- Monitor temperature, pressure, and time.
- Inspect initial production samples.
- Record defects and corrective actions.
- Train operators to recognise early warning signs.
17. Quick Troubleshooting Reference Table
| Defect | Likely causes | Recommended first checks |
|---|---|---|
| Incomplete filling | Insufficient charge, poor flow, low temperature, blocked vents | Charge weight, material placement, temperature, venting |
| Excessive flash | Excess material, worn mould, poor alignment, insufficient clamping | Charge weight, parting surfaces, mould alignment |
| Internal voids | Trapped air, moisture, poor venting | Material condition, venting, closing sequence |
| Surface blisters | Moisture, trapped gases, excessive heat | Material preparation, mould temperature, venting |
| Burn marks | Excessive heat, long exposure, trapped gases | Actual temperature, curing time, vent condition |
| Warpage | Uneven temperature, shrinkage, early demoulding | Temperature uniformity, curing or cooling cycle |
| Sink marks | Uneven shrinkage, thick sections, inconsistent processing | Part geometry, charge consistency, temperature |
| Poor surface finish | Dirty mould, damaged cavity, contamination | Mould cleaning, surface condition, material quality |
| Cracking | Incorrect cure, stress concentration, difficult demoulding | Cure conditions, component geometry, removal method |
| Sticking | Poor release, inadequate draft, residue | Mould surface, release agent, component geometry |
| Inconsistent curing | Temperature variation, inconsistent material or cycle | Temperature distribution, material batch, cycle records |
| Weld lines | Flow fronts meeting poorly, premature curing | Charge placement, material flow, temperature |
18. Important Safety Considerations
Compression moulding often involves high temperatures, high forces, and potentially hazardous materials.
Follow these precautions:
- Never reach into a press while it is operating.
- Use approved tools and handling equipment for hot moulds and components.
- Follow lockout/tagout procedures before maintenance.
- Wear the specified personal protective equipment.
- Follow the material supplier’s safety data sheet.
- Provide suitable ventilation where processing may release fumes or gases.
- Never exceed the rated pressure, temperature, or load limits of the equipment.
- Do not bypass press guards, interlocks, or other safety devices.
Any adjustment involving machine pressure, temperature limits, or tooling should be performed by trained personnel in accordance with the equipment manufacturer’s instructions.
Conclusion
Troubleshooting compression moulding problems requires a systematic understanding of material behaviour, mould design, machine performance, and processing conditions.
The most common defects—including incomplete filling, excessive flash, air traps, blisters, burn marks, warpage, cracking, and sticking—can often be reduced through correct material preparation, effective venting, consistent temperature control, suitable pressure and curing conditions, and regular mould maintenance.
The most effective troubleshooting principle is to identify the actual root cause before changing process settings. By inspecting the material, mould, machine, and production cycle in a consistent order, manufacturers can reduce scrap, improve component quality, shorten downtime, and maintain reliable production.