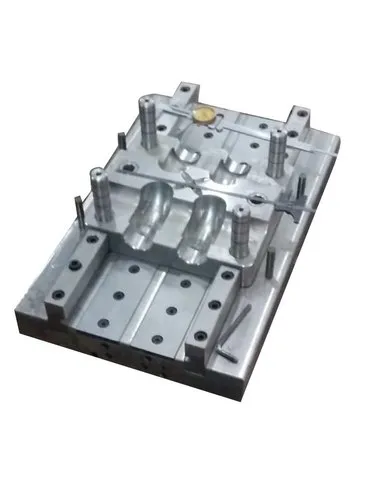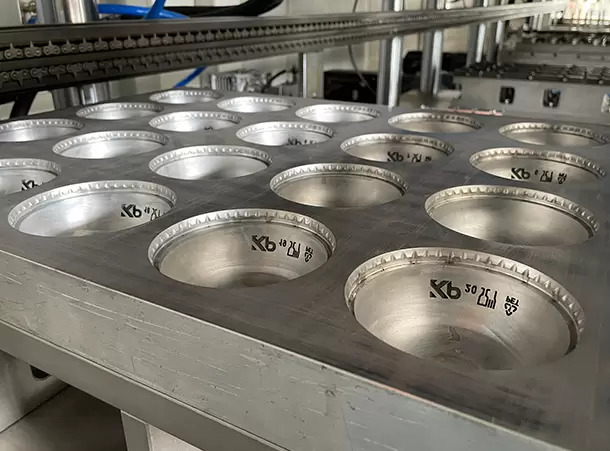
Surface finishing of thermoforming moulds is an important process that determines the appearance, texture, accuracy, and quality of thermoformed plastic products. It involves preparing and refining the mould surface to achieve the desired finish, improve plastic release, and ensure consistent product quality.
Thermoforming is a manufacturing process in which a thermoplastic sheet is heated until it becomes soft and flexible, then formed over or into a mould using vacuum, air pressure, or mechanical force. Once the plastic cools, it retains the shape and surface characteristics of the mould.
The finish of the mould directly influences the finish of the final plastic component. A smooth mould can produce a glossy surface under suitable processing conditions, while a textured mould can create a patterned or matte appearance.
1. Importance of Surface Finishing in Thermoforming Moulds
Surface finishing is not only a cosmetic operation. It also affects mould performance, production efficiency, and the service life of the tooling.
The main benefits include:
- Improved product appearance: Creates smooth, polished, matte, or textured surfaces according to design requirements.
- Better part release: Appropriate surface conditions help the formed plastic separate from the mould more easily.
- Improved dimensional consistency: A properly finished mould helps reproduce surface details more consistently.
- Reduced surface defects: Removing scratches, burrs, and machining marks helps prevent unwanted marks on plastic products.
- Easier cleaning: Well-finished surfaces can be easier to clean, depending on the mould material and finish.
- Reduced rework: A suitable surface finish helps minimise defects caused by tooling imperfections.
2. Common Types of Surface Finishing
A. Polishing
Polishing is used to produce a smooth, refined mould surface. It typically involves progressively finer abrasive materials to remove machining marks, scratches, and other surface imperfections.
The polishing process may use abrasive stones, polishing compounds, abrasive papers, or specialised polishing tools.
Advantages:
- Produces smooth surfaces.
- Can improve the appearance of glossy plastic parts.
- Removes minor surface imperfections.
- Helps achieve a consistent finish when performed correctly.
Applications: Transparent packaging components, display covers, glossy trays, and products requiring a high-quality surface.
Polishing must be carefully controlled because excessive material removal can alter fine details, dimensions, or the intended geometry of the mould.
B. Mirror Finishing
Mirror finishing is a highly refined form of polishing that produces a very smooth, reflective mould surface.
It is generally used when the finished plastic component requires a high-gloss appearance or minimal visible surface imperfections.
Advantages:
- Supports high-gloss product surfaces.
- Reduces visible tooling marks when properly executed.
- Provides a refined appearance for suitable applications.
Applications: Decorative plastic products, high-gloss packaging, optical-related components where the process and material are suitable, and premium consumer products.
Mirror finishing requires careful preparation. Deep scratches and machining marks should be removed before the final polishing stages because they may remain visible in the moulded product.
C. Sandblasting and Bead Blasting
Sandblasting and bead blasting are abrasive finishing methods that use particles propelled against the mould surface. The choice of abrasive, particle size, pressure, and treatment time determines the resulting surface texture.
Sandblasting commonly uses harder abrasive particles, while bead blasting often uses spherical media to create a more uniform matte appearance.
Advantages:
- Creates matte or textured surfaces.
- Helps remove selected surface contaminants and minor imperfections.
- Can produce consistent textures when the process is controlled.
Applications: Matte packaging, textured trays, industrial housings, and plastic components where a non-glossy appearance is required.
Blasting parameters must be chosen carefully to avoid damaging delicate features, changing critical dimensions, or producing an unsuitable surface profile.
D. CNC Machining Finish
CNC machining creates the initial geometry of many thermoforming moulds. The cutting tools leave a surface pattern that depends on tool condition, cutting parameters, material, and toolpath strategy.
A mould may be used directly after machining when the resulting finish meets the product requirements, or it may undergo further finishing operations.
Advantages:
- Provides accurate mould geometry.
- Supports repeatable surface preparation.
- Can create controlled surface details and patterns.
- Reduces the amount of manual finishing required when machining is optimised.
Applications: Aluminium moulds, prototype tooling, production moulds, and moulds with complex shapes.
CNC machining marks may transfer to the plastic sheet, so the surface should be inspected before production.
E. Grinding and Abrasive Finishing
Grinding removes material using an abrasive wheel or tool. It is often used to improve flatness, remove surface irregularities, and prepare a mould for subsequent polishing.
Fine abrasive finishing can then be used to achieve the required surface quality.
Advantages:
- Corrects selected surface irregularities.
- Helps prepare surfaces for polishing.
- Supports controlled finishing of suitable mould materials.
Applications: Mould bases, flat surfaces, precision tooling components, and selected metal mould surfaces.
Grinding must be performed carefully to prevent overheating, distortion, or damage to the mould geometry.
F. Chemical Surface Treatment
Chemical treatments may be used to clean, passivate, etch, or otherwise modify a mould surface, depending on the mould material and treatment system.
These treatments are different from mechanical polishing and should be selected according to the tooling material and the intended result.
Advantages:
- Can improve cleanliness or surface condition.
- May provide specific surface properties when a suitable treatment is used.
- Can support specialised finishing requirements.
Applications: Selected metal moulds and specialised tooling surfaces.
Chemical treatments require compatible materials, appropriate process controls, and suitable safety precautions. They are not interchangeable with polishing or texturing methods.
G. Protective Coatings
Some thermoforming moulds receive a suitable protective or functional coating to improve wear resistance, corrosion resistance, or release characteristics.
The coating must be compatible with the mould material, operating temperature, plastic resin, and production environment.
Advantages:
- May improve resistance to wear or corrosion.
- Can support easier release in suitable applications.
- May extend tooling service life when properly selected.
Applications: Production moulds exposed to repeated heating cycles, wear, or demanding processing conditions.
Coatings do not automatically improve every surface. Incorrect coating selection or application can affect dimensions, surface quality, heat transfer, and part release.
3. Surface Finishing Process: Step by Step
A typical surface finishing workflow includes the following stages.
Step 1: Inspect the Mould
Examine the mould for scratches, machining marks, dents, burrs, corrosion, and other imperfections. Identify the required surface finish based on the final product specifications.
Step 2: Clean the Surface
Remove dust, oil, grease, machining residue, and other contaminants using a cleaning method compatible with the mould material.
A clean surface helps abrasives work consistently and makes inspection more reliable.
Step 3: Correct Surface Defects
Remove burrs and address machining marks or local imperfections using suitable machining or abrasive techniques.
Large defects should be corrected before fine polishing begins because polishing alone may not remove deep marks efficiently.
Step 4: Apply Progressive Finishing
Use progressively finer abrasives or finishing tools to refine the surface. The sequence depends on the mould material, starting condition, geometry, and target finish.
For textured surfaces, use a controlled texturing process rather than polishing the surface to a mirror finish.
Step 5: Perform Final Polishing or Texturing
Apply the final operation required by the product specification. This may involve fine polishing, mirror polishing, bead blasting, or a controlled texture treatment.
Step 6: Clean and Inspect Again
Remove abrasive residue and inspect the surface under suitable lighting. Check for scratches, inconsistent texture, dimensional changes, and damage to fine features.
Step 7: Conduct a Trial Forming Test
Where practical, form a sample plastic sheet using the intended production conditions. Inspect the resulting component to verify surface appearance, detail reproduction, and release behaviour.
4. Surface Finish and Final Product Appearance
The mould surface has a strong influence on the appearance of the thermoformed component, but the final result also depends on the plastic sheet, forming conditions, temperature, and mould design.
| Mould surface finish | Typical product appearance | Common applications |
|---|---|---|
| Mirror polished | High-gloss appearance | Decorative parts and glossy packaging |
| Smooth machined | Smooth with possible machining marks | General-purpose components |
| Matte | Low-gloss, subdued appearance | Trays and industrial products |
| Textured | Patterned or tactile surface | Housings and decorative products |
| Fine satin | Soft, uniform sheen | Consumer and packaging components |
| Special patterned finish | Repeated decorative pattern | Custom-designed plastic products |
The final appearance should always be confirmed through testing because different plastic materials may reproduce the same mould finish differently.
5. Factors Affecting Surface Finishing Quality
Mould Material
Aluminium, steel, epoxy, and other tooling materials respond differently to polishing, blasting, machining, and chemical treatment. The finishing method must suit the material.
Surface Hardness
Hardness affects how easily a mould surface can be scratched or worn. It also influences the choice of abrasive tools and finishing parameters.
Mould Geometry
Deep cavities, narrow channels, sharp corners, and fine details can be difficult to finish uniformly. Specialised tools may be necessary to reach complex areas.
Required Product Finish
A glossy component may require fine polishing, while a matte or patterned component may need controlled texturing. The target appearance should be defined before finishing begins.
Tool Condition
Worn cutting tools, incorrect machining parameters, and poor mould maintenance can create defects that require additional finishing work.
Temperature and Production Conditions
Repeated heating and cooling, material contact, cleaning chemicals, and mechanical wear can affect the mould surface over time. The finish should be suitable for the intended operating conditions.
6. Common Surface Finishing Defects
Scratches: May transfer to the plastic product. They can result from abrasive contamination, improper polishing, or handling damage.
Uneven gloss: Can occur when different areas have inconsistent finishes or when forming conditions vary.
Orange-peel texture: An irregular surface appearance that may originate from the finishing process, material behaviour, or other process conditions.
Rounded edges and lost details: Excessive polishing can remove sharp features or alter fine mould details.
Uneven texture: Inconsistent blasting or texturing parameters can create variations across the mould surface.
Corrosion or staining: May develop because of unsuitable cleaning chemicals, moisture, or inadequate storage.
To prevent these problems, use suitable finishing tools, maintain consistent procedures, clean the mould properly, and inspect critical areas before production.
7. Maintenance of Finished Thermoforming Moulds
Maintaining the finished surface is essential for consistent product quality and long mould life.
- Clean the mould regularly using compatible cleaning materials.
- Avoid abrasive tools that could damage polished or textured surfaces.
- Inspect the mould for scratches, wear, corrosion, and residue.
- Store moulds in a clean, dry environment.
- Apply suitable corrosion protection where required.
- Repair surface damage before it affects a large number of products.
- Recheck the finish after repairs or major maintenance.
For high-volume production, a documented inspection schedule helps identify surface deterioration before it causes widespread product defects.
8. Best Practices for Achieving High-Quality Surface Finishing
- Define the required finish before machining the mould.
- Select a finishing process suitable for the mould material.
- Remove major surface defects before fine polishing.
- Use clean abrasives and appropriate finishing tools.
- Protect sharp edges, small features, and critical dimensions.
- Apply blasting or texturing consistently when a matte or patterned finish is required.
- Inspect the finished mould under suitable lighting.
- Validate the surface using trial-formed plastic components.
- Maintain the mould throughout its production life.
Conclusion
Surface finishing of thermoforming moulds is a critical step in producing plastic components with consistent appearance, accurate detail, and reliable release characteristics. Techniques such as polishing, mirror finishing, blasting, grinding, CNC machining, chemical treatment, and protective coating each serve different purposes.
The correct method depends on the mould material, component design, required surface appearance, and production conditions. By selecting an appropriate finishing process, inspecting the mould carefully, and maintaining its surface regularly, manufacturers can improve product quality, reduce defects, and extend mould service life.