1. Introduction
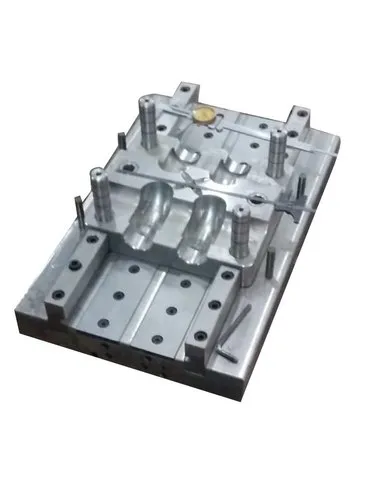
Polishing and texturing are two important surface-finishing processes used in the manufacturing of thermoforming moulds. These processes determine the surface appearance of the finished plastic product, influence the release of the formed sheet from the mould, and help maintain consistent product quality.
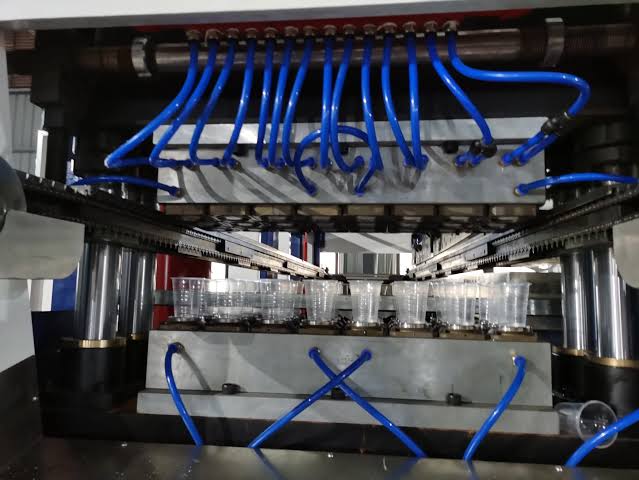
Thermoforming is a manufacturing process in which a thermoplastic sheet is heated until it becomes soft and pliable. The heated sheet is then formed over or into a mould using vacuum, air pressure, or mechanical force. After cooling, the plastic retains the shape and many of the surface characteristics of the mould.
The mould surface can be polished to produce a smooth or glossy finish, or textured to create a matte, patterned, or decorative appearance. The appropriate method depends on the product design, mould material, plastic type, and required surface quality.
2. Polishing of Thermoforming Moulds
Definition
Polishing is a surface-finishing operation in which small surface irregularities, machining marks, scratches, and other imperfections are progressively removed to produce a smoother mould surface.
The process commonly uses abrasive stones, abrasive papers, polishing compounds, and specialised polishing tools. The abrasives are selected according to the mould material and the required finish.
Polishing is particularly important when the finished plastic product must have a smooth surface, high gloss, or accurate reproduction of fine details.
Objectives of Polishing
The main objectives of polishing thermoforming moulds are:
- To remove machining marks and minor surface defects.
- To improve the smoothness and appearance of the mould.
- To obtain a glossy surface on suitable plastic products.
- To reduce unwanted marks transferred from the mould to the plastic.
- To improve the consistency of surface quality.
- To facilitate cleaning and maintenance.
- To support reliable release of the formed plastic where surface condition is a contributing factor.
Polishing cannot compensate for all mould-design or process problems. Draft angles, forming temperature, vacuum conditions, and cooling must also be suitable for effective release.
3. Types of Polishing Used for Thermoforming Moulds
A. Mechanical Polishing
Mechanical polishing uses abrasive materials and tools to remove small irregularities from the mould surface.
The process may involve abrasive papers, stones, polishing wheels, or other suitable equipment.
Advantages:
- Provides control over surface smoothness.
- Removes many types of machining marks.
- Can be applied to selected areas or entire surfaces.
- Is suitable for many metal mould materials.
Applications: Aluminium moulds, steel tooling, and mould surfaces requiring a smooth or glossy finish.
Limitations: Excessive polishing can round sharp edges, alter dimensions, or remove fine details.
B. Manual Polishing
Manual polishing is performed by an operator using hand-held abrasives and polishing tools.
It is particularly useful for areas that are difficult to access using machines, such as corners, recesses, and selected curved surfaces.
Advantages:
- Allows careful control over small areas.
- Is useful for detailed finishing work.
- Can be performed on complex mould geometries.
- Requires relatively simple equipment.
Applications: Prototype moulds, small tooling components, intricate cavity features, and finishing corrections.
Limitations: Results depend heavily on operator skill, and achieving uniform finishes over large areas can be time-consuming.
C. Machine Polishing
Machine polishing uses powered tools or specialised polishing equipment to finish the mould surface.
It can provide more consistent results over accessible surfaces and may reduce the time required compared with entirely manual methods.
Advantages:
- Can improve finishing efficiency.
- Supports repeatable surface treatment.
- Is useful for larger mould surfaces.
- Can reduce manual effort.
Applications: Production moulds, large cavity surfaces, and tooling requiring repeatable finishing operations.
Limitations: Incorrect tool speed, pressure, or abrasive selection can cause overheating, uneven polishing, or surface damage.
D. Mirror Polishing
Mirror polishing is a high-grade polishing process designed to produce a very smooth and reflective surface.
It requires the progressive removal of scratches and imperfections, usually through several increasingly fine abrasive stages.
Advantages:
- Supports high-gloss product finishes.
- Reduces visible machining marks.
- Can provide a refined appearance on suitable plastic components.
Applications: Decorative packaging, glossy trays, display products, and selected components requiring a premium finish.
Limitations: It requires more time and care than ordinary polishing. It is also unnecessary for products that require a matte or textured appearance.
E. Fine Abrasive Polishing
Fine abrasive polishing uses progressively finer abrasive materials to reduce the roughness left by earlier machining or grinding operations.
It is often performed before the final polishing stage.
Advantages:
- Produces a more uniform surface.
- Helps remove fine scratches.
- Prepares the mould for high-gloss finishing.
Applications: Mould surfaces requiring smooth finishes and moulds that undergo multiple finishing stages.
4. Step-by-Step Procedure for Polishing Thermoforming Moulds
Step 1: Inspect the mould surface. Examine the mould for machining marks, scratches, dents, corrosion, and other defects.
Step 2: Clean the mould. Remove oil, grease, dust, and machining residue using a cleaner compatible with the mould material.
Step 3: Correct major defects. Use suitable machining or abrasive methods to address deeper marks before beginning fine polishing.
Step 4: Start with an appropriate abrasive. Select an abrasive suitable for the mould material and the condition of the surface. Avoid unnecessarily aggressive material removal.
Step 5: Progress to finer abrasives. Gradually reduce the abrasive grade to remove the marks left by the previous stage.
Step 6: Perform the final polish. Use an appropriate polishing compound or tool to obtain the required finish.
Step 7: Clean and inspect again. Remove polishing residue and inspect the surface under suitable lighting.
Step 8: Conduct a forming trial. Form a sample plastic sheet and inspect the finished product for gloss, surface marks, dimensional accuracy, and release behaviour.
5. Texturing of Thermoforming Moulds
Definition
Texturing is the process of deliberately creating a controlled pattern or surface roughness on a mould. Unlike polishing, which generally reduces surface irregularities, texturing produces a specific surface structure to achieve a desired appearance or functional property.
Textures can range from fine matte finishes to pronounced patterns, such as grain-like, geometric, or decorative surfaces.
The texture is transferred to the thermoplastic sheet during forming, although the exact reproduction depends on the plastic material, sheet temperature, forming pressure or vacuum, and cooling conditions.
Objectives of Texturing
Texturing is used to:
- Create matte or non-glossy surfaces.
- Improve the decorative appearance of plastic products.
- Produce consistent grain or patterned finishes.
- Reduce the visibility of minor surface marks on some products.
- Create tactile surface characteristics.
- Match the appearance of other product materials, such as leather or fine-grain surfaces.
- Establish a specified surface appearance across production batches.
Texturing should be designed according to the final product’s functional and visual requirements.
6. Types of Texturing Used for Thermoforming Moulds
A. Sandblasting or Bead Blasting
Blasting creates a surface texture by directing abrasive particles or beads against the mould surface under controlled conditions.
The resulting finish depends on the media type, particle size, pressure, distance, and treatment duration.
Advantages:
- Produces matte or satin-like surfaces.
- Can treat relatively large areas.
- Provides a practical method for selected uniform textures.
Applications: Matte trays, industrial housings, packaging moulds, and products requiring a non-glossy appearance.
Limitations: Excessive blasting may damage fine features or produce uneven surface roughness. Delicate moulds require carefully controlled parameters.
B. Chemical Etching
Chemical etching uses a controlled chemical process to create a selected pattern or texture on a compatible mould surface.
The mould is prepared, selected areas are protected where necessary, and the exposed surface is treated according to the chosen process.
Advantages:
- Can create detailed and repeatable patterns.
- Is suitable for selected complex surface designs.
- Can produce decorative grain or textured finishes.
Applications: Decorative product surfaces, patterned plastic components, and moulds requiring a specified texture.
Limitations: The process requires compatible materials, chemical controls, and appropriate safety measures. It may not be suitable for every mould material.
C. Laser Texturing
Laser texturing uses a controlled laser process to create patterns or microscopic surface features on the mould.
The pattern is programmed or otherwise specified, allowing fine details to be reproduced on suitable tooling surfaces.
Advantages:
- Supports precise and repeatable patterns.
- Can produce detailed textures.
- Allows selective texturing of particular areas.
- Reduces the need for physical pattern-forming tools in some applications.
Applications: Precision moulds, decorative textures, functional surface patterns, and specialised product designs.
Limitations: Equipment and processing costs can be high. The resulting texture must be validated for the mould material and intended thermoforming process.
D. EDM Texturing
Electrical discharge machining (EDM) can produce a textured surface on electrically conductive mould materials. During EDM, controlled electrical discharges remove small amounts of material and can leave a characteristic surface pattern.
Advantages:
- Can texture selected conductive mould materials.
- Is useful for surfaces that are difficult to machine conventionally.
- Can provide repeatable surface finishes with controlled parameters.
Applications: Selected metal moulds, tooling features, and surfaces requiring an EDM-generated texture.
Limitations: The finish depends on the EDM parameters and electrode condition. It may not provide the same pattern flexibility as dedicated laser or chemical texturing.
E. CNC-Machined Texturing
CNC machining can create intentional surface patterns through programmed toolpaths.
The texture may consist of grooves, repeated geometric features, or other patterns designed into the mould surface.
Advantages:
- Provides control over pattern geometry.
- Supports integration of texture and mould shape.
- Can produce repeatable patterns in suitable designs.
Applications: Decorative panels, geometric patterns, functional grooves, and specialised thermoformed components.
Limitations: Tool accessibility, machining time, tool marks, and minimum feature size may restrict the achievable texture.
7. Step-by-Step Procedure for Texturing Thermoforming Moulds
Step 1: Define the required texture. Specify the pattern, roughness, depth, appearance, and areas that require texturing.
Step 2: Prepare the mould. Clean the mould and remove unwanted defects before texturing begins.
Step 3: Select the texturing method. Choose blasting, chemical etching, laser texturing, EDM, or CNC machining according to the mould material and required pattern.
Step 4: Protect critical areas. Mask or protect surfaces that must remain smooth, dimensionally accurate, or untextured.
Step 5: Apply the texture. Use controlled processing parameters to achieve the specified pattern and surface condition.
Step 6: Clean the mould thoroughly. Remove abrasive particles, chemical residues, machining debris, or other contaminants.
Step 7: Inspect the texture. Check for uniformity, pattern accuracy, defects, and unwanted texture in protected areas.
Step 8: Conduct a forming trial. Verify that the texture transfers to the plastic sheet as intended and that the component releases without damage.
8. Difference Between Polishing and Texturing
| Feature | Polishing | Texturing |
|---|---|---|
| Main purpose | Produce a smoother surface | Create a controlled surface pattern |
| Surface appearance | Smooth, satin, or glossy | Matte, grainy, patterned, or tactile |
| Common methods | Abrasive finishing and polishing compounds | Blasting, etching, laser, EDM, or CNC |
| Material removal | Usually removes small surface irregularities | Creates or modifies surface features |
| Typical applications | Glossy packaging and smooth products | Decorative panels and non-glossy products |
| Main risk | Loss of fine details or dimensional accuracy | Uneven pattern or excessive surface roughness |
Polishing and texturing are not necessarily competing processes. A mould may be polished in selected regions and textured in others to achieve different visual effects on the same component.
9. Factors Affecting Polishing and Texturing Quality
A. Mould Material
Aluminium, steel, and other tooling materials respond differently to abrasives, blasting, etching, and laser treatment. The finishing method must be compatible with the mould material.
B. Required Surface Finish
A high-gloss component may require fine polishing, while a decorative or matte component may need a controlled texture. The finish should be specified before the mould is manufactured.
C. Mould Geometry
Corners, recesses, deep cavities, and narrow features may be difficult to polish or texture uniformly. Special tools or processing techniques may be required.
D. Plastic Sheet Material
Different thermoplastics reproduce surface detail differently. Material stiffness, forming temperature, thickness, and other characteristics influence how well a mould texture transfers to the finished product.
E. Forming Conditions
Vacuum level, pressure, sheet temperature, mould temperature, and cooling conditions affect surface reproduction. A well-textured mould cannot compensate for inadequate contact between the heated sheet and mould.
F. Operator Skill and Process Control
Inconsistent polishing pressure, abrasive selection, blasting conditions, or texturing parameters can result in uneven surfaces. Standardised procedures improve repeatability.
10. Common Defects and Their Prevention
Polishing Defects
- Scratches: Use clean abrasives and progressively finer finishing stages.
- Uneven gloss: Maintain consistent polishing techniques and inspect the entire surface.
- Rounded edges: Protect sharp features and control material removal.
- Residual polishing compound: Clean the mould thoroughly before forming.
- Distorted details: Avoid excessive polishing on critical geometry.
Texturing Defects
- Uneven texture: Maintain consistent processing parameters and equipment condition.
- Excessive roughness: Adjust the texturing method to suit the specified finish.
- Incomplete pattern transfer: Review sheet temperature, vacuum or pressure, and mould contact.
- Unwanted texture in smooth areas: Use suitable masking or controlled selective processing.
- Poor part release: Review texture geometry, draft angles, and forming conditions.
11. Maintenance of Polished and Textured Moulds
Proper maintenance helps preserve the required surface finish throughout the mould’s service life.
- Clean the mould using compatible cleaning products.
- Avoid abrasive cleaning tools on polished surfaces.
- Use suitable brushes or cleaning methods for textured areas.
- Inspect the mould periodically for scratches, wear, corrosion, and contamination.
- Protect the surface during storage and transport.
- Repair damaged areas using a process that matches the original finish.
- Verify the product surface after maintenance or refinishing.
Polished surfaces may show scratches easily, while textured surfaces can retain dust, deposits, or residue in their recesses. Each finish therefore requires an appropriate cleaning and inspection method.
12. Advantages of Proper Polishing and Texturing
- Improves the visual appearance of thermoformed products.
- Supports consistent surface quality.
- Helps reproduce specified gloss levels and patterns.
- Reduces defects caused by unwanted machining marks.
- Allows manufacturers to create customised product finishes.
- Can improve release behaviour when the surface design is appropriate.
- Helps maintain the intended appearance across production batches.
Conclusion
Polishing and texturing are essential surface-finishing operations for thermoforming moulds. Polishing produces smooth, refined surfaces suitable for glossy or high-quality finishes, while texturing creates controlled patterns and roughness for matte, decorative, or tactile products.
Common polishing methods include manual, mechanical, machine, fine abrasive, and mirror polishing. Common texturing methods include sandblasting, chemical etching, laser texturing, EDM, and CNC machining.
The best method depends on the mould material, product design, required surface appearance, and thermoforming conditions. Careful process selection, controlled finishing, proper inspection, and regular maintenance help manufacturers achieve consistent product quality and extend mould service life.