A Complete Guide to Surface Finishing, Methods, Tools, and Best Practices
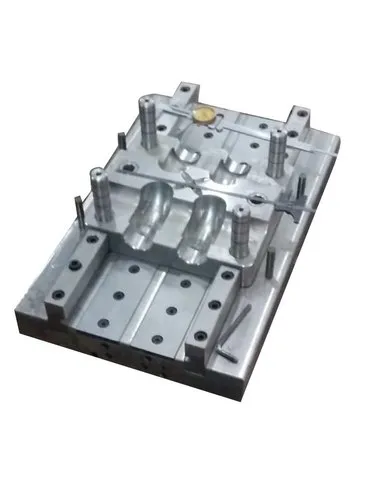
Polishing is an important finishing operation in injection mould manufacturing. It improves the surface quality of mould cavities and cores, helps produce components with the required appearance, and can make mould cleaning and maintenance easier.
Injection moulds are used to manufacture plastic components for automotive parts, electronic housings, household products, packaging, medical devices, and many other applications. The quality of the mould surface directly influences the appearance and performance of the finished product.
A poorly polished mould may produce components with scratches, visible machining marks, unwanted texture, or other surface defects. In contrast, a properly polished mould can produce smooth, glossy, or optically clear surfaces when the mould design and plastic material support those results.
The main objective of mould polishing is to achieve the required surface finish without damaging the mould geometry, dimensions, or functional features.
1. What Is Injection Mould Polishing?
Injection mould polishing is the process of refining the surface of a mould cavity or core to remove machining marks, scratches, and surface irregularities.
The process generally involves gradually removing very small amounts of material using abrasives, polishing stones, abrasive papers, diamond compounds, or specialised polishing equipment.
Polishing may be performed manually, mechanically, or through a combination of techniques.
The required finish depends on the application. Some moulds need only a uniform, functional finish, while others require a highly reflective surface for transparent or glossy plastic products.
Common applications
Polishing is used for moulds that manufacture:
- Transparent plastic covers
- Optical components
- Automotive interior parts
- Decorative plastic products
- Consumer electronics housings
- Medical device components
- Precision plastic lenses
- Household appliance parts
- High-gloss packaging components
Not every mould requires a mirror finish. The appropriate polishing level should be determined by the product specification, plastic material, mould design, and production requirements.
2. Why Is Polishing Important?
2.1 Improves Product Appearance
The mould surface is transferred to the plastic component during injection moulding.
If the cavity contains scratches, machining marks, or unwanted irregularities, these may appear on the finished product.
Proper polishing helps produce a consistent surface appearance and can improve the visual quality of the component.
2.2 Helps Plastic Parts Release from the Mould
A suitable surface finish can reduce friction and help components release from the mould, particularly when combined with correct draft angles and appropriate mould design.
However, polishing alone cannot correct every demoulding problem. Undercuts, insufficient draft, shrinkage, and unsuitable ejection arrangements may still cause sticking.
2.3 Removes Machining Marks
Machining operations such as milling, grinding, and electrical discharge machining can leave surface marks.
Polishing removes or reduces these irregularities to achieve the specified finish.
The process must be controlled carefully to avoid removing excessive material or changing the intended cavity geometry.
2.4 Improves Surface Consistency
Consistent polishing helps reduce differences in surface appearance between areas of a mould and between production batches.
This is especially important when manufacturing components that must match in gloss, transparency, or texture.
2.5 Supports Mould Maintenance
A suitable surface finish can make some mould surfaces easier to clean and inspect.
However, highly polished surfaces can still be damaged by corrosion, contamination, improper handling, or unsuitable cleaning methods.
Regular maintenance remains essential.
3. Common Injection Mould Polishing Techniques
Different polishing methods are used depending on the mould material, initial surface condition, required finish, and geometry of the cavity.
3.1 Manual Polishing
Manual polishing uses hand tools such as polishing stones, abrasive papers, diamond files, and polishing compounds.
The operator gradually refines the surface by applying controlled pressure and using progressively finer abrasives.
Advantages:
- Good control over localised areas
- Suitable for complex shapes and detailed features
- Relatively simple equipment requirements
- Useful for removing small surface defects
Limitations:
- Requires skilled operators
- Can be time-consuming
- Results may vary between operators
- Excessive polishing can alter dimensions or round sharp edges
Manual polishing is often used for detailed mould surfaces, corners, ribs, and areas that are difficult to reach with larger equipment.
3.2 Polishing with Abrasive Stones
Polishing stones are commonly used to remove machining marks and refine mould surfaces before finer polishing.
Different stones have different abrasive characteristics and are selected according to the mould steel, surface condition, and required finish.
A typical process begins with a suitable coarser stone and progresses to finer grades.
Advantages:
- Effective for removing machining marks
- Suitable for flat and moderately curved surfaces
- Provides good control during initial surface refinement
Limitations:
- May leave directional marks if used incorrectly
- Can damage corners or fine features
- Requires careful cleaning between abrasive stages
Use compatible lubricants and follow the stone manufacturer’s instructions.
3.3 Abrasive Paper Polishing
Abrasive paper is used to refine surfaces after the larger machining marks have been removed.
It is available in a range of abrasive grades, from relatively coarse materials to very fine finishing grades.
The operator gradually changes to finer abrasives until the required surface condition is achieved.
Advantages:
- Useful for broad, accessible surfaces
- Available in different abrasive grades
- Suitable for progressive surface refinement
Limitations:
- Can leave scratches if abrasive grades are skipped
- May round edges if excessive pressure is applied
- Can produce uneven results on complex surfaces
Abrasive paper should be used carefully around parting lines, sharp edges, and precision features.
3.4 Diamond Compound Polishing
Diamond polishing compounds contain fine diamond particles that remove very small amounts of material.
They are commonly used when a fine or mirror-like finish is required.
Different compound grades are selected according to the stage of polishing.
Advantages:
- Suitable for high-quality surface finishing
- Can achieve very fine surface finishes
- Useful for precision mould cavities and cores
Limitations:
- Requires careful selection of abrasive grade
- Contamination with coarser particles can cause scratches
- Requires suitable tools and operator skill
- Excessive polishing can change the geometry of the mould
Diamond compounds are especially useful for moulds that require a high level of surface smoothness.
3.5 Mechanical Polishing
Mechanical polishing uses powered tools, such as polishing machines or suitable rotary equipment, to refine mould surfaces.
The technique can improve productivity on accessible areas, but the tool speed, abrasive, pressure, and contact time must be controlled.
Advantages:
- Faster than manual polishing for some surfaces
- Useful for repeatable finishing operations
- Can reduce operator effort
Limitations:
- May generate excessive heat
- Can produce uneven polishing
- May damage edges or fine details
- Requires careful control of tool movement and pressure
Mechanical polishing should not be used indiscriminately on delicate mould features.
3.6 Ultrasonic Polishing
Ultrasonic polishing uses a vibrating tool to assist abrasive action on small or intricate mould surfaces.
It is particularly useful for detailed areas, narrow grooves, ribs, and other features that are difficult to polish manually.
Advantages:
- Suitable for small and intricate features
- Can improve access to restricted areas
- Provides controlled finishing when correctly set up
Limitations:
- Requires specialised equipment
- Tool selection and operating settings are important
- Poor technique can damage delicate features
Ultrasonic polishing is commonly used in precision toolmaking where detailed surface finishing is required.
3.7 Lapping
Lapping is a precision finishing process in which a suitable abrasive is used between the workpiece and a lapping surface or tool.
It can be used to improve flatness, surface finish, and contact between appropriate mould components.
Advantages:
- Can achieve precise surface finishes
- Useful for selected flat or mating surfaces
- Can improve surface contact when properly controlled
Limitations:
- Not suitable for every cavity geometry
- Requires specialised techniques and careful measurement
- May remove excessive material if poorly controlled
Lapping should be selected according to the geometry and dimensional requirements of the mould component.
3.8 Polishing After Electrical Discharge Machining
Electrical discharge machining (EDM) is often used to create cavities and features that are difficult to machine using conventional cutting tools.
EDM can leave a textured surface and a recast layer, depending on the process settings and electrode conditions.
When a smoother finish is required, the EDM surface may need additional refinement.
A typical approach is to:
- Inspect the EDM surface.
- Determine the required finishing allowance.
- Remove the EDM texture using an appropriate abrasive method.
- Progress through finer abrasive grades.
- Apply the specified final polishing technique.
- Inspect the surface and verify critical dimensions.
Important: Polishing should not begin until the EDM surface condition and required finishing allowance are understood. Excessive removal can affect cavity dimensions and fine details.
4. Typical Polishing Process: From Rough Surface to Fine Finish
Polishing is generally performed in stages rather than using one abrasive throughout the entire operation.
Stage 1: Surface Inspection
Inspect the mould cavity or core for machining marks, scratches, EDM texture, corrosion, and other defects.
Identify the required finish and confirm which areas must retain sharp edges or precise dimensions.
Stage 2: Initial Surface Refinement
Use an appropriate abrasive stone or other suitable method to remove the larger surface irregularities.
The goal is to establish a consistent surface before moving to finer abrasives.
Avoid unnecessary material removal.
Stage 3: Intermediate Polishing
Use progressively finer abrasive grades to reduce the scratches left by the previous stage.
Each stage should remove the marks from the preceding abrasive rather than simply making the surface appear brighter.
Stage 4: Fine Polishing
Use fine abrasives or suitable diamond compounds to refine the surface further.
At this stage, the operator should apply light, controlled pressure and inspect the surface frequently.
Stage 5: Final Polishing
Apply the specified finishing method to achieve the required surface appearance.
For mirror finishes, careful control of abrasive cleanliness, tool movement, and polishing pressure is essential.
Stage 6: Cleaning
Remove abrasive residue, polishing compounds, and other contaminants using a cleaning method compatible with the mould material.
Contamination from a coarse abrasive can introduce scratches during a later, finer polishing stage.
Stage 7: Final Inspection
Inspect the mould under suitable lighting and verify that the required finish has been achieved.
Check critical dimensions, parting lines, edges, and cavity details before returning the mould to production.
5. Understanding Abrasive Grades
Abrasives are selected according to the amount of material that needs to be removed and the finish required.
Coarser abrasives remove material more quickly but leave deeper scratches. Finer abrasives remove less material and are used to refine the surface.
A simplified progression may look like this:
| Polishing stage | General purpose |
|---|---|
| Coarse abrasive | Removes significant machining marks and surface irregularities |
| Medium abrasive | Reduces scratches left by the initial stage |
| Fine abrasive | Refines the surface and reduces visible scratch patterns |
| Very fine abrasive | Prepares the surface for high-quality finishing |
| Fine diamond compound | Produces very smooth or mirror-like finishes when appropriate |
The actual abrasive sequence depends on the mould steel, starting surface, polishing system, and required finish.
Abrasive grades from different manufacturers may use different grading systems. Their numerical values should not be assumed to be directly interchangeable.
6. Factors That Affect Polishing Quality
Several factors influence the final surface quality of an injection mould.
6.1 Mould Material
Different mould steels and other mould materials respond differently to polishing.
Steel composition, hardness, heat treatment, cleanliness, and microstructure can influence how readily a smooth finish can be achieved.
A material that is unsuitable for the required finish may be difficult to polish consistently.
6.2 Initial Surface Condition
A surface with deep machining marks requires more preparation than one with a fine, uniform finish.
Trying to achieve a mirror finish without removing the underlying scratches can result in a surface that looks shiny but still contains visible defects.
6.3 Abrasive Selection
The abrasive must suit the material and the current polishing stage.
Using an abrasive that is too coarse during the final stage may introduce scratches. Using an excessively fine abrasive too early may make the process unnecessarily slow.
6.4 Polishing Pressure
Excessive pressure can cause uneven material removal, rounded edges, or localised defects.
Controlled pressure helps preserve the intended cavity geometry.
6.5 Tool Movement
Consistent movement helps produce an even finish.
The polishing direction and sequence should be selected to reveal and remove the scratches left by previous stages.
6.6 Cleanliness
Small abrasive particles left on a tool, cloth, or mould surface can create deep scratches during fine polishing.
Clean tools and controlled separation of abrasive grades are therefore essential.
6.7 Temperature
Excessive friction can generate heat during mechanical polishing.
Uncontrolled heating may affect the surface or create undesirable local conditions. Tool speed, contact pressure, and polishing duration should be appropriate for the operation.
7. Common Polishing Defects and Their Solutions
| Problem | Possible cause | Recommended solution |
|---|---|---|
| Visible scratches | Abrasive too coarse or previous scratches not removed | Return to an appropriate earlier stage and remove the scratches systematically. |
| Uneven gloss | Inconsistent polishing pressure or movement | Use a consistent polishing sequence and inspect the entire surface. |
| Rounded edges | Excessive polishing near corners | Protect critical edges and use suitable small tools. |
| Orange-peel appearance | Material microstructure, heat treatment, or polishing issues | Review mould material and heat-treatment quality, and assess the polishing process. |
| Pits or small depressions | Material inclusions, porosity, corrosion, or surface defects | Identify the underlying cause before removing more material. |
| Repeated fine scratches | Abrasive contamination | Clean tools and surfaces and separate abrasive grades. |
| Poor mirror finish | Inadequate preparation or unsuitable polishing sequence | Improve the initial surface before using finer abrasives. |
| Dimensional changes | Excessive material removal | Measure critical features and use a controlled finishing allowance. |
| Corrosion after polishing | Moisture, residue, or insufficient protection | Clean and dry the mould and apply suitable corrosion protection. |
Some defects originate in the mould material or heat-treatment process rather than in polishing itself. Removing more material will not necessarily solve them.
8. Polishing for Different Surface Finish Requirements
Not every injection mould needs the same finish.
Functional Finish
A functional finish is used where appearance is secondary and the component must meet basic surface and dimensional requirements.
The objective is to remove unacceptable machining marks while maintaining the specified geometry.
General Smooth Finish
A general smooth finish is suitable for many household and industrial plastic components.
The surface is refined enough to provide an acceptable appearance and performance without requiring a mirror finish.
High-Gloss Finish
High-gloss moulds require more careful surface preparation and fine polishing.
The final result depends on the mould surface, plastic material, processing conditions, and product design.
Mirror Finish
Mirror polishing produces a highly reflective mould surface.
It is commonly required for selected transparent, optical, or premium decorative components.
Achieving this finish requires suitable mould material, careful preparation, compatible polishing compounds, excellent cleanliness, and skilled operators.
Textured Finish
Some components require a deliberate texture rather than a polished surface.
In these cases, polishing may be limited to selected areas, or the mould may undergo a separate texturing process.
Unnecessary polishing can destroy the intended texture.
9. Quality Inspection After Polishing
After polishing, the mould should be inspected to verify that the surface meets the product requirements.
Visual inspection
Use suitable lighting to identify scratches, pits, dull areas, polishing marks, and other surface imperfections.
Surface roughness measurement
Where required, use an appropriate surface-roughness measurement method.
Parameters such as Ra or Rz may be specified in engineering drawings or quality documentation. A roughness value alone does not fully describe the visual quality of a mirror-polished surface, so additional inspection may be necessary.
Dimensional inspection
Verify critical cavity dimensions, edges, radii, and fine features.
Polishing removes material, so dimensions should be checked whenever the operation could affect them.
Trial moulding
Where appropriate, produce trial components and inspect their surface appearance.
This helps determine whether the polished mould produces the intended finish under actual processing conditions.
Documentation
Record the polishing method, inspection results, any corrective work, and the final acceptance status.
This supports repeatability during future maintenance or mould refurbishment.
10. Safety Precautions During Mould Polishing
Polishing operations can create hazards from rotating tools, abrasive particles, noise, and cleaning chemicals.
Follow these precautions:
- Wear suitable eye protection.
- Use appropriate respiratory protection where required by the risk assessment.
- Follow the tool manufacturer’s operating instructions.
- Secure the mould component before polishing.
- Keep hands and loose clothing away from rotating equipment.
- Use suitable gloves when handling sharp mould components, but never wear gloves where they could become entangled in rotating machinery.
- Use polishing compounds and cleaning chemicals according to their safety instructions.
- Avoid excessive pressure or tool speed.
- Ensure adequate ventilation when required.
- Clean the mould and work area after finishing.
- Follow lockout and isolation procedures when polishing moulds installed in machinery.
Always use the appropriate protective equipment and procedures for the specific polishing method.
11. Best Practices for Injection Mould Polishing
To achieve consistent results, manufacturers should follow a structured polishing procedure.
- Define the required surface finish. Establish whether the application requires a functional, smooth, high-gloss, or mirror finish.
- Inspect the mould before polishing. Identify scratches, machining marks, pits, corrosion, and dimensional concerns.
- Choose suitable abrasives. Match the abrasive system to the mould material and surface condition.
- Follow a progressive sequence. Remove scratches systematically before moving to finer grades.
- Protect critical features. Avoid rounding sharp edges or changing cavity geometry.
- Maintain cleanliness. Prevent contamination between abrasive stages.
- Control pressure and tool movement. Aim for consistent material removal across the surface.
- Inspect frequently. Check the surface throughout the process rather than waiting until the end.
- Verify dimensions and finish. Use suitable measurement and inspection methods.
- Protect the finished mould. Clean, dry, and store the mould appropriately to reduce corrosion and damage.
Conclusion
Polishing techniques are essential for achieving the required surface quality in injection mould manufacturing. Methods such as manual polishing, abrasive stone polishing, abrasive paper finishing, diamond compound polishing, mechanical polishing, ultrasonic polishing, and lapping each have specific applications.
The correct method depends on the mould material, initial surface condition, cavity geometry, and required finish.
The key to successful mould polishing is progressive material removal, careful control of the process, and frequent inspection. By selecting suitable abrasives, maintaining clean tools, protecting critical dimensions, and verifying the finished surface, manufacturers can improve plastic component appearance, maintain mould accuracy, and support consistent production quality.