1. Introduction
Temperature control in compression moulding is the process of regulating and maintaining the temperature of the mould and moulding material during the manufacturing process to achieve the desired shape, strength, surface finish, and dimensional accuracy of the finished product.
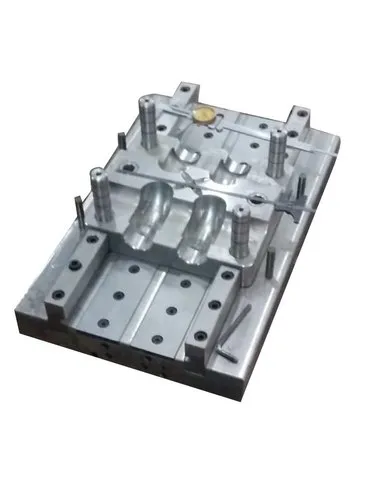
Compression moulding is a manufacturing process in which a measured quantity of material is placed into a heated mould cavity. The mould is then closed, and pressure is applied to distribute the material throughout the cavity. Heat and pressure cause the material to soften, flow, cure, or solidify, depending on its type.
Temperature control is one of the most important parameters in compression moulding because it directly influences material flow, curing time, product quality, production efficiency, and energy consumption.
It is commonly used in the manufacture of rubber components, thermosetting plastic products, composite parts, electrical components, automotive components, and industrial moulded products.
2. Objectives of Temperature Control
The main objectives of temperature control in compression moulding are:
- Uniform heating: Ensure that the mould and material reach the required temperature throughout the cavity.
- Proper curing: Allow thermosetting resins and rubber compounds to undergo the required chemical reactions.
- Improved material flow: Maintain suitable viscosity so that the material fills the mould cavity correctly.
- Dimensional accuracy: Reduce shrinkage variation, warpage, and distortion.
- Surface finish: Minimize defects such as blisters, surface irregularities, and incomplete mould filling.
- Reduced production time: Optimize heating and curing cycles without compromising product quality.
- Energy efficiency: Avoid unnecessary heating and reduce heat loss.
- Consistent product quality: Maintain repeatable processing conditions from one moulding cycle to another.
3. Principle of Temperature Control in Compression Moulding
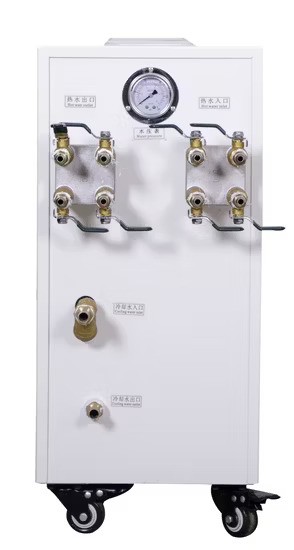
In compression moulding, heat is generally supplied to the mould using electrical heaters, steam, hot oil, or another suitable heating system.
The mould is maintained at a predetermined temperature based on the material being processed. When the material is placed inside the mould, heat transfers from the mould surfaces into the material.
The material undergoes different changes depending on its type.
- Thermosetting plastics: Heat initiates and accelerates curing reactions, producing a permanently cross-linked structure.
- Rubber compounds: Heat promotes vulcanization, creating cross-links that improve elasticity and strength.
- Thermoplastic materials: Heat softens or melts the material, which subsequently cools and solidifies into the required shape.
- Composite materials: Heat may soften the resin, improve flow, and initiate curing while the reinforcing fibres provide structural strength.
The temperature must be controlled throughout the moulding cycle because insufficient heat can result in incomplete curing or poor mould filling, whereas excessive heat may cause degradation, scorching, discoloration, or other defects.
4. Main Components of a Temperature Control System
A. Heating System
The heating system supplies the energy required to raise and maintain the mould temperature.
Common heating methods include:
1. Electrical resistance heaters
Electrical heaters convert electrical energy into heat. Cartridge heaters, plate heaters, and embedded resistance heaters are commonly used in compression moulding equipment.
Advantages:
- Accurate temperature regulation
- Relatively straightforward installation
- Fast response in appropriately designed systems
- Compatibility with automated control systems
2. Steam heating
Steam transfers heat to the mould through suitable heating passages or jackets. It is used in some industrial moulding applications where steam infrastructure is available.
Advantages:
- Effective heat transfer
- Suitability for large-scale equipment
- Potentially uniform heating with a properly designed system
3. Hot-oil heating
A temperature-controlled oil circuit transfers heat to the mould through internal passages or external heating equipment.
Advantages:
- Suitable for controlled heating at elevated temperatures
- Good temperature uniformity when flow is properly designed
- Useful for large moulds and industrial processes
The heating method is selected according to the required temperature, mould dimensions, heating rate, operating pressure, and production requirements.
B. Temperature Sensors
Temperature sensors measure the temperature of the mould or material.
Common sensors include:
- Thermocouples: Widely used in industrial moulds because they are rugged and suitable for a broad temperature range.
- Resistance temperature detectors (RTDs): Provide accurate and stable temperature measurements in suitable operating ranges.
- Infrared temperature sensors: Measure surface temperature without direct contact, although readings can be affected by surface conditions and emissivity.
Sensors should be positioned at representative locations, particularly where temperature differences or hot spots are likely to occur.
A sensor that measures only the heater temperature may not accurately represent the actual temperature of the mould cavity.
C. Temperature Controller
The temperature controller compares the measured temperature with the desired setpoint and adjusts the heating system accordingly.
A proportional-integral-derivative (PID) controller is frequently used because it can reduce temperature fluctuations and maintain a stable operating temperature.
The controller may regulate electrical power, a heating-fluid valve, or another heat-input mechanism.
D. Cooling System
Some compression moulding processes require active cooling after heating and curing. Cooling may be achieved through water passages, controlled air circulation, or another suitable cooling arrangement.
Cooling is particularly important when the moulded material must reach a safe ejection temperature before the mould is opened.
The cooling rate must be controlled because rapid or uneven cooling can cause residual stresses, warpage, cracking, or dimensional variation.
E. Insulation
Thermal insulation reduces heat loss from the mould and heating equipment.
Appropriate insulation can:
- Reduce energy consumption
- Improve temperature stability
- Shorten warm-up time
- Reduce unwanted heating of surrounding equipment
5. Factors Affecting Temperature Control
Several factors influence the temperature distribution and control accuracy during compression moulding.
| Factor | Effect on the process |
|---|---|
| Material type | Determines the required processing temperature and thermal behavior |
| Mould material | Influences heat conduction and temperature uniformity |
| Mould thickness | Affects heating time and internal temperature distribution |
| Component geometry | Thick sections may heat and cool more slowly than thin sections |
| Heating rate | Influences thermal gradients and the time needed to reach the setpoint |
| Applied pressure | Affects material flow and contact with the mould surfaces |
| Curing time | Determines how long the material must remain under suitable conditions |
| Sensor location | Influences how accurately the measured temperature represents the actual mould temperature |
| Cooling rate | Affects solidification, residual stress, and dimensional stability |
| Ambient conditions | May influence heat losses and temperature stability |
These factors must be considered together when establishing the moulding process parameters.
6. Temperature Control Procedure in Compression Moulding
A typical temperature-control procedure consists of the following steps.
Step 1: Material Selection
Identify the material to be moulded, including its grade, formulation, and recommended processing conditions.
Consult the material supplier’s technical data to determine the suitable mould temperature, curing or heating time, and cooling requirements.
Step 2: Mould Preparation
Inspect the mould for cleanliness, damage, and correct assembly.
Ensure that heaters, sensors, cooling passages, and temperature-control equipment are functioning properly.
Step 3: Preheating the Mould
Heat the mould gradually until the required operating temperature is reached.
Preheating helps establish stable thermal conditions before the moulding material is introduced. The mould should be allowed sufficient time to reach a uniform temperature rather than relying only on the heater reaching its setpoint.
Step 4: Material Loading
Place the required quantity of material into the mould cavity.
The material may be in the form of a preform, powder, sheet, pellet, rubber compound, or composite charge, depending on the process.
Correct charge placement helps ensure uniform material distribution and reduces the likelihood of incomplete filling.
Step 5: Closing the Mould and Applying Pressure
Close the mould and apply the specified pressure.
Heat and pressure work together to help the material fill the cavity and undergo the required transformation. The pressure and temperature settings must be appropriate for the material and mould design.
Step 6: Temperature Regulation
The temperature-control system monitors the mould temperature and adjusts the heat input to maintain the desired conditions.
In some processes, the temperature is held constant throughout the cycle. In others, a programmed temperature profile is used.
The temperature should be monitored at critical locations to detect hot spots or cold regions.
Step 7: Curing or Processing
Maintain the material at the specified temperature for the required processing time.
For thermosetting plastics and rubber, the objective is to achieve the necessary degree of curing or vulcanization. For thermoplastics, the objective is to achieve suitable softening or melting followed by appropriate solidification.
The required time depends on material properties, component thickness, mould temperature, and the actual temperature reached within the material.
Step 8: Cooling
After the required processing stage, cool the moulded product when the process calls for it.
Cooling may occur while the mould remains closed or after a controlled transfer to a cooling station. The appropriate method depends on the material and manufacturing process.
Step 9: Demoulding
Open the mould and remove the finished component when it has reached the required processing state and is sufficiently stable for removal.
Premature demoulding may cause deformation, surface damage, or incomplete curing.
Step 10: Inspection and Process Adjustment
Inspect the finished component for dimensional accuracy, surface quality, cracks, blisters, warpage, and other defects.
Use the inspection results and temperature records to adjust the heating profile, processing time, cooling rate, or other parameters where necessary.
7. Temperature Control Methods
A. On-Off Control
In on-off control, the heater switches on when the temperature falls below a specified threshold and switches off when the temperature rises above another threshold.
Advantages:
- Simple and inexpensive
- Easy to implement
- Suitable for basic heating systems
Disadvantages:
- Temperature fluctuates around the setpoint
- May be unsuitable for processes requiring tight temperature tolerances
- Can cause frequent switching of the heating equipment
B. PID Control
PID control adjusts the heating output based on the difference between the measured temperature and the setpoint.
The three control terms are:
- Proportional: Responds to the current temperature error.
- Integral: Corrects accumulated error over time.
- Derivative: Responds to the rate at which the error changes.
A properly tuned PID controller can provide stable temperature regulation with limited overshoot and improved recovery from disturbances.
C. Multi-Zone Temperature Control
Large moulds may be divided into several independently controlled heating zones.
Each zone has its own sensor and control output. This arrangement helps compensate for differences in mould geometry, heater location, and heat loss.
Multi-zone control is particularly useful when a mould contains thick sections, complex cavities, or areas with different thermal requirements.
D. Programmed Temperature Control
Some processes use a temperature profile that changes over time.
For example, the process may include gradual preheating, a controlled holding period, a curing stage, and a cooling stage.
Programmed control is useful when the material requires a specific thermal history rather than a single constant temperature.
8. Effects of Incorrect Temperature Control
Incorrect temperature settings or uneven temperature distribution can cause significant defects.
| Temperature condition | Possible effect | Corrective action |
|---|---|---|
| Temperature too low | Incomplete curing, poor flow, weak bonding, or incomplete cavity filling | Verify sensor accuracy and adjust the heating profile |
| Temperature too high | Material degradation, scorching, discoloration, or excessive curing | Reduce the setpoint and check controller operation |
| Uneven mould temperature | Warpage, inconsistent curing, and dimensional variation | Improve heater placement and temperature distribution |
| Excessive temperature fluctuation | Inconsistent product quality between cycles | Tune the controller and check the heating system |
| Insufficient heating time | Incomplete curing or inadequate material processing | Validate the required cycle time and internal material temperature |
| Excessively rapid cooling | Residual stress, cracking, or distortion in susceptible materials | Adjust the cooling profile |
| Excessive heating time | Degradation or reduced productivity, depending on the material | Optimize the process duration |
The corrective action should be based on the specific material and the observed defect rather than on temperature adjustment alone.
9. Advantages of Proper Temperature Control
Effective temperature control provides several important benefits:
- Improved product quality: Helps produce components with consistent mechanical properties and surface finishes.
- Reduced defects: Minimizes incomplete curing, scorching, warpage, and dimensional variation.
- Higher productivity: Optimized thermal cycles can reduce unnecessary heating and processing time.
- Improved repeatability: Helps maintain consistent conditions across production batches.
- Lower energy consumption: Reduces heat losses and avoids excessive heating.
- Longer mould life: Prevents unnecessary thermal cycling and excessive operating temperatures.
- Better process automation: Enables monitoring, recording, and adjustment of operating conditions.
10. Applications of Temperature Control in Compression Moulding
Temperature control is essential in many industries.
- Automotive industry: Manufacture of rubber seals, gaskets, composite components, and selected thermoset parts.
- Electrical industry: Production of insulating components, switchgear parts, and thermoset housings.
- Rubber manufacturing: Production of seals, bushings, vibration dampers, and rubber mouldings.
- Composite manufacturing: Manufacture of fibre-reinforced components using suitable resin systems.
- Consumer goods: Production of handles, housings, appliance parts, and selected household products.
- Industrial engineering: Production of wear-resistant parts, machine components, and specialized moulded products.
11. Example of Temperature Control in Rubber Compression Moulding
Consider a rubber component manufactured using a heated compression mould.
The rubber compound is placed inside the mould cavity, and the mould is closed under pressure. Heat transfers from the mould into the rubber, initiating vulcanization.
The temperature controller maintains the mould near the selected process setpoint. A thermocouple measures the mould temperature, and a PID controller adjusts the heater output to compensate for heat losses.
The rubber remains under the required conditions until the specified cure state is achieved. The mould is then cooled if required, opened, and the component is removed.
If the temperature is too low, vulcanization may be incomplete, producing a component with inadequate properties. If the temperature is too high, the rubber may degrade or undergo undesirable changes.
The exact temperature and curing time must be determined from the rubber formulation, component geometry, mould design, and validated process data. There is no single temperature suitable for all rubber compounds.
12. Best Practices for Effective Temperature Control
To achieve reliable results in compression moulding:
- Use calibrated temperature sensors.
- Position sensors near representative mould surfaces and critical thermal regions.
- Allow sufficient time for the mould to reach a uniform temperature.
- Follow the material supplier’s recommended processing conditions.
- Use suitable control methods, such as PID or multi-zone control, where necessary.
- Monitor both mould temperature and, when practical, the temperature history of the material.
- Inspect heating and cooling passages regularly.
- Record temperature, pressure, and cycle-time data for quality control.
- Validate any changes to the temperature profile before implementing them in production.
- Follow the equipment manufacturer’s safety instructions and applicable industrial standards.
Conclusion
Temperature control in compression moulding is a fundamental process-control technique that regulates the heating, processing, and cooling of moulded materials. It affects material flow, curing, dimensional stability, mechanical properties, surface finish, cycle time, and energy consumption.
A successful temperature-control system combines suitable heaters, accurate sensors, an effective controller, and an appropriate cooling arrangement. By selecting material-specific processing conditions and maintaining uniform temperature distribution, manufacturers can improve product quality, reduce defects, and achieve more efficient and reliable production.