1. Introduction
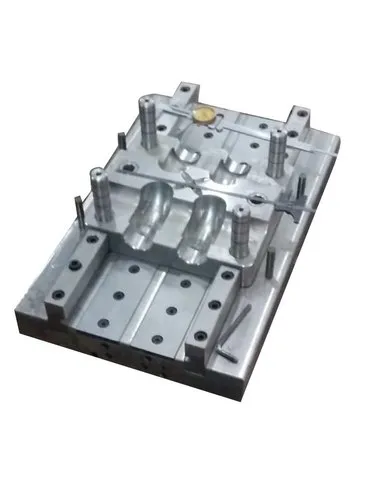
Surface finishing of compression moulds is an important manufacturing process that improves the quality, smoothness, accuracy, and performance of mould surfaces. It involves refining the mould’s working surfaces through operations such as grinding, polishing, lapping, and texturing to achieve the required surface condition.
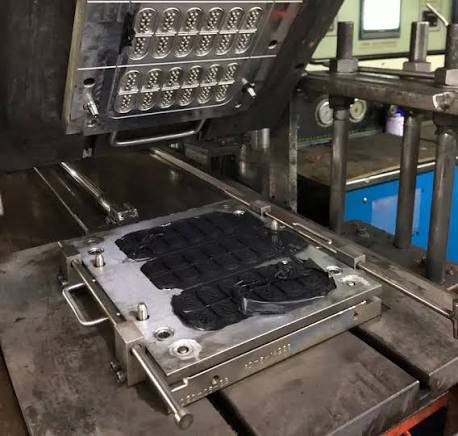
Compression moulds are used to shape materials by applying heat and pressure inside a mould cavity. Depending on the application, these materials may include thermosetting plastics, rubber, silicone, composite materials, and certain wax-based products.
The surface finish of a compression mould directly affects the appearance of the finished component, ease of demoulding, dimensional consistency, mould maintenance, and overall production efficiency. A properly finished mould can produce smoother components, reduce surface defects, and improve the reliability of repeated production cycles.
2. Importance of Surface Finishing
Surface finishing is not merely a cosmetic operation. It also influences how the mould performs during production.
The main benefits include:
- Improved product appearance: Produces smooth, glossy, matte, or textured surfaces according to design requirements.
- Easy demoulding: Reduces friction and can help components release more consistently.
- Reduced surface defects: Helps minimise scratches, machining marks, and unwanted surface irregularities.
- Better dimensional accuracy: Removes unwanted surface imperfections while maintaining the specified mould geometry.
- Improved mould life: Proper finishing can reduce wear and make cleaning easier.
- Reduced material sticking: Suitable surface conditions may reduce adhesion, depending on the moulded material.
- Consistent production quality: Helps maintain a repeatable surface finish across multiple moulding cycles.
The best finish depends on the product’s intended use. A decorative component may require a highly polished surface, while a rubber part may need a controlled matte finish or a textured surface for functional reasons.
3. Types of Surface Finishing for Compression Moulds
3.1 Grinding
Grinding is a machining process used to remove small amounts of material from the mould surface using an abrasive grinding wheel or tool.
It is commonly used after machining or heat treatment to improve flatness, remove surface irregularities, and prepare the mould for further finishing.
Advantages:
- Improves surface flatness
- Removes machining marks
- Helps achieve accurate dimensions
- Provides a suitable base for polishing
Applications:
- Mould plates
- Parting surfaces
- Flat cavity sections
- Mould components requiring precise alignment
Grinding must be carefully controlled because excessive material removal or heat generation can affect dimensional accuracy and surface integrity.
3.2 Polishing
Polishing uses progressively finer abrasives to reduce surface roughness and produce a smoother finish.
Depending on the mould material and the polishing process, the final result may range from a fine satin appearance to a highly reflective surface.
Advantages:
- Improves surface smoothness
- Reduces visible machining marks
- Can improve demoulding
- Produces attractive finishes on appearance-critical components
Applications:
- Decorative plastic products
- Smooth rubber components
- Silicone moulding surfaces
- Gloss-finish mould cavities
Polishing should preserve the intended geometry. Excessive polishing can round sharp edges, alter cavity dimensions, or remove important surface details.
3.3 Mirror Polishing
Mirror polishing is a high-level polishing process that produces a highly reflective mould surface.
It generally requires several stages of progressively finer abrasive treatment and careful inspection.
Advantages:
- Produces a highly glossy finish on suitable moulded materials
- Reduces the visibility of fine surface marks
- Can help improve release where adhesion and material behaviour permit
Applications:
- High-gloss plastic components
- Optical or appearance-critical mouldings
- Decorative product surfaces
- Precision mould cavities requiring a reflective finish
Mirror polishing is not necessary for every compression mould. It can increase manufacturing cost and may be unsuitable when a matte or textured finish is required.
3.4 Lapping
Lapping is a precision finishing process in which fine abrasive particles are used between the workpiece and a lapping surface to achieve a highly accurate finish.
It is particularly useful for surfaces that require close contact, flatness, or precise mating.
Advantages:
- Improves surface flatness
- Produces fine surface finishes
- Helps achieve accurate contact between mating surfaces
- Can improve sealing at suitable interfaces
Applications:
- Precision mould plates
- Parting surfaces
- Sealing faces
- Components requiring close surface contact
Lapping is especially valuable where surface contact and dimensional precision are more important than visual gloss alone.
3.5 Sandblasting or Bead Blasting
Blasting uses abrasive particles or beads propelled against the mould surface to create a controlled matte or textured appearance.
The result depends on the blasting medium, particle size, pressure, distance, and exposure time.
Advantages:
- Creates a uniform matte finish when properly controlled
- Helps establish a repeatable surface texture
- Can reduce the visibility of minor machining marks
- Provides decorative or functional surface effects
Applications:
- Matte-finish components
- Textured plastic products
- Rubber moulds
- Certain decorative and industrial parts
Blasting is not the same as polishing. It generally creates or modifies surface texture rather than producing a mirror-like surface. It must also be controlled to avoid changing critical dimensions or damaging the mould.
3.6 Chemical and Electrochemical Finishing
Chemical or electrochemical processes modify or smooth a metal surface through controlled chemical reactions or electrical action.
Examples include electropolishing for suitable metals and specialised chemical treatments for particular tooling materials.
Advantages:
- Can improve surface smoothness in suitable applications
- May help remove microscopic surface irregularities
- Can improve cleanability when the process is appropriate
- May be useful for complex geometries that are difficult to polish mechanically
Limitations:
- Not suitable for every mould material
- Requires process control and appropriate safety measures
- May affect dimensions, edges, or surface properties
- Must be selected according to the alloy and moulding application
These treatments should be performed by qualified specialists when the required finish or material compatibility demands them.
4. Surface Roughness and Its Importance
Surface roughness describes the small irregularities present on a mould surface. It is commonly measured using parameters such as \(Ra\) and \(Rz\).
- Ra: The arithmetic average of the absolute surface-height deviations from the mean line over a measurement length.
- Rz: A roughness parameter based on peak-to-valley height measurements, calculated according to the applicable measurement standard.
Lower roughness values generally indicate a smoother surface, but the lowest possible roughness is not always the best choice. The correct roughness depends on the product’s function, material, appearance, and demoulding requirements.
Typical illustrative targets might include:
| Surface requirement | Illustrative Ra range |
|---|---|
| General machined surface | 1.6–3.2 µm |
| Fine finished surface | 0.4–1.6 µm |
| Smooth polished surface | 0.1–0.4 µm |
| Very fine polish | Below 0.1 µm |
These are broad examples, not universal specifications. Actual requirements depend on the mould design, material, measurement method, and customer specifications. A drawing should identify the required surface finish wherever it is critical.
5. Step-by-Step Surface Finishing Process
A typical compression mould surface-finishing process involves several stages.
Step 1: Inspection of the Mould
Inspect the mould for scratches, machining marks, corrosion, dents, burrs, and other imperfections.
Check the mould drawing to identify critical dimensions, parting surfaces, cavity geometry, and the required finish.
Step 2: Cleaning
Remove oil, grease, dust, machining residues, and other contaminants using a cleaning method compatible with the mould material.
A clean surface makes it easier to identify defects and prevents contaminants from interfering with subsequent finishing operations.
Step 3: Initial Grinding
Use a suitable grinding method to correct surface irregularities and establish the required geometry.
Grinding parameters must be selected to avoid excessive heat, distortion, or unwanted material removal.
Step 4: Progressive Abrasive Finishing
Use progressively finer abrasive grades to reduce scratches left by earlier operations.
Each stage should remove the marks from the preceding stage before moving to a finer abrasive.
Step 5: Polishing or Texturing
Apply the finishing method specified for the final product.
- Use polishing for smooth or glossy surfaces.
- Use mirror polishing when a highly reflective surface is required.
- Use controlled blasting or specialised texturing for matte or patterned surfaces.
Step 6: Final Cleaning
Remove polishing compounds, abrasive particles, oils, and other residues.
Residual abrasives can contaminate the moulded material or create surface defects during production.
Step 7: Inspection and Measurement
Inspect the surface under suitable lighting and magnification. Where required, measure surface roughness using a calibrated instrument.
Verify critical dimensions, flatness, edge condition, and cavity geometry after finishing.
Step 8: Trial Moulding
Produce trial components using the intended material and process conditions.
Inspect the components for gloss, texture, sticking, surface marks, flash, and other defects. Make adjustments if the finished part does not meet specifications.
6. Factors Affecting Surface Finishing Quality
6.1 Mould Material
The material influences how easily the mould can be ground, polished, textured, or treated.
- Tool steel: Commonly used for compression moulds requiring strength and wear resistance.
- Stainless steel: Can provide corrosion resistance and may be polished to a high finish.
- Aluminium: Often easier to machine and finish than many steels, but its suitability depends on the pressure, temperature, wear, and service life required.
- Copper alloys: Can offer high thermal conductivity but require finishing methods suited to their strength and surface properties.
6.2 Initial Surface Condition
Deep machining marks, scratches, pits, and tool damage require more work to remove than a well-machined starting surface.
A good machining process reduces the time and cost needed for final finishing.
6.3 Abrasive Selection
The abrasive material and grit size determine how quickly material is removed and how fine the resulting surface becomes.
Coarser abrasives remove material more quickly but leave deeper marks. Finer abrasives produce smoother surfaces but require more time and careful process control.
6.4 Heat Generation
Excessive heat during grinding or polishing may alter the surface condition or cause dimensional changes.
Use suitable tools, controlled pressure, appropriate speeds, and cooling methods where required.
6.5 Operator Skill
Manual polishing often depends on operator experience. Inconsistent pressure or polishing direction can produce uneven finishes, rounded edges, or local dimensional changes.
6.6 Mould Geometry
Deep cavities, narrow corners, ribs, and intricate details can be difficult to finish uniformly.
Specialised polishing tools or carefully controlled finishing methods may be needed to preserve the original geometry.
7. Common Surface-Finishing Defects and Solutions
| Defect | Possible cause | Recommended solution |
|---|---|---|
| Visible scratches | Abrasive marks not fully removed | Return to an appropriate abrasive stage and finish progressively |
| Uneven gloss | Inconsistent polishing pressure or technique | Standardise the polishing process |
| Rounded edges | Excessive polishing at corners | Protect critical edges and control material removal |
| Pitting | Corrosion, inclusions, or surface damage | Assess the defect depth and repair or refinish appropriately |
| Orange-peel appearance | Material or finishing-process issues | Review polishing technique and surface condition |
| Embedded abrasive particles | Inadequate cleaning | Improve cleaning and inspection between stages |
| Dimensional changes | Excessive grinding or polishing | Measure critical features before and after finishing |
| Poor demoulding | Inadequate draft, unsuitable texture, adhesion, or roughness | Review the overall mould design and material behaviour |
| Corrosion after finishing | Inadequate protection or unsuitable storage | Apply compatible protection and control storage conditions |
Not every demoulding problem is caused by surface roughness. Draft angle, mould temperature, release characteristics, material formulation, and ejection design must also be considered.
8. Surface Finishing for Different Compression-Moulded Materials
8.1 Thermosetting Plastics
Thermosetting plastics are moulded under heat and pressure and undergo a curing reaction.
A smooth cavity finish may be needed for decorative or precision parts, while a controlled texture may be appropriate for functional components.
The mould surface must also withstand the processing temperature, pressure, and any cleaning requirements.
8.2 Rubber Moulds
Rubber moulds often require surfaces that provide consistent appearance and reliable release.
Depending on the rubber compound and part design, the finish may be polished, matte, or textured. Venting and parting-line quality are also important for preventing trapped air and excess flash.
8.3 Silicone Moulds
Silicone components can reproduce fine surface details from the mould. Therefore, the finish of the moulding surface can strongly influence the finished part’s appearance.
The appropriate finish depends on the silicone formulation, required gloss or texture, and demoulding characteristics.
8.4 Composite Materials
Compression moulds for composite materials may require specialised surface finishes to meet appearance, dimensional, and release requirements.
The mould surface must be compatible with the resin system, processing temperature, pressure, and any release agent used.
8.5 Wax-Based Products
For wax products, such as certain decorative moulded components, the mould finish affects surface appearance and release.
The required finish depends on the wax formulation, mould material, cooling shrinkage, and the detail of the product. A highly polished surface may be appropriate for glossy products, while a textured surface may be desirable for decorative effects.
9. Maintenance of Finished Compression Moulds
Regular maintenance helps preserve the mould’s surface condition and production performance.
Recommended practices include:
- Clean the mould after use with a compatible cleaning method.
- Avoid abrasive tools that could scratch the finished cavity.
- Inspect the mould for corrosion, wear, deposits, and damage.
- Use compatible release agents when required by the process.
- Store the mould in a clean, dry environment.
- Apply a suitable protective coating or corrosion inhibitor when appropriate.
- Verify the surface finish periodically for high-volume or precision applications.
- Repair damaged surfaces before defects become more severe.
Maintenance procedures should account for the mould material, operating temperature, and the material being moulded.
10. Best Practices for Achieving High-Quality Surface Finishing
- Define the required finish before manufacturing the mould.
- Specify surface roughness and texture clearly on engineering drawings.
- Use suitable mould materials for the intended service conditions.
- Begin with accurate machining to reduce the amount of finishing required.
- Progress through abrasive grades systematically.
- Protect sharp edges and dimensionally critical features.
- Prevent contamination between finishing stages.
- Measure roughness where surface quality is critical.
- Conduct trial moulding to confirm the actual product finish.
- Maintain documented inspection and maintenance procedures.
11. Conclusion
Surface finishing of compression moulds is essential for achieving consistent product quality, smooth surfaces, reliable demoulding, and long-term mould performance. Processes such as grinding, polishing, mirror polishing, lapping, and controlled texturing are selected according to the required finish and the mould’s application.
The best results come from combining accurate machining, appropriate finishing methods, careful inspection, and regular maintenance. By controlling surface roughness without compromising mould geometry, manufacturers can improve production consistency, reduce defects, and extend the useful life of compression moulds.